R5905948 /12
Event Master Devices
211
7
The BG Input tab shows the current Background source assigned to the destination. Clicking this tab
allows the user to adjust the settings for the destination
’
s Background source.
8
Users can zoom in / out of the workspace area, from 25% to 150%, in 25% increments.
9
“
Select All
”
Destinations allows the user to quickly select or unselect all Destinations for a Transition.
10
A small arrow on the left-hand side of Destination name expands or collapses the Destination View.
11
Users can manually control the transition by clicking on the bar or by clicking-and-dragging the
mouse.
12
Layout tabs allow for user assignable layouts of Destinations in the Programming menu. Drag and
drop one or more individual Destination View tabs onto a Layout tab; select the Layout tab; and the
workspace area displays only the Destinations assigned to the layout. To view all of the Destinations
again, select the "View All" Destination tab. You may rename a Layout tab by double-clicking it and
typing the new name.
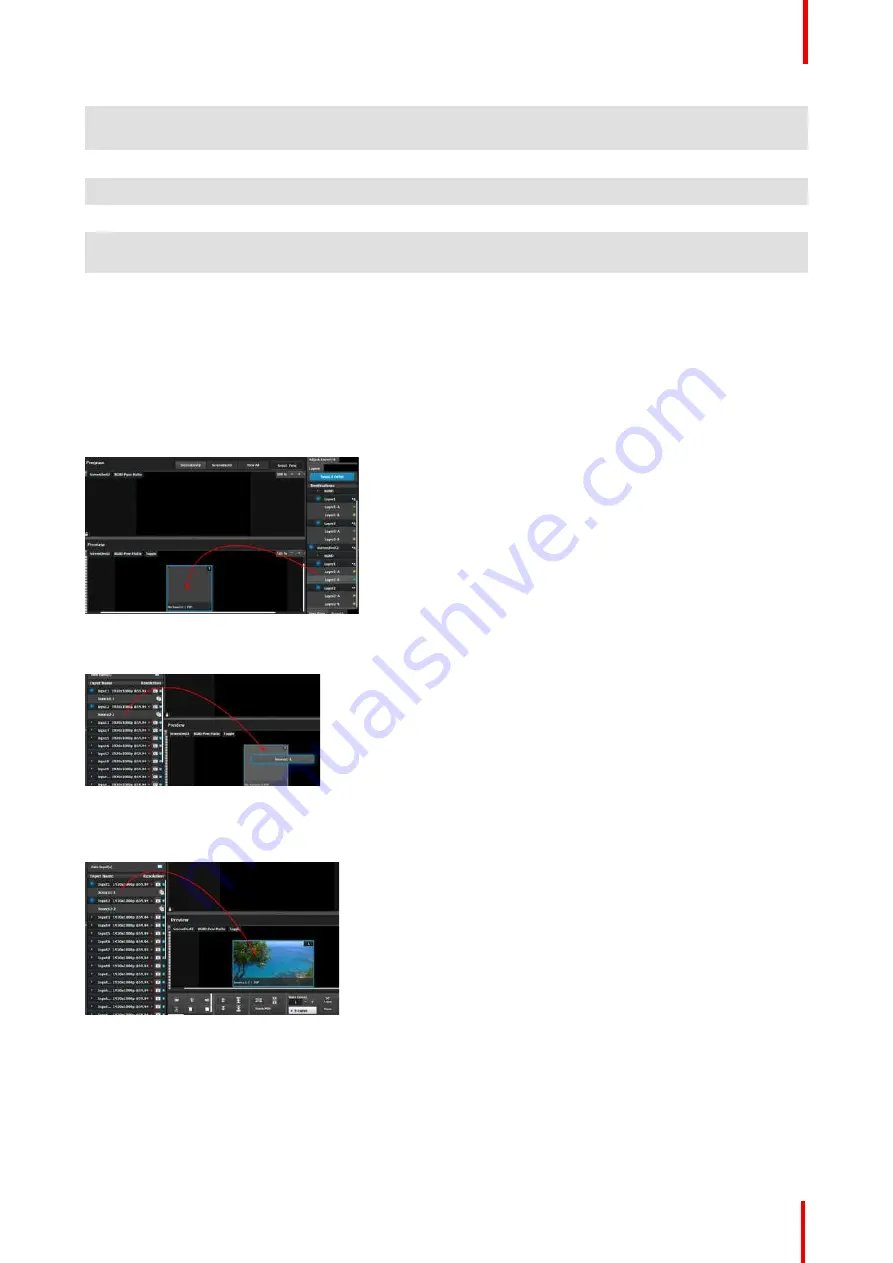
Layer and Source into the previous screen
Users can drag layers to the preview screen as long as the layer is not on program. In the example below,
since no source has been assigned to the layer, the layer will be black and default to a square shape.
Image 6-69
Next a source from the Input panel on the left hand side can be dragged into the layer.
Image 6-70
Alternatively, an Input or a source can be dragged into the Preview screen directly as long as there are
available layers.
Image 6-71
If the available layer is already in Preview, then the source will immediately be assigned to that layer. The layer
will be resized automatically to match the source aspect ratio.
If a layer is available but it hasn
’
t been placed into the preview screen, then the software will automatically
place the layer in the position where the Source was dropped and allocate the lowest unassigned layer to the
source. The source and layer must also comply with the sizing rule that is explained next.
Summary of Contents for Event Master E2 Series
Page 1: ...ENABLING BRIGHT OUTCOMES User s Guide Event Master Devices...
Page 12: ...R5905948 12 Event Master Devices 12...
Page 24: ...R5905948 12 Event Master Devices 24 Safety...
Page 52: ...R5905948 12 Event Master Devices 52 General...
Page 82: ...R5905948 12 Event Master Devices 82 Hardware orientation...
Page 102: ...R5905948 12 Event Master Devices 102 Front Panel Menu orientation...
Page 272: ...R5905948 12 Event Master Devices 272 Image 6 137 EM GUI orientation...
Page 304: ...R5905948 12 Event Master Devices 304 Updating firmware...
Page 326: ...R5905948 12 Event Master Devices 326 Image 9 28 General operation example...
Page 382: ...R5905948 12 Event Master Devices 382 Preventive maintenance actions...
Page 444: ...R5905948 12 Event Master Devices 444 E2 Maintenance...
Page 528: ...R5905948 12 Event Master Devices 528 EC 200 EC 210 Maintenance...
Page 569: ...569 R5905948 12 Event Master Devices Troubleshooting C...
Page 572: ...R5905948 12 Event Master Devices 572 Troubleshooting...


