February 2013
2-17
ColorQube® 9303 Family
01A
Status Indicator RAPs
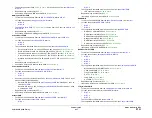
The ink reservoir heaters are good. If necessary, install a new Marking unit heater PWB,
PL
92.10 Item 5
. Perform
SCP 5
Final Actions.
Ink Melt Heaters Check
Procedure
Switch off the electricity to the machine,
GP 14
, and disconnect the power cord. Refer to
WD
1.2
. Disconnect PJ5AC from the
power supply unit
. Check the electrical resistance of the four
ink melt heaters by measuring the resistance across the pins of the PJ5AC harness as follows:
•
Black ink melt heater, pin 6 to pin 12. Expect a cold resistance of approximately 70-80
ohms.
•
Yellow ink melt heater, pin 6 to pin 13. Expect a cold resistance of approximately 70-80
ohms.
•
Cyan ink melt heater, pin 7 to pin 1. Expect a cold resistance of approximately 70-80
ohms.
•
Magenta ink melt heater, pin 7 to pin 11. Expect a cold resistance of approximately 70-80
ohms.
•
Check that pin 7 to chassis is open circuit.
•
Check that pin 6 to the chassis is open circuit.
The measured resistances are correct.
Y
N
Go to
WD 1.2
. Check the wiring between PJ5AC and PJX to the ink melt heaters. Repair
the wiring as necessary, refer to
REP 1.1
. If necessary, install a new ink loader melt plate
assembly,
PL 93.10 Item 3
.
The ink melt heaters are good. If necessary, install a new power supply unit,
PL 1.15 Item 2
.
Drum Heaters Check
Procedure
Switch off the electricity to the machine,
GP 14
, and disconnect the power cord. Refer to
WD
1.2
. Disconnect PJ5AC from the
power supply unit
. Check the electrical resistance of the two
drum heaters by measuring the resistance across the pins of the PJ5AC harness as follows:
•
Drum heater 1 first section, pin 15 to pin 16. Expect a cold resistance of approximately 40-
50 ohms.
•
Drum heater 1 second section, pin 15 to pin 17. Expect a cold resistance of approximately
40-50 ohms.
•
Drum heater 2 first section, pin 10 to pin 19. Expect a cold resistance of approximately 40-
50 ohms.
•
Drum heater 2 second section, pin 10 to pin 20. Expect a cold resistance of approximately
40-50 ohms.
•
Check that pin 15 to the chassis is open circuit.
•
Check that pin 10 to the chassis is open circuit.
The measured resistances are correct.
Y
N
Go to
WD 1.2
. Check the wiring between PJ5AC on the
power supply unit
, and PJX to the
drum heaters. Repair the wiring as necessary, refer to
REP 1.1
. As necessary, install a
new drum,
PL 94.20 Item 1
.
Go to
Thermal Cutout Check
Registration / Pre-Heaters Check
Procedure
Switch off the electricity to the machine,
GP 14
, and disconnect the power cord. Refer to
WD
1.2
. Disconnect PJ5AC from the
power supply unit
. Check the electrical resistance of the regis-
tration/pre-heaters by measuring the resistance across the pins of the PJ5AC harness as fol-
lows:
•
Registration pre-heater 1, pin 3 to pin 9. Expect a cold resistance of approximately 50-60
ohms.
•
Registration pre-heater 2, pin 2 to pin 8. Expect a cold resistance of approximately 50-60
ohms.
•
Check that pin 8 to the chassis is open circuit.
•
Check that pin 9 to the chassis is open circuit.
The measured resistances are correct.
Y
N
Go to
WD 1.2
. Check the wiring between PJ5AC on the
power supply unit
, and PJ140 to
the registration preheat assembly. Repair the wiring as necessary, refer to
REP 1.1
. As
necessary, install a new registration preheat assembly
PL 88.10 Item 1
.
The registration/pre-heaters are good. If necessary, install a new power supply unit,
PL 1.15
Item 2
.
Thermal Cutout Check
Procedure
Switch off the electricity to the machine,
GP 14
, and disconnect the power cord. Refer to
WD
1.2
. Disconnect PJ5AC harness on the
power supply unit
. Check the continuity of the thermal
cutouts on the thermal cutout PWB, by measuring the resistance across the pins of the PJ5AC
harness as follows:
•
cutout for drum heater 1, pin 4 to pin 14. Expect a short circuit.
•
cutout for drum heater 2, pin 5 to pin 18. Expect a short circuit.
•
Check that pin 4 and 5 to the chassis is open circuit.
The measured resistances are correct.
Y
N
Go to
WD 1.2
. Check the wiring between PJ5AC on the
power supply unit
and PJ140 to
the thermal cutout PWB,
PL 88.10 Item 11
. Repair as necessary, refer to
REP 1.1
. As
necessary, install a new thermal cutout PWB,
PL 94.20 Item 11
.
The thermal cutouts are good. Refer to
WD 9.4
. Switch on the electricity to the machine,
GP
14
, and check the voltage on PJ902 pin 1 or pin 2 on the
drum driver PWB
is greater than
+2.5V. Check the voltage on PJ902 pin 33 on the
drum driver PWB
is greater than +2.5V. The
voltages are good.
Y
N
Install a new drum driver PWB,
PL 1.15 Item 4
.
Check the condition of harness between PJDC2 of the
power supply unit
and PJ 902 of the
drum driver PWB
. The harness is good.
Y
N
Repair the harness,
REP 1.1
.
Install a new power supply unit,
PL 1.15 Item 2
.
A
Содержание ColorQube 9303 Series
Страница 1: ...Xerox ColorQube 9303 Family Service Manual 708P90290 February 2013...
Страница 4: ...February 2013 ii ColorQube 9303 Family Introduction...
Страница 18: ...February 2013 1 2 ColorQube 9303 Family Service Call Procedures...
Страница 92: ...February 2013 2 68 ColorQube 9303 Family 05F Status Indicator RAPs...
Страница 104: ...February 2013 2 80 ColorQube 9303 Family 12 701 00 65 Status Indicator RAPs...
Страница 200: ...February 2013 2 176 ColorQube 9303 Family 12N 171 Status Indicator RAPs...
Страница 292: ...February 2013 2 268 ColorQube 9303 Family 16D Status Indicator RAPs...
Страница 320: ...February 2013 2 296 ColorQube 9303 Family 42 504 00 42 505 00 Status Indicator RAPs...
Страница 500: ...February 2013 2 476 ColorQube 9303 Family 94B Status Indicator RAPs...
Страница 648: ...February 2013 3 2 ColorQube 9303 Family Image Quality...
Страница 653: ...February 2013 3 7 ColorQube 9303 Family IQ 1 Image Quality Figure 1 IQ defects 1...
Страница 654: ...February 2013 3 8 ColorQube 9303 Family IQ 1 Image Quality Figure 2 IQ defects 2...
Страница 655: ...February 2013 3 9 ColorQube 9303 Family IQ 1 Image Quality Figure 3 IQ defects 3...
Страница 656: ...February 2013 3 10 ColorQube 9303 Family IQ 1 Image Quality Figure 4 IQ defects 4...
Страница 657: ...February 2013 3 11 ColorQube 9303 Family IQ 1 Image Quality Figure 5 IQ defects 5...
Страница 658: ...February 2013 3 12 ColorQube 9303 Family IQ 1 Image Quality Figure 6 IQ defects 6...
Страница 659: ...February 2013 3 13 ColorQube 9303 Family IQ 1 Image Quality Figure 7 IQ defects 7 Figure 8 IQ defects 8...
Страница 660: ...February 2013 3 14 ColorQube 9303 Family IQ 1 Image Quality Figure 9 IQ defects 9...
Страница 661: ...February 2013 3 15 ColorQube 9303 Family IQ 1 Image Quality Figure 10 IQ defects 10...
Страница 662: ...February 2013 3 16 ColorQube 9303 Family IQ 1 Image Quality Figure 11 IQ defects 11...
Страница 663: ...February 2013 3 17 ColorQube 9303 Family IQ 1 Image Quality Figure 12 IQ defects 12...
Страница 664: ...February 2013 3 18 ColorQube 9303 Family IQ 1 Image Quality Figure 13 IQ defects 13...
Страница 707: ...February 2013 3 61 ColorQube 9303 Family IQ 15 Image Quality Figure 4 Corrupt image data Figure 5 Service test pattern...
Страница 728: ...February 2013 3 82 ColorQube 9303 Family IQ 29 IQ 30 Image Quality...
Страница 736: ...February 2013 3 90 ColorQube 9303 Family TP 15 Image Quality Figure 2 Media path test pages...
Страница 752: ...February 2013 3 106 ColorQube 9303 Family TP 26 Image Quality Figure 1 Print head uniformity colour bands test page...
Страница 758: ...February 2013 3 112 ColorQube 9303 Family IQS 7 IQS 8 Image Quality...
Страница 778: ...February 2013 4 20 ColorQube 9303 Family REP 1 9 Repairs Adjustments...
Страница 794: ...February 2013 4 36 ColorQube 9303 Family REP 3 10 Repairs Adjustments...
Страница 1144: ...February 2013 4 386 ColorQube 9303 Family REP 94 1 Repairs Adjustments...
Страница 1176: ...February 2013 4 418 ColorQube 9303 Family ADJ 62 3 ADJ 62 4 Repairs Adjustments...
Страница 1182: ...February 2013 4 424 ColorQube 9303 Family ADJ 75 3 Repairs Adjustments...
Страница 1184: ...February 2013 4 426 ColorQube 9303 Family ADJ 82 1 Repairs Adjustments...
Страница 1186: ...February 2013 4 428 ColorQube 9303 Family ADJ 91 1 Repairs Adjustments...
Страница 1348: ...February 2013 6 56 ColorQube 9303 Family GP 19 General Procedures Information Figure 1 SIM card matrix...
Страница 1378: ...February 2013 6 86 ColorQube 9303 Family GP 29 General Procedures Information Document Handler DADH Figure 4 DADH Sensor Map...
Страница 1380: ...February 2013 6 88 ColorQube 9303 Family GP 29 General Procedures Information High Volume Finisher HVF Figure 6 HVF Sensor Map...
Страница 1552: ...February 2013 6 260 ColorQube 9303 Family dC140 General Procedures Information...
Страница 1576: ...February 2013 6 284 ColorQube 9303 Family dC640 General Procedures Information...
Страница 1578: ...February 2013 6 286 ColorQube 9303 Family dC708 dC715 General Procedures Information...
Страница 1600: ...February 2013 7 2 ColorQube 9303 Family Wiring Data...
Страница 1696: ...February 2013 8 2 ColorQube 9303 Family Principles of Operation...
Страница 1718: ...February 2013 8 24 ColorQube 9303 Family Principles of Operation Figure 1 Sensors in the media path...
Страница 1808: ...February 2013 8 114 ColorQube 9303 Family Principles of Operation...
Страница 1809: ...XEROX EUROPE...
Страница 1810: ...XEROX EUROPE...
Страница 1811: ...XEROX EUROPE...
Страница 1812: ...XEROX EUROPE...


