CHAPTER 1: GETTING STARTED 35
Basics
This section gets you started on the basics of using PhotoImpact. Here you will
learn to create, modify, and save images, as well as acquire them from imaging
devices or the Internet. Aside from this, you will also learn about how to print
images in different forms or layouts and how to recover from making mistakes
while working on your documents.
Creating new images
PhotoImpact gives you a wide range of options when creating a new image from
scratch. These options let you customize the appearance of your image, including
background, and set it for DVD menu, Web, or normal image editing. For more
information on how to create a new Web page, see “Creating a new Web page”.
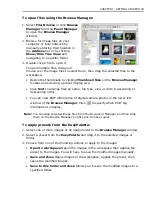
To create your own image from scratch:
1. Select
File: New - New Image [Ctrl+N]
.
2. Click the desired data type that defines the image format to use for the new
image.
3. Select one of the
Canvas
options:
•
White
Sets the base image to plain color white.
•
Custom color
Sets the base image to be a solid color of your choice.
•
Background color
Sets the base image using the assigned background
color in the
Toolbox
. By default, a document’s background color is white.
•
Transparent
Hides the base image and displays the default background
grid.
4. Set the image dimensions in the
Image size
set of options.
•
Standard
Offers commonly used on screen and paper sizes.
•
Active image
Opens a new image with the same size as the currently active
image in the workspace.
•
Same as image in clipboard
Opens a new image with the exact same size
as the image in the clipboard.
•
User-defined
Lets you customize the size. Once you specify a size, you can
click
Reverse
to switch the width and height, or click
User-defined
to add
the dimensions as a preset for easy access. For the steps on how to
customize a new page’s dimensions, please refer to the procedure below.
Содержание PHOTOIMPACT 11
Страница 1: ...User Guide Ulead Systems Inc August 2005 ...
Страница 295: ...9 Appendix COMMANDS ...

