262 ULEAD PHOTOIMPACT USER GUIDE
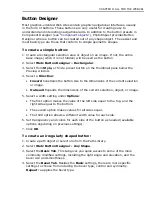
5. Select your preferred
Bevel type
,
size
, and
smoothness
. The size is
measured in pixels, so, for an object 20x20 a bevel of 10 would be drawn to a
central point. The lower the smoothness the more distinct the bevel.
6. Select the
Light Tab
and select the number of lights you want shining on the
button. Then select the angle, elevation, color, value and specular intensity for
each light. The lower the specular value. the more the reflective light.
7. Adjust the
Highlight
,
Shadow
, and
Face brightness
. With these settings you
make changes to the overall lighting effect, not each individual light.
Highlight
adjusts the intensity of the areas highlighted by the lights.
Shadow
adjusts the
intensity of the darkened areas.
Face brightness
adjusts the intensity of the
lighting on the entire button.
8. Select the
Shadow Tab
. Add a drop-shadow to your button by selecting one of
the shadow directions and then making adjustments to the offsets and
transparency settings.
Glow
is only available for shadows that are equal around
the entire button.
9. Select the
Warping Tab
if you would like to distort the bevel. Adjust the
Smoothness
setting for greater distortion.
Notes:
• Irregularly shaped image selections do not render very well. Instead of using
the selection to make a button, consider making a button from a path object
and then pasting the image selection on top.
• To make buttons for Rollovers, duplicate the object you want to use for the
button before opening the Button Designer. Then select
Pressed
to create one
button and clear
Pressed
to make the other.
• After using
Button Designer
to create a button your settings are stored until
PhotoImpact is restarted at which point the settings return to the defaults.
• If you are using an outer button style, depending on the size of the button and
the dimensions of your image, you may need to select
Adjust: Expand
Canvas
and adjust the canvas dimensions to see the result.
Slice Tool
Slice Tool
cuts your Web document into rectangular cells, allowing each cell to be
loaded separately into a Web page browser. You can insert images, HTML text,
hyperlinks, Script Effects, and other Web objects in each cell. They can be saved
individually in different Web image formats, enabling the entire image to be
downloaded more efficiently.
For example, a cell that is predominantly a simple color can be saved as a GIF
which provides better compression for solid colors; whereas a cell with a more
complex image can be saved as a JPEG.
Содержание PHOTOIMPACT 11
Страница 1: ...User Guide Ulead Systems Inc August 2005 ...
Страница 295: ...9 Appendix COMMANDS ...

