4
4
4-196
4-196
Parts Replacement and Cleaning > Periodic Replacing Parts, Durable Parts, Cleaning Parts > Removing Drum Cleaning Unit
Parts Replacement and Cleaning > Periodic Replacing Parts, Durable Parts, Cleaning Parts > Removing Drum Cleaning Unit
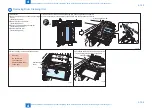
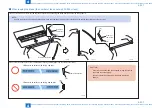
Caution :
Put your fingers in the upper and under side of the drum cleaning
unit, be sure not to drop or tilt it when engaging/disengaging.
Caution :
When installing/removing
it, be careful not to get your
fingers caught between the
drum cleaning unit and the
process unit.
F-4-396
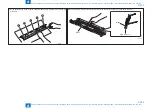
5) Insert a hand from under the process unit and hold the drum cleaning unit.
6) Move the drum cleaning unit to the right and remove it from under the process unit.
Drum cleaning unit
F-4-397
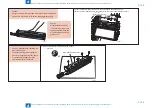
Caution : Preparation for installing the
drum cleaning unit
The drum cleaning unit assigned as
parts is not supplied with toner, hence
it is necessary to supply the toner
from toner bottle in the content.
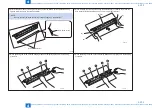
1) Remove the cleaner cover and put it on a paper.
• 4 screws
Dram cleaning blade cover
x4
F-4-398
Содержание imagePRESS 1110
Страница 242: ...3 3 Periodical Service Periodical Service Periodical service item ...
Страница 655: ...5 5 Adjustment Adjustment Overview When replacing parts Major adjustment ...
Страница 733: ...7 7 Error Code Error Code Overview Location Code Pickup Position Code Pickup size Error Code Jam Code Alarm Code ...
Страница 944: ...8 8 Service Mode Service Mode Overview COPIER FEEDER SORTER BOARD Situation Mode ...
Страница 1555: ... Service Tools General Circuit Diagram General Timing Chart Operator Maintenance Appendix ...


