8
8
8-465
8-465
Service Mode > Situation Mode > Troubleshooting
Service Mode > Situation Mode > Troubleshooting
Explaination [Replacement Part]
FM3-2886 DEVELOPING SLEEVE UNIT
Title
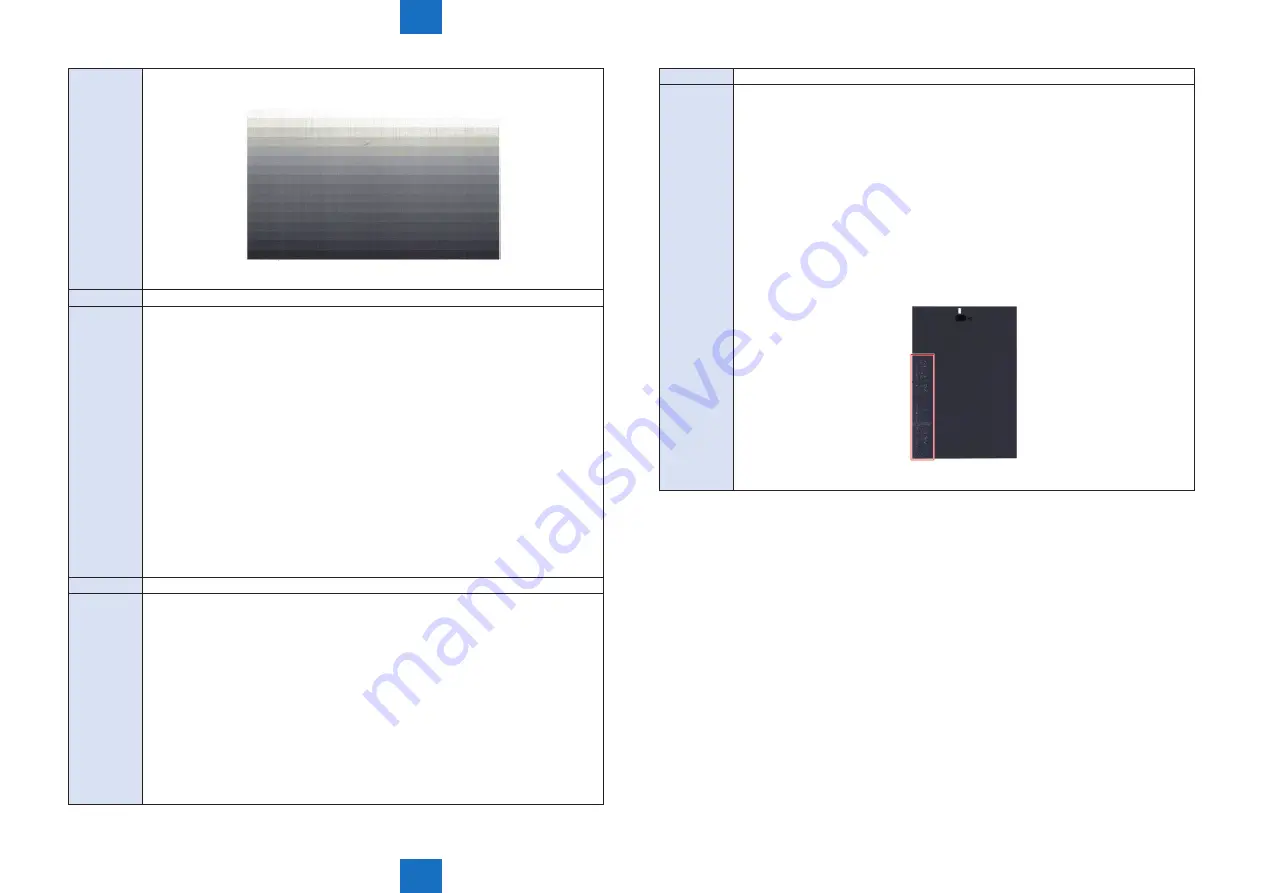
A 50mm (Two Inch) Wide Light Gray Band
Explaination [Description]
ntermittently, on the back side of a single sided copy, a 50mm (two inch) wide light
gray band occurs near the trail edge of the copy, in the cross-feed direction.
The issue was more noticeable, when running tabs through the machine. The System
Software is at the latest level in the machine, and the SL-RATIO for IMGDEV in
service mode is set to 0. The SL Ratio was adjusted to a lower and higher value with
the same result. The SL Ratio image quality adjustment has been known to correct
banding issues on some machines. The default value for the SL-Ratio is 0.
[Field Remedy]
In this case, adjusting the 2nd transfer cleaning voltage corrected the banding issue.
The adjustment is used to set the secondary transfer roller cleaning bias. To adjust the
2nd transfer cleaning voltage, perform the following in Service Mode.
Copier > Adjust > HV-TR > 2TR-CLOF
[Note]
The default value for 2TR-CLOF is 0, and in this case, the value was set to -10 to
resolve the issue.
Title
“The Default Key is corrupted or invalid” is displayed
Explaination [Detailed explanation]
When executing the following work or operation, the key/certificate for encryption
communication and the CA certificate (that verifies the external server certificate) can
be erased.
• Replace/format HDD
• Replace the main controller PCB/clear RAM
If “The Default Key is corrupted or invalid” was displayed after the above operation is
executed, follow the steps below.
[Field Remedy]
1. Enter Service Mode (level 2)> COPIER> Function> CLEAR> select CA-KEY, and
press “OK”.
2. Execute shutdown and turn OFF and then ON the main power SW (the main power
switch is automatically turned OFF once executing shutdown).
Title
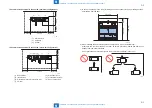
an image with water drop marks
Explaination [Detailed explanation]
When a halftone solid image was printed, an image with water drop marks occurred.
[Cause]
When the life of the Developing Sleeve advances, residual toner accumulates on the
Upper Sleeve. As a result, residual toner may fall on the Lower Sleeve and cause an
image failure with water drop marks.
[Field Remedy]
Execute COPIER> FUNCTION> INSTALL> TONER-S.
If the symptom persists, replace the Developing Sleeve or the Developing Assembly.
Using a vacuum cleaner to remove residual toner on the Upper Sleeve may end up
worsening the accumulation of residual toner.
Do not use a vacuum cleaner to remove residual toner.
T-8-116
Содержание imagePRESS 1110
Страница 242: ...3 3 Periodical Service Periodical Service Periodical service item ...
Страница 655: ...5 5 Adjustment Adjustment Overview When replacing parts Major adjustment ...
Страница 733: ...7 7 Error Code Error Code Overview Location Code Pickup Position Code Pickup size Error Code Jam Code Alarm Code ...
Страница 944: ...8 8 Service Mode Service Mode Overview COPIER FEEDER SORTER BOARD Situation Mode ...
Страница 1555: ... Service Tools General Circuit Diagram General Timing Chart Operator Maintenance Appendix ...


