


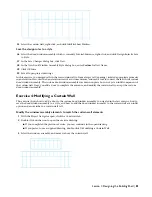


The assembly created in the previous exercise was not inserted into the curtain wall. It was created in-place, using
the curtain-wall as a template for the sketch but it is not yet part of the curtain wall. You now isolate the assembly
for easier editing. After you modify the assembly, you save the door/window assembly style so it can be inserted
as an override to fill a cell in the curtain wall. The unanchored instance of the assembly can then be erased.
4
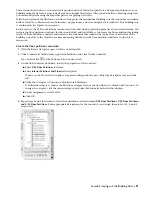
With the door/window assembly selected, right-click, and click Edit Door/Window Assembly Style.
5
Click Yes to edit the Door/Window Assembly Style.
6
In the Door/Window Assembly Style Properties dialog box, click the Design Rules tab.
7
In the left pane, click Frames.
8
In the lower right pane, enter
2"
for Width, and enter 3" for Depth.
9
In the left pane, click Mullions.
10
In the lower right pane, enter
1.5"
for Width, and enter 3" for Depth.
11
In the left pane, click Infills.
Notice that the double door optional infill, associated with the Tutorial-Entrance style, was copied into the custom
style when you applied the tool to the elevation sketch. You use the Double Door style as an override later in this
exercise.
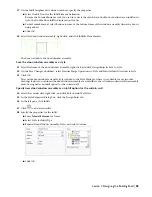
12
Click OK.
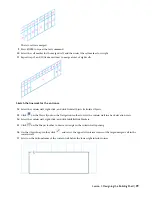
The dimensions of the frames and mullions in the window assembly match those in the curtain wall.
13
Select the window assembly above the curtain wall, right-click, and click Infill
➤
Show Markers.
Displaying cell markers makes selecting individual cells in the window assembly easier.
Create a door opening in a window assembly
14
With the window assembly selected, right-click, and click Infill
➤
Merge.
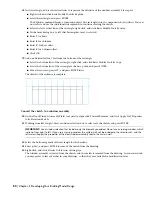
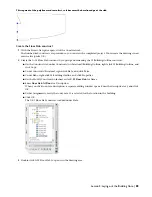
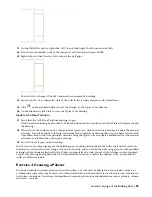
15
Select the cell marker [
] for the bottom cell that is fourth from the left, and then select the cell marker to the
right of it.
The two cells are merged to form an opening for a door.
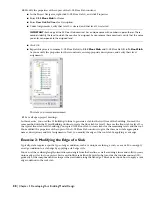
16
Press ENTER to repeat the last command, and then merge the two cells above the door opening in the window
assembly.
TIP:
Zoom in to select the cell markers, if necessary.
Add a door to the window assembly
17
Select the window assembly, right-click, and click Infill
➤
Override Assignment.
18
Select the cell marker for the merged cell on the bottom, and press ENTER.
82 | Chapter 3 Developing Your Building Model Design
Содержание 18506-091462-9305 - Architectural Desktop 2006
Страница 1: ...AUTODESK ARCHITECTURAL DESKTOP 2006 Imperial Tutorials Update August 2005 ...
Страница 6: ...iv Contents ...
Страница 142: ...136 Chapter 3 DevelopingYour Building Model Design ...
Страница 290: ...284 Chapter 5 Creating a Steel Framed Residence ...


