


Exercise 4: Generating Project Tools from a Project Standards Drawing
In this exercise, you create tools for your project catalog from the standards drawing, Styles_STD.dwg.
Generate project tools
1
On the File menu, click Open.
2
Browse to the my documents/autodesk/my projects/small office building/standards/object styles folder, select the
Styles_STD.dwg file, and click Open.
This is the standards drawing that contains the styles that you will use for your project tools. You created this from
a legacy drawing for the building type.
3
On the File menu, click Close to save the drawing. The project should be active but the drawing does not need to
be open.
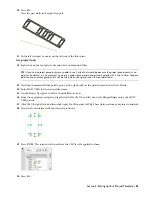
TIP:
All the styles in the drawing are available for creation of tools. You can see all the styles in the Style Manager. You
would purge the drawing to remove unwanted styles so as to avoid creating unwanted tools. You also do not have to
have the styles placed in the drawing, as they are in our tutorial file. The intention in leaving them was to visually confirm
we are creating a project template for an office. You would repeat this process for other building types that you specialize
in, where you want custom tools according to the building type.
4
If you do not see CAD Manager menu on the Menu bar, on the Window menu, click Pulldowns
➤
CAD Manager
Pulldown.
5
On the CAD Manager menu, click Tool Catalog Generator.
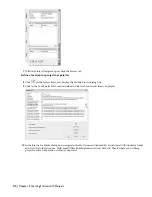
6
In the Populate Tool Catalog from Content Drawings dialog box, under Catalog, select Create a new catalog. Use
Add to an existing catalog when you already have a catalog and do not wish to replace it.
Lesson 2: Setting up Your Project Template | 53
Содержание 18506-091462-9305 - Architectural Desktop 2006
Страница 1: ...AUTODESK ARCHITECTURAL DESKTOP 2006 Imperial Tutorials Update August 2005 ...
Страница 6: ...iv Contents ...
Страница 142: ...136 Chapter 3 DevelopingYour Building Model Design ...
Страница 290: ...284 Chapter 5 Creating a Steel Framed Residence ...


