


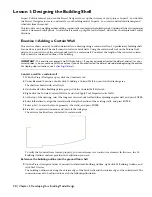


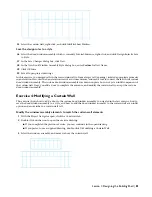


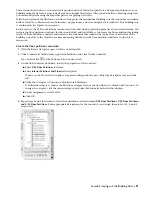


18
In the rectangle, add seven vertical lines to represent the divisions of the window assembly 3 feet apart:
■
Right-click, and click Basic Modify Tools
➤
Explode.
■
Select the rectangle, and press ENTER.
The Explode command breaks a compound object (the rectangle) into its component objects (lines). You can
now select and use the individual line segments to continue creating the sketch.
■
Select the left vertical line of the rectangle, right-click, and click Basic Modify Tools
➤
Array.
■
In the Array dialog box, verify that Rectangular Array is selected.
■
Enter
1
for Rows.
■
Enter
8
for Columns.
■
Enter
0"
for Row offset.
■
Enter
3'
for Column offset.
■
Click OK.
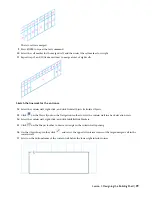
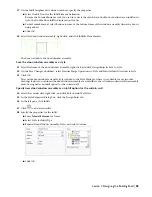
19
Add one horizontal line 7 feet from the bottom of the rectangle.
■
Select the bottom line of the rectangle, right-click, and click Basic Modify Tools
➤
Copy.
■
Select the bottom line of the rectangle as the base point, and press ENTER.
■
Move the cursor up, enter
7'
, and press ENTER twice.
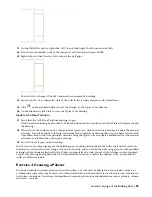
The sketch of the entrance is complete.
Convert the sketch to a window assembly
20
On the Door/Window Assembly Styles tool palette, right-click Tutorial-Entrance, and click Apply Tool Properties
to
➤
Elevation Sketch.
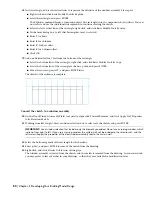
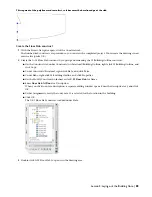
21
Working from left to right, draw a window selection box to select only the sketch, and press ENTER.
IMPORTANT:
Use a window selection that includes only the linework you added. Do not use a crossing window, which
is drawn from right to left. If you use a crossing window, the curtain wall will be included in the selection set, and the
software will apply the properties of the door/window assembly tool to the curtain wall.
22
Select the bottom segment of the rectangle for the baseline.
23
Enter
y
(Yes), and press ENTER to remove the sketch from the drawing.
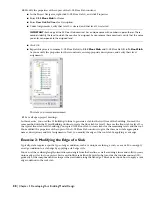
24
Right-click, and click Deselect All to turn off the grips.
The window assembly is created from the sketch, and the sketch is removed from the drawing. In your own work,
you may prefer to leave sketches in your drawings, so that they are available for modification later.
80 | Chapter 3 Developing Your Building Model Design
Содержание 18506-091462-9305 - Architectural Desktop 2006
Страница 1: ...AUTODESK ARCHITECTURAL DESKTOP 2006 Imperial Tutorials Update August 2005 ...
Страница 6: ...iv Contents ...
Страница 142: ...136 Chapter 3 DevelopingYour Building Model Design ...
Страница 290: ...284 Chapter 5 Creating a Steel Framed Residence ...


