


When you have finished rotating the model, right-click, and click Exit to end the 3D Orbit function.
11
On the View menu, click Hide.
Notice the bold shading at the edge of objects to show where the section cut was made through the building model.
12
On the View menu, click Shade
➤
Flat Shaded.
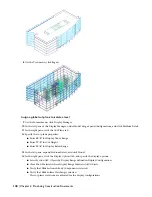
13
On the View menu, click Shade
➤
3D Wireframe.
Change the location of the section
14
Click
on the Views flyout on the Navigation toolbar.
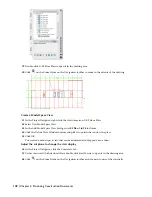
15
Select the section line.
16
Using the Edge grip, drag the section line up to move the boundary box to the location shown below.
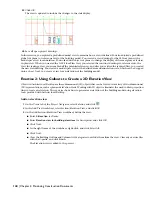
17
Select the section line.
18
Select the Length grip at the midpoint of the bottom line segment, drag the grip to a point below the building
model, and then click to place it.
The live section is updated automatically.
Lesson 1: Creating a Floor Plan, an Elevation, and a Section | 153
Содержание 18506-091462-9305 - Architectural Desktop 2006
Страница 1: ...AUTODESK ARCHITECTURAL DESKTOP 2006 Imperial Tutorials Update August 2005 ...
Страница 6: ...iv Contents ...
Страница 142: ...136 Chapter 3 DevelopingYour Building Model Design ...
Страница 290: ...284 Chapter 5 Creating a Steel Framed Residence ...


