4 Setup
Operator’s Manual
4 - 9
2.
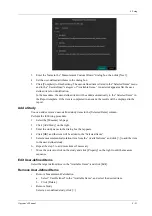
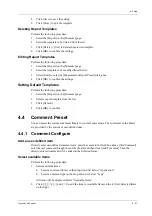
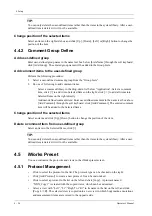
Click to select a function in the Function area. You can see the available functions selected on
the right side.
3.
Click [OK] to complete the function setting.
Footswitch Function Setting
You can assign a function to the left/middle/right key of the foot switch. The method is similar to
setting key functions. See the steps above.
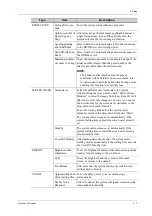
Trackball Speed
Set the speed of the trackball when using the trackball.
Key Volume
Set the key volume level.
Key Brightness
Set the brightness for the keys.
Trackball Light
Set the light color for the trackball.
Touchscreen Volume
Set button volume level on the touch screen.
Auxiliary Output Function
For the following three functions, the system provides auxiliary output function setting: “Save
Image”, “Save Cine (Retrospective)” and “Save Cine (Prospective)”. When the corresponding user-
defined key is pressed, the system can perform multiple operations one by one as per the preset.
•
Save the single-frame image:
–
Send image to DICOM storage
–
Send image to DICOM print
–
Send image to USB disk
–
Send image to iStorage
–
Send image to local printer
•
Retrospective/prospective saving cine:
–
Send cine to DICOM storage
–
Send cine to USB disk
–
Send cine to iStorage
Setting method (taking “Save Image” as an example, add the auxiliary functions “Send Image to
DICOM Storage” and “Send Image to USB disk”):
1.
Select a key in the Key Function field on the left side and select “Save Image” in the Output
page of Function field on the right side.
2.
Click [Add] in the middle part of the screen, then there will be “Function 2: NULL” under the
key function in the Key Function Field on the left side, and at the same time, “Output” column
on the right side will show the available auxiliary functions for current key. Select “Send
Image to DICOM Storage” in the “Output” column on the right side. Then the Function 2 on
the left side turns into “Send Image to DICOM Storage”.
3.
Click [Add] again, then there will be “Function 3: NULL” under the key function in the Key
Function Field on the left side. Select “Send Image to USB disk” in the “Output” column on
the right side. Then the Function 3 on the left side turns into “Send Image to USB disk”.
Summary of Contents for Anesus ME7T
Page 2: ......
Page 58: ...This page intentionally left blank ...
Page 154: ...This page intentionally left blank ...
Page 164: ...This page intentionally left blank ...
Page 182: ...This page intentionally left blank ...
Page 190: ...This page intentionally left blank ...
Page 208: ...This page intentionally left blank ...
Page 254: ...This page intentionally left blank ...
Page 264: ...This page intentionally left blank ...
Page 280: ...This page intentionally left blank ...
Page 311: ......
Page 312: ...P N 046 018839 00 5 0 ...


