Replacing IOAs on the E120 Router and the E320 Router
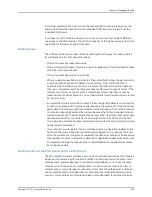
When you configure an IOA in an IOA bay on the E120 and E320 routers, the router stores
the configuration in NVS.
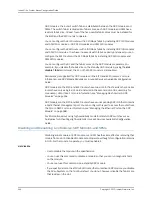
When you replace an IOA that supports hot-swapping with the same type of IOA, the
line module goes online immediately. When you replace an IOA that
does no
t support
hot-swapping with the same type of IOA, the line module reboots.
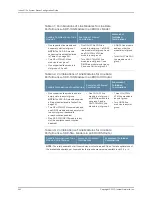
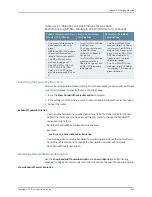
Before you install an IOA that was previously occupied by another IOA in the E120 or E320
router—for example, an ES2-S1 GE-4 IOA in an IOA bay that previously contained an
ES2-S1 OC3-8 STM1 ATM IOA—consider whether the IOA that you are replacing supports
hot-swapping. For example:
•
When you replace an IOA that does not support hot-swapping, the line module reboots.
Before installing the different type of IOA, issue the
adapter erase
or
slot erase
command for the slot that contains the IOA bay.
•
When you replace an IOA that supports hot-swapping, the line module becomes
inactive with a “ mismatch” state. After installing the different type of IOA, issue the
adapter accept
command or the
slot erase
command for the slot that contains the
IOA bay.
Replacing SRP Modules and SFMs
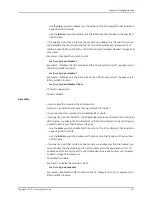
If you remove a standby SRP module or an SFM, you must issue the
slot erase
command
to delete the configuration. If you fail to issue the
slot erase
command, then the E Series
router cannot guarantee that the SRP modules were synchronized. In this situation, the
E Series router does not properly execute a simple
reload
command.
To reload the router you must do either of the following:
•
Issue the
reload force
command.
•
Issue the
slot erase
command followed by the
reload
command.
If you perform one of the following actions, you must reset the configuration of the router
to factory default:
•
Replace a 5-Gbps SRP module with a 10-Gbps SRP module or vice versa.
•
Transfer an SRP module from an ERX7xx router to a Juniper Networks ERX1410 router
or vice versa.
You cannot use the
slot accept
command to force the router to accept the new SRP
module.
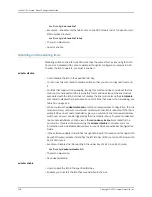
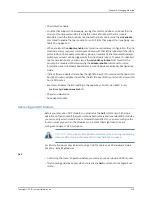
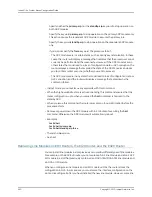
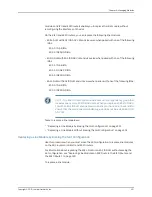
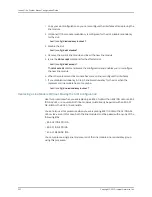
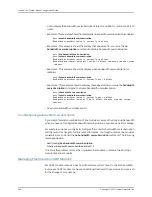
When you have installed the SRP module in the new location, reset the configuration of
the router to factory defaults as follows:
1.
Reload the operating router, then press
mb
key sequence (case-insensitive) during
the countdown.
355
Copyright © 2010, Juniper Networks, Inc.
Chapter 6: Managing Modules
Summary of Contents for JUNOSE 11.3
Page 6: ...Copyright 2010 Juniper Networks Inc vi...
Page 8: ...Copyright 2010 Juniper Networks Inc viii JunosE 11 3 x System Basics Configuration Guide...
Page 24: ...Copyright 2010 Juniper Networks Inc xxiv JunosE 11 3 x System Basics Configuration Guide...
Page 32: ...Copyright 2010 Juniper Networks Inc 2 JunosE 11 3 x System Basics Configuration Guide...
Page 146: ...Copyright 2010 Juniper Networks Inc 116 JunosE 11 3 x System Basics Configuration Guide...
Page 166: ...Copyright 2010 Juniper Networks Inc 136 JunosE 11 3 x System Basics Configuration Guide...
Page 432: ...Copyright 2010 Juniper Networks Inc 402 JunosE 11 3 x System Basics Configuration Guide...
Page 488: ...Copyright 2010 Juniper Networks Inc 458 JunosE 11 3 x System Basics Configuration Guide...
Page 524: ...Copyright 2010 Juniper Networks Inc 494 JunosE 11 3 x System Basics Configuration Guide...
Page 554: ...Copyright 2010 Juniper Networks Inc 524 JunosE 11 3 x System Basics Configuration Guide...
Page 566: ...Copyright 2010 Juniper Networks Inc 536 JunosE 11 3 x System Basics Configuration Guide...
Page 588: ...Copyright 2010 Juniper Networks Inc 558 JunosE 11 3 x System Basics Configuration Guide...
Page 613: ...PART 3 Index Index on page 585 583 Copyright 2010 Juniper Networks Inc...
Page 614: ...Copyright 2010 Juniper Networks Inc 584 JunosE 11 3 x System Basics Configuration Guide...
Page 632: ...Copyright 2010 Juniper Networks Inc 602 JunosE 11 3 x System Basics Configuration Guide...

