


407
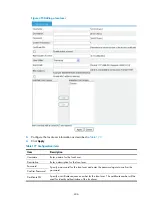
Item Description
Enable public
account
Select this item to set the local user account as a public account. A public account can
be concurrently used by multiple users to log in to the SSL VPN system.
If you do not select this item, only one user can use the local user account to log in to the
SSL VPN system at a time.
Max Number of
Users
Set the maximum number of concurrent users that can log in to the SSL VPN system by
using the public account.
User Status
Select a user status, which can be
Permitted
,
Permitted When Valid
, and
Denied
.
Expiry Date
Set the expiry date for the user when the user status is set to
Permitted When Valid
.
MAC Address
Specify the MAC addresses to be bound with the
username. The MAC addresses are used for user identity
authentication.
IMPORTANT:
To implement the two
functions, you must also
enable the MAC address
binding function in the
domain policy (see
"
Enable MAC
address learning
Select this item to enable MAC address learning.
With this function enabled, when a user uses this user
account to log in, the SSL VPN system automatically learns
the MAC address of the user host and records the MAC
address for the account. The SSL VPN can record up to
three MAC addresses for an account. The recorded MAC
addresses are still effective after you disable the MAC
address learning function.
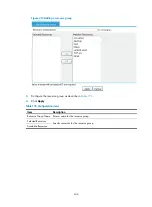
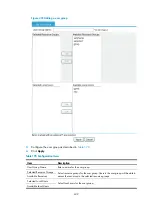
Selected User
Groups
Specify the user groups to which the local user belongs.
Available User
Groups
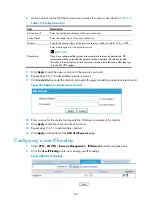
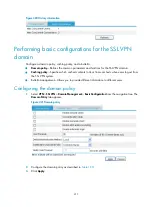
Importing local users in bulk
1.
Select
VPN
>
SSL VPN
>
User Management
>
Batch Import
from the navigation tree.
The batch import page appears.
2.
Click
Browse
to locate the local file that saves the user information.
3.
Set whether to directly overwrite the file with the same name on the device.
4.
Click
Apply
to import local users from the file into the SSL VPN.
Summary of Contents for MSR SERIES
Page 17: ...xv Documents 835 Websites 835 Conventions 836 Index 838 ...
Page 20: ...3 Figure 3 Initial page of the Web interface ...
Page 42: ...25 Figure 13 Firefox Web browser setting ...
Page 59: ...42 Figure 27 Checking the basic service configuration ...
Page 73: ...56 Figure 35 Sample interface statistics ...
Page 156: ...139 Figure 139 Rebooting the 3G modem ...
Page 168: ...151 Figure 152 Configuring Web server 2 ...
Page 174: ...157 Figure 158 Configure the URL filtering function ...
Page 242: ...225 Figure 233 Enabling the DHCP client on interface Ethernet 0 1 ...
Page 247: ...230 Figure 236 The page for configuring an advanced IPv4 ACL ...
Page 255: ...238 Figure 241 Advanced limit setting ...
Page 298: ...281 e Click Apply 2 Configure Router B in the same way Router A is configured ...
Page 400: ...383 Figure 387 Verifying the configuration ...
Page 405: ...388 ...
Page 523: ...506 Figure 530 Ping configuration page ...
Page 775: ...758 Figure 785 Configuring a jump node ...


