


210
Item Description
Subnet Mask
IMPORTANT:
Make sure the IP address is on the same network segment as the IP address of
the DHCP server interface or the DHCP relay agent interface to avoid wrong IP
address allocation.
Lease Duration
Specify the lease for IP addresses to be assigned.
NOTE:
•
If the lease has an end time specified later than the year 2106, the system
considers it an expired lease.
•
The lease duration does not have the inherit attribute.
Domain Name
Specify a domain name suffix for the DHCP client.
After specifying a domain name in the address pool, the DHCP server assigns
the domain name along with an IP address to a client.
Gateway IP Address
Specify a gateway for the DHCP client.
DHCP clients that want to access hosts outside the local subnet need a
gateway to forward data. After specifying a gateway in the address pool, the
DHCP server assigns the gateway address along with an IP address to a
client.
Primary DNS Server
Specify a primary DNS server for the DHCP client.
In order for clients to access the Internet using a domain name, the DHCP
server assigns the specified DNS server address along with an IP address to
a client.
Standby DNS Server
Specify a standby DNS server for the DHCP client.
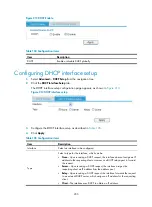
Configuring IP addresses excluded from dynamic
allocation
1.
Select
Advanced
>
DHCP Setup
from the navigation tree.
2.
Click the
DHCP Interface Setup
tab to enter the DHCP interface setup configuration page as shown
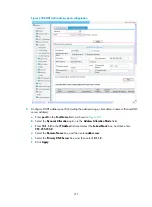
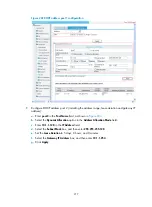
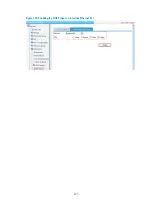
3.
Select the
Server
option in the
Type
field.
4.
Expand the
Forbidden IP Addresses
node.
Summary of Contents for MSR SERIES
Page 17: ...xv Documents 835 Websites 835 Conventions 836 Index 838 ...
Page 20: ...3 Figure 3 Initial page of the Web interface ...
Page 42: ...25 Figure 13 Firefox Web browser setting ...
Page 59: ...42 Figure 27 Checking the basic service configuration ...
Page 73: ...56 Figure 35 Sample interface statistics ...
Page 156: ...139 Figure 139 Rebooting the 3G modem ...
Page 168: ...151 Figure 152 Configuring Web server 2 ...
Page 174: ...157 Figure 158 Configure the URL filtering function ...
Page 242: ...225 Figure 233 Enabling the DHCP client on interface Ethernet 0 1 ...
Page 247: ...230 Figure 236 The page for configuring an advanced IPv4 ACL ...
Page 255: ...238 Figure 241 Advanced limit setting ...
Page 298: ...281 e Click Apply 2 Configure Router B in the same way Router A is configured ...
Page 400: ...383 Figure 387 Verifying the configuration ...
Page 405: ...388 ...
Page 523: ...506 Figure 530 Ping configuration page ...
Page 775: ...758 Figure 785 Configuring a jump node ...


