Fax (imageRUNNER 1025iF Only)
5-25
Specifying Destinations
5
Press [Start].
If the <ORIGINAL SIZE> message appears, press
[
] or [
] to select the original size, then
press [Start] for each original. When scanning
is complete, press [OK] to start sending.
When <TIME OUT> is set to <ON> in <TX
SETTINGS> in <FAX SETTINGS> in <TX/RX
SETTINGS>, and if you have specifi ed the
destination by any other method than using
– [numeric keys], the machine starts
scanning automatically without pressing
[Start], after the preset time for this setting is
elapsed.
You can also adjust the following scan settings
as necessary, using the keys on the operation
panel, after specifying the destination in step 4.
Image Qaulity: See “Selecting Image Quality,”
on p. 5-29.
Density: See “Adjusting Density,” on p. 5-30.
2-Sided: See “2-Sided Originals,” on p. 5-31.
–
–
•
•
•
Using the Group Addresses
Using the Group Addresses
Group Dialing enables you to specify a group of registered destinations in the one-touch keys or coded dial
codes. This is useful if you want to send the same document to several destinations. You can specify up to 199
destinations in one group.
To use this feature, you must store group addresses in the one-touch keys or coded dial codes beforehand. (See “Storing/Editing One-
Touch Keys” on p. 3-3 or “Storing/Editing Coded Dial Codes,” on p. 3-14.)
A maximum of 201 destinations can be specifi ed at the same time. (Out of the 200 destinations, a number or address can be specifi ed
with the numeric keys.) If you specify a group, which is made up of several destinations, each destination in the group is counted as a
separate address.
You can select when specifying the following two types of the groups.
Specifying a Group from the One-Touch Keys
–
–
●
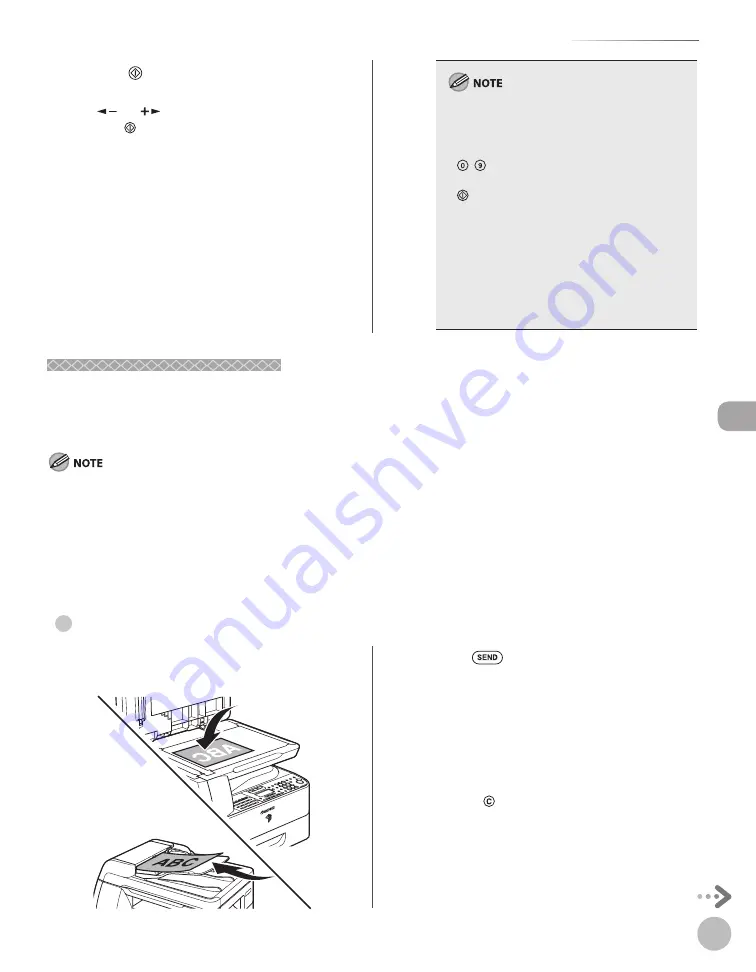
1
Place the original on the platen glass or
load it in the ADF.
2
Press
[SEND].
3
Press the desired one-touch key under
which the desired address group is
registered.
■
If you enter a wrong key:
Press
[Clear], and perform step 3 again.
■
If you specify an I-fax address:
You can enter the optional settings by
pressing [OK]. (See“Send Settings,” on p. 5-
43.)
Summary of Contents for imageRUNNER 1025
Page 90: ...Copying 4 3 Overview of Copy Functions p 4 17 p 4 19 p 4 25 ...
Page 93: ...Copying 4 6 Canceling Copy Jobs 5 Press Stop to return to the standby mode ...
Page 118: ...Copying 4 31 Erasing Shadows Lines Platen Glass C D A B A LEFT B RIGHT C TOP D BOTTOM ...
Page 123: ...Copying 4 36 ...
Page 193: ...Fax imageRUNNER 1025iF Only 5 70 ...
Page 196: ...E Mail imageRUNNER 1025iF Only 6 3 Overview of E Mail Functions ...
Page 201: ...E Mail imageRUNNER 1025iF Only 6 8 ...
Page 204: ...Printing 7 3 Overview of the Print Functions p 7 7 p 7 10 p 7 9 ...
Page 216: ...Scanning 8 3 Overview of the Scanner Functions ...
Page 231: ...Settings from a PC 10 6 ...
Page 265: ...12 16 Maintenance ...
Page 315: ...14 32 Machine Settings ...


