S
ettings fr
om a PC
10-4
Starting the Remote UI
Starting the Remote UI
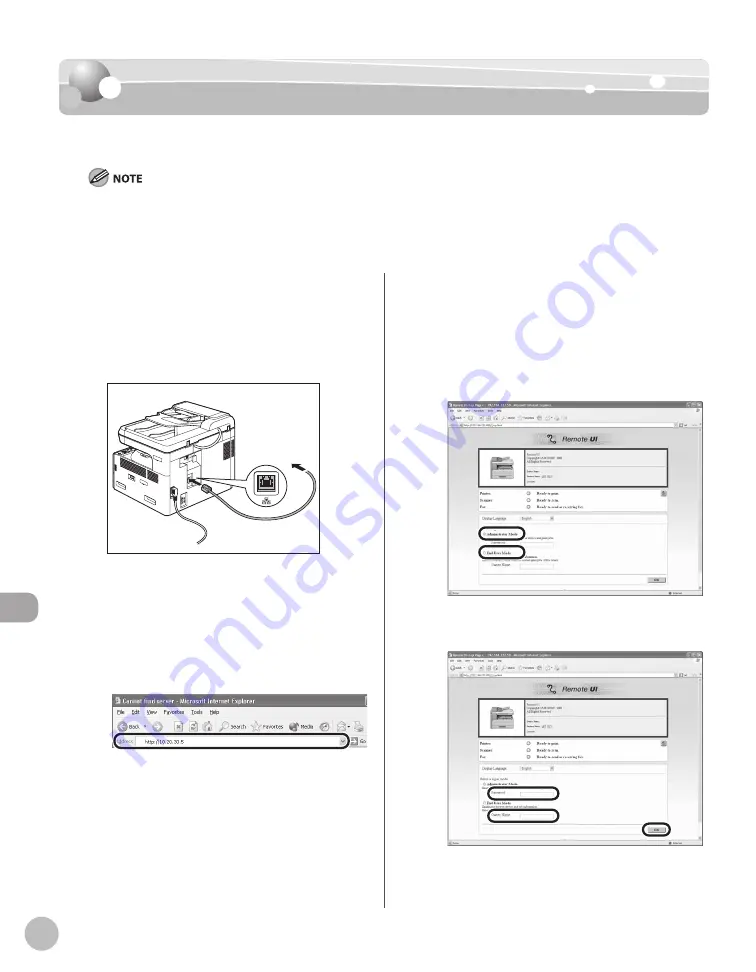
To start the Remote UI, follow the procedure described below.
Before you start the Remote UI, perform the following:
Select <VIEW IP ADDRESS> in <NETWORK SETTINGS> located in the <SYSTEM SETTINGS>, and verify the IP address of the
machine. If you do not know the IP address, consult with your network administrator.
Set <REMOTE UI> to <ON> in <SYSTEM SETTINGS>.
–
–
1
Prepare the Network.
Set up the machine for use in a network, then
connect the machine and the Computer to your
network router or a hub.
For details, see “Set UP Computers and Software,”
in the Quick Start Guide.
2
Start the web browser.
3
Enter the IP address of the machine in
[Address] or [Location], then press [Enter]
on the keyboard.
For details on how to check the IP address, see
“Setting and Checking IP Address,” in the e-
Manual.
The Remote UI screen appears.
4
Enter the required data.
The required data diff er depending on the
authentication mode you are using.
■
In case of default settings:
Select [Administrator Mode] or [End-User
Mode].
②
Enter the password or owner name and
click [OK].
Summary of Contents for imageRUNNER 1025
Page 90: ...Copying 4 3 Overview of Copy Functions p 4 17 p 4 19 p 4 25 ...
Page 93: ...Copying 4 6 Canceling Copy Jobs 5 Press Stop to return to the standby mode ...
Page 118: ...Copying 4 31 Erasing Shadows Lines Platen Glass C D A B A LEFT B RIGHT C TOP D BOTTOM ...
Page 123: ...Copying 4 36 ...
Page 193: ...Fax imageRUNNER 1025iF Only 5 70 ...
Page 196: ...E Mail imageRUNNER 1025iF Only 6 3 Overview of E Mail Functions ...
Page 201: ...E Mail imageRUNNER 1025iF Only 6 8 ...
Page 204: ...Printing 7 3 Overview of the Print Functions p 7 7 p 7 10 p 7 9 ...
Page 216: ...Scanning 8 3 Overview of the Scanner Functions ...
Page 231: ...Settings from a PC 10 6 ...
Page 265: ...12 16 Maintenance ...
Page 315: ...14 32 Machine Settings ...


