


PARTNER
®
Advanced Communications System Installation, Programming, and Use
Problems with Automatic Backup
11-22
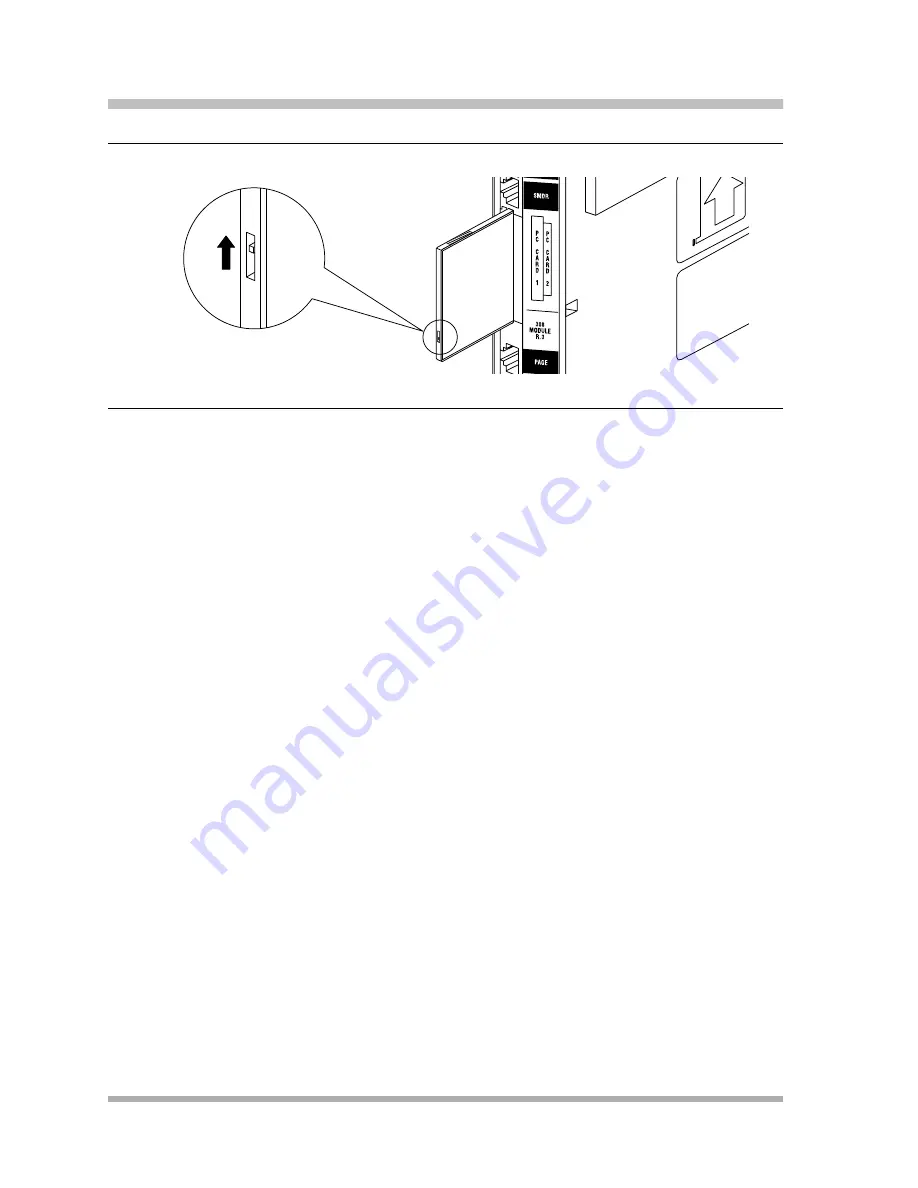
Figure 11-1. Write-Protect Tab on a Backup/Restore PC Card
Enter Backup Programming—Automatic (#123) and select Option 3 to clear the alarm display
(see
“Clearing a Backup-Failure Alarm” on page 11-4
).
Display Shows “Backup Failed:Check Card”
at Idle Extensions 10 and 11
1
1
Possible Cause 1: The Backup/Restore PC Card was removed while the backup was in progress.
What to do: Check to see whether the PC Card was removed. If it was not, go to Possible Cause
2. If it was, power down the system, reinsert the PC Card, and reapply power to the system. The
backup is rescheduled for the next day at 2:00 a.m.
Enter Backup Programming—Automatic (#123) and select Option 3 to clear the alarm display
(see
“Clearing a Backup-Failure Alarm” on page 11-4
).
Possible Cause 2: The Backup/Restore PC Card or the processor module is corrupted.
What to do: Try to do a backup using the manual backup procedure—Backup Programming—
Manual (#124)—to test the system.
■
If the backup completes successfully, the problem may be solved. An automatic backup is
rescheduled for the next day at 2:00 a.m. Enter Backup Programming—Automatic (#123)
and select Option 3 to clear the alarm display (see
“Clearing a Backup-Failure Alarm” on page
■
If the backup fails, try to determine whether the problem is a corrupted PC Card or a corrupted
processor module by trying the backup twice using two different Backup/Restore PC Cards:
— If the system will not write to either PC Card, the processor module is probably corrupted;
call the helpline number listed on the front, inside cover.
— If the system writes to one of the PC Cards, the original PC Card is corrupted. See
“Obtaining Products” in the PARTNER Customer Support document to order a new
Backup/Restore PC Card.
Slide the switch on the PC card
up to the nonprotected position
Summary of Contents for programming and use
Page 10: ...PARTNER Advanced Communications System Installation Programming and Use viii Master TOC...
Page 12: ...PARTNER Advanced Communications System Installation Programming and Use 1 ii...
Page 30: ...PARTNER Advanced Communications System Installation Programming and Use System Components 1 18...
Page 32: ...PARTNER Advanced Communications System Installation Programming and Use 2 ii...
Page 74: ...PARTNER Advanced Communications System Installation Programming and Use 3 ii...
Page 170: ...PARTNER Advanced Communications System Installation Programming and Use 5 ii...
Page 178: ...PARTNER Advanced Communications System Installation Programming and Use 6 ii...
Page 210: ...PARTNER Advanced Communications System Installation Programming and Use Handling Calls 6 32...
Page 212: ...PARTNER Advanced Communications System Installation Programming and Use 7 ii...
Page 366: ...PARTNER Advanced Communications System Installation Programming and Use 10 ii...
Page 390: ...PARTNER Advanced Communications System Installation Programming and Use 11 iv...
Page 430: ...PARTNER Advanced Communications System Installation Programming and Use A 10...
Page 436: ...PARTNER Advanced Communications System Installation Programming and Use Speed Dial Form C 4...
Page 440: ...PARTNER Advanced Communications System Installation Programming and Use Overview D 4...
Page 468: ...PARTNER Advanced Communications System Installation Programming and Use IN 14...