


Chapter 6 How to Operate Sampling Scope
6-14
6.2.2
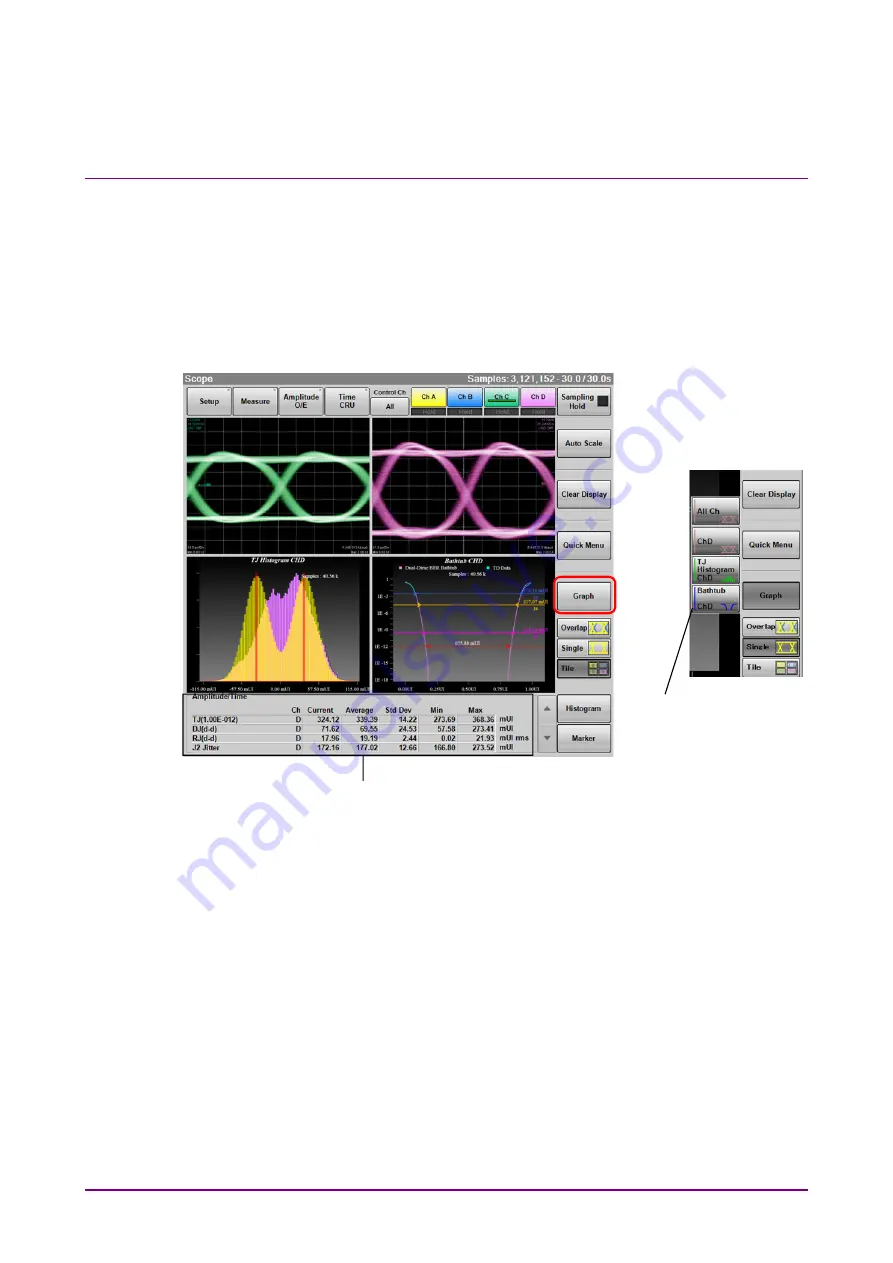
Displaying Measured Jitter
When MP2110A-096 is installed, Graph is displayed in the Result window.
Click Graph to display the Graph selection buttons.
Note:
Graph cannot be operated when Sampling Mode is set to Pulse or
Coherent Eye.
Figure 6.2.2-1 Result Window (Graph Display)
When Advanced Jitter is set to Sampling Mode in the Setup dialog box,
the following buttons in the Result window cannot be operated.
Control Ch, Auto Scale, Clear Display, Quick Menu, Overlap, Histogram,
Marker
When the Correction Factor of Figure 6.2.4-8 “Jitter Measure Dialog Box -
Advanced Tab” is ON, corrected value(s) is(are) indicated by “*1”, in red
letters, in the measurement result display area. When Fixed RJ is ON,
“*2” is displayed at RJ.
Graph selection
buttons
Jitter analysis result
Summary of Contents for BERTWave Series
Page 26: ...VI...
Page 74: ...Chapter 1 Outline 1 48...
Page 166: ...Chapter 4 Screen Operation 4 24...
Page 210: ...Chapter 6 How to Operate Sampling Scope 6 16 Figure 6 2 2 4 Switching Graph Display...
Page 309: ...6 9 Measuring Waveform 6 115 6 How to Operate Sampling Scope Figure 6 9 5 1 Marker Display...
Page 322: ...Chapter 6 How to Operate Sampling Scope 6 128...
Page 380: ...Chapter 8 Maintenance 8 14 7 Click Reinstall Windows 8 Click Yes...
Page 432: ...Appendix A Specifications A 36...
Page 458: ...Appendix D Performance Test Record Form D 12...
Page 466: ...Index Index 6...