3-38 Options
Internal 3 1/2-Inch Drive Cage Removal
Remove the internal 3 1/2-inch drive cage as follows.
NOTE:
The internal 3 1/2-inch drive cage holds
up to two 1.0-inch high devices or one 1.0-inch
and one 1.6-inch high device.
1.
Remove the top cover as previously described.
2.
Tag and unplug the power and signal cables attached to any installed devices in
the internal drive cage.
3.
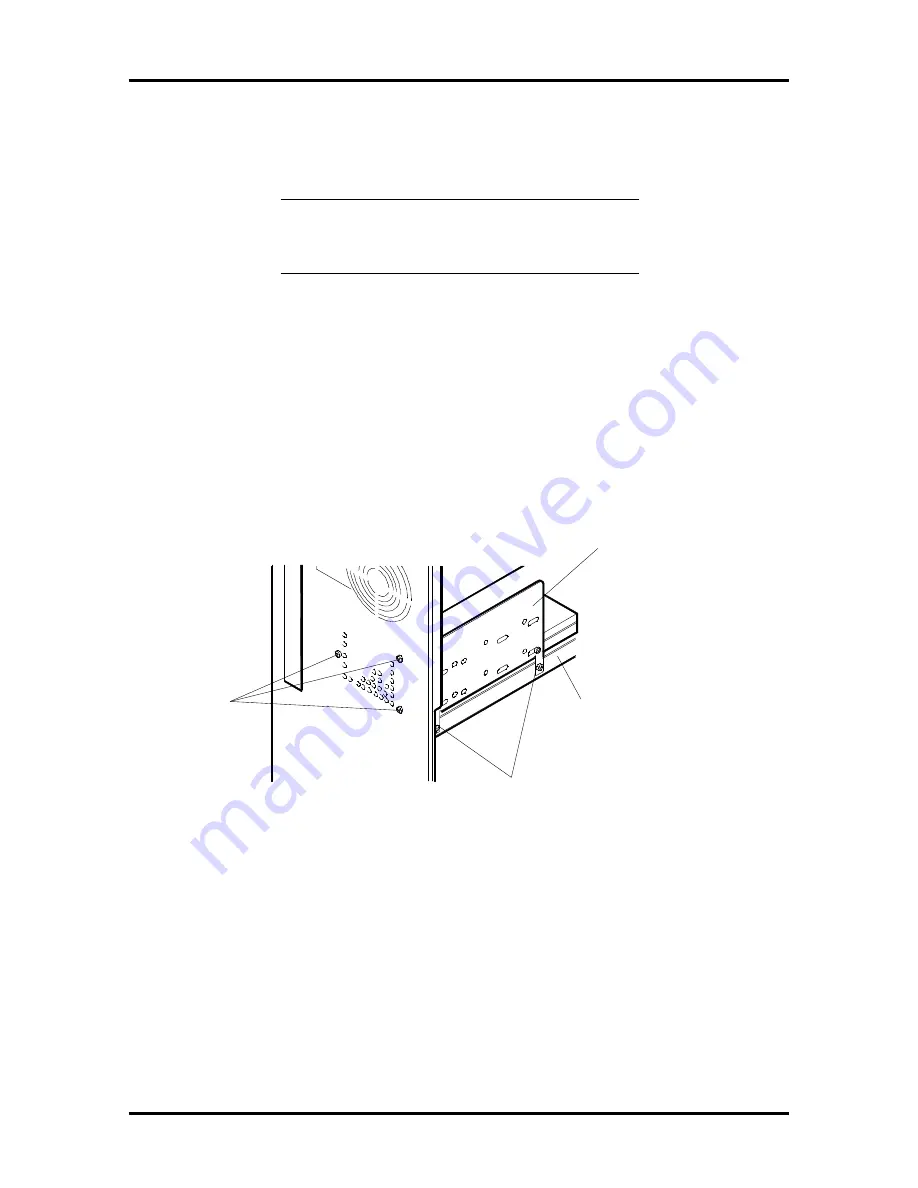
Remove the three screws holding the internal drive cage to the rear of the chassis
(see Figure Section 3-29).
4.
Remove the two screws holding the internal drive cage to the chassis support
bracket.
Figure Section 3-29 Removing 3 1/2-Inch Drive Cage Screws
5.
Remove the 3 1/2-inch drive cage from the chassis.
3 1/2-Inch Drive Placement
Install the hard disk drive into the 3 1/2-inch drive cage as follows.
1.
Remove the top cover, front panel assembly, and 3 1/2-inch drive cage as
previously described.
Screws
Screws
3 1/2-Inch
Drive Cage
Chassis Support
Bracket


