5-22 Image Optimization
Scale
Description
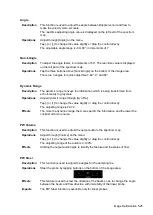
This function is used to adjust the speed range of the flow, which is adjusted
using the PRF in the system.
The real-time PRF value is displayed in the image parameter area in the top-left
corner of the screen.
Operations
Use buttons on the right part of the image area to adjust PRF values.
Or you can pinch on the vertical axis of scale to change the range.
Effects
Provides a much clearer color flow image.
Use a low PRF to observe low-velocity flows, and a high PRF to observe high-
velocity flows.
Impacts
Aliasing may occur if a low-velocity scale is used and high velocities are
encountered.
Low velocities may not be identified when a high-velocity scale is used.
iTouch
Description
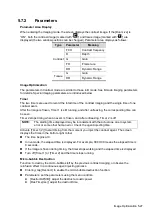
To optimize image parameters as per the current tissue characteristics for a
better image effect.
Operations
Tap
on the left part of the image area to get iTouch optimization.
For L12-4s, L9-3s, L11-3VNs and L12-3RCs probes under EM Vas, VAS and
carotid exam modes, you can use iTouch to optimize PW sampling line
automatically.
Auto-Calculation
Description
This function is used to trace the spectrum and calculate the PW/CW mode
image parameters. The results are displayed in the results window.
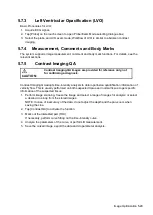
Tap [Auto Calc] to turn the auto calculation function on or off.
After auto calculation function is turned on, select “Auto Calc” tab to enter the
auto calculation menu.
Auto
Calculation
Parameter
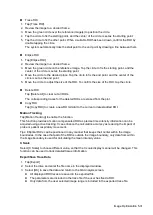
Select parameters in the dialog box prompted by tapping [Auto Calc Param.] on
the Auto Calc menu.
Auto
Calculation
Cycle
To set the heart cycle number for auto-calculation.
Adjust through [Auto Calc Cycle] on the menu.
Trace Area
To set the trace area of the Doppler wave in the spectrum map, applicable for
auto calculation, V Max and V Mean display.
Adjust through [Trace Area] on the menu.
The available selections of trace area are: Above, Below, All.
To set the smooth level when tracing.
Содержание TE5
Страница 1: ...TE7 TE5 Diagnostic Ultrasound System Operator s Manual Basic Volume ...
Страница 2: ......
Страница 6: ......
Страница 12: ......
Страница 24: ......
Страница 36: ......
Страница 54: ......
Страница 56: ...4 2 Exam Preparation 4 1 1 New Patient Information The Patient Info screen is shown as follows 2 1 3 ...
Страница 110: ......
Страница 115: ...Display Cine Review 6 5 6 Tap Return on the screen or tap Freeze to exit image compare ...
Страница 120: ......
Страница 124: ......
Страница 156: ......
Страница 174: ......
Страница 192: ...12 18 Setup Select Advanced and do as follows Select MAPS and do as follows ...
Страница 202: ...13 2 Probes and Biopsy C5 2s L12 4s L7 3s P4 2s L14 6s C11 3s L14 6Ns V11 3Ws P7 3Ts 7LT4s ...
Страница 203: ...Probes and Biopsy 13 3 7L4s P10 4s L20 5s P7 3s L14 5sp SC6 1s SP5 1s 6CV1s L9 3s C5 1s L11 3VNs C4 1s ...
Страница 222: ...13 22 Probes and Biopsy No Name Description 8 Grooves of the needle guided bracket Matched with the tabs of the probe ...
Страница 226: ...13 26 Probes and Biopsy NGB 034 NGB 035 ...
Страница 250: ......
Страница 272: ......
Страница 276: ...A 4 Wireless LAN Tap Add Manually create a network profile to set ...
Страница 282: ......
Страница 318: ......
Страница 322: ......
Страница 323: ...P N 046 006959 07 1 0 ...

