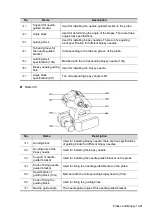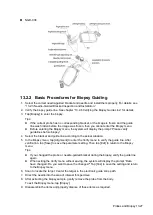
13-12 Probes and Biopsy
13.1.5 Probes Cleaning and Disinfection
After completing each examination, clean and disinfect (or sterilize) the probes as required. When
biopsy procedures have been performed, be sure to sterilize the needle-guided bracket. Failure to
do so may result in the probe and the needle-guided bracket becoming sources of infection.
Please follow the instructions in the manual for cleaning.
WARNING:
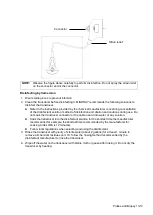
Never immerse the probe connector into liquid such
as water or disinfectant. Immersion may cause
electrical shock or malfunction.
CAUTION:
When performing cleaning and
disinfection of the probe to prevent
infection, wear sterile gloves.
After disinfection, rinse the probe thoroughly with sterile water to
remove all chemical residues. Chemical residues on the probe may be
harmful to the human body.
No cleaning and disinfecting may result in the probe becoming a
source of infection.
NOTE:
After the examination, wipe off the ultrasound gel thoroughly. Otherwise, the
ultrasound gel may solidify and degrade the image quality of the transducer.
DO NOT make the probe overheated (more than 55°C) during cleaning and
disinfections. High temperature may cause the probe to become deformed or
damaged.
Cleaning
Please refer to the instructions in the manual and follow your hospital policy and procedures for
cleaning.
1. Disconnect the probe from the system.
2. Wear sterile gloves to prevent infection.
3. Wash the transducer with clean water or soapy water to remove all the foreign matters, or,
wipe the transducer with a soft ethyl carbamate sponge. Avoid using a brush, because it may
damage the transducer.
4. Dry the transducer using a sterile cloth or gauze after rinsing. Do not dry the transducer by
heating it.
Disinfecting with Sprays or Wipes
CAUTION:
Use protective eyewear when disinfecting using sprays.
1. Wear sterile gloves to prevent infection.
2. After you have finished cleaning, wipe or spray the transducer with a disinfectant. Follow the
disinfectant manufacturer’s recommended contact time and mode.
3. Remove any residue with a water-moistened soft cloth on the transducer.
4. Wipe off water on the transducer using sterile cloth or gauze after washing.
Содержание TE5
Страница 1: ...TE7 TE5 Diagnostic Ultrasound System Operator s Manual Basic Volume ...
Страница 2: ......
Страница 6: ......
Страница 12: ......
Страница 24: ......
Страница 36: ......
Страница 54: ......
Страница 56: ...4 2 Exam Preparation 4 1 1 New Patient Information The Patient Info screen is shown as follows 2 1 3 ...
Страница 110: ......
Страница 115: ...Display Cine Review 6 5 6 Tap Return on the screen or tap Freeze to exit image compare ...
Страница 120: ......
Страница 124: ......
Страница 156: ......
Страница 174: ......
Страница 192: ...12 18 Setup Select Advanced and do as follows Select MAPS and do as follows ...
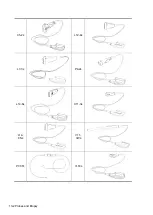
Страница 202: ...13 2 Probes and Biopsy C5 2s L12 4s L7 3s P4 2s L14 6s C11 3s L14 6Ns V11 3Ws P7 3Ts 7LT4s ...
Страница 203: ...Probes and Biopsy 13 3 7L4s P10 4s L20 5s P7 3s L14 5sp SC6 1s SP5 1s 6CV1s L9 3s C5 1s L11 3VNs C4 1s ...
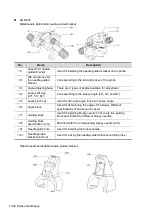
Страница 222: ...13 22 Probes and Biopsy No Name Description 8 Grooves of the needle guided bracket Matched with the tabs of the probe ...
Страница 226: ...13 26 Probes and Biopsy NGB 034 NGB 035 ...
Страница 250: ......
Страница 272: ......
Страница 276: ...A 4 Wireless LAN Tap Add Manually create a network profile to set ...
Страница 282: ......
Страница 318: ......
Страница 322: ......
Страница 323: ...P N 046 006959 07 1 0 ...


