Patient Data Management 10-13
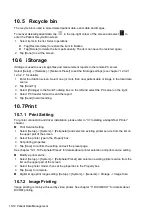
Print current screen image
In the main screen, use [Freeze] to freeze the image and tap [Print] to print the current screen
image.
Image print via send to function
1. Select the desired image in the iStation or Review screen.
2. Tap [Send To] and select the printer in the dialog box which appears.
3. Tap [Send] to start printing.
See the accompanying printer manuals for more details.
10.7.3 Report Printing
Both reports and images can be printed on a graph/text printer
.
1. Tap [Report] on the left side of the operating panel to enter the report dialog box.
2. Tap [Preview] to enter report preview screen.
3. Select [Print] to print the report.
See the accompanying printer manuals for more details.
10.8 Back Up Files using the DVD Drive
The system supports writing data to CD/DVD using the external DVD-RW/DVD+RW drive.
The system supports the following media: DVD+RW, DVD+R, CD-RW, CD-R, DVD-R and DVD-
RW.
To write data to a CD/DVD:
1. Put a CD/DVD in the external DVD R/W drive.
2. Select the data to be backed up and then select [Option] -> [Back up] in the iStation screen.
Select the target drive in the Back Up Patient Record dialog box.
3. Tap [Back up] to begin writing.
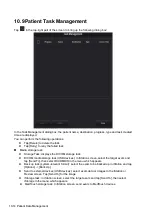
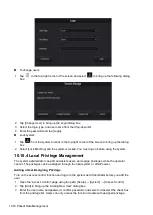
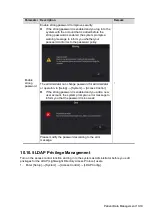
You can check the data writing procedure in the patient task manager. For details, see “10.9
Patient Task Management.”
CAUTION:
During the backup process, if a CD/DVD is forcibly taken out or you
perform other operations, the backup process will fail or the system
may malfunction.
Содержание TE5
Страница 1: ...TE7 TE5 Diagnostic Ultrasound System Operator s Manual Basic Volume ...
Страница 2: ......
Страница 6: ......
Страница 12: ......
Страница 24: ......
Страница 36: ......
Страница 54: ......
Страница 56: ...4 2 Exam Preparation 4 1 1 New Patient Information The Patient Info screen is shown as follows 2 1 3 ...
Страница 110: ......
Страница 115: ...Display Cine Review 6 5 6 Tap Return on the screen or tap Freeze to exit image compare ...
Страница 120: ......
Страница 124: ......
Страница 156: ......
Страница 174: ......
Страница 192: ...12 18 Setup Select Advanced and do as follows Select MAPS and do as follows ...
Страница 202: ...13 2 Probes and Biopsy C5 2s L12 4s L7 3s P4 2s L14 6s C11 3s L14 6Ns V11 3Ws P7 3Ts 7LT4s ...
Страница 203: ...Probes and Biopsy 13 3 7L4s P10 4s L20 5s P7 3s L14 5sp SC6 1s SP5 1s 6CV1s L9 3s C5 1s L11 3VNs C4 1s ...
Страница 222: ...13 22 Probes and Biopsy No Name Description 8 Grooves of the needle guided bracket Matched with the tabs of the probe ...
Страница 226: ...13 26 Probes and Biopsy NGB 034 NGB 035 ...
Страница 250: ......
Страница 272: ......
Страница 276: ...A 4 Wireless LAN Tap Add Manually create a network profile to set ...
Страница 282: ......
Страница 318: ......
Страница 322: ......
Страница 323: ...P N 046 006959 07 1 0 ...


