System Preparation 3-7
3.4.2 Disconnecting a probe
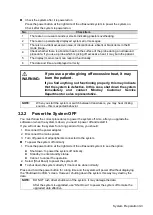
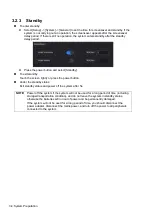
1. Turn the locking lever to the right position to unlock the connector.
2. Pull the probe connector straight out as shown in the figure below.
3.5
Connecting the Footswitch
WARNING: DO NOT connect more than one wireless
footswitch receiver to the ultrasound system at
the same time; otherwise, malfunction may result.
The system supports USB port-type footswitches and wireless type footswitches.
The function of the foot switch can be preset. See chapter “12.1.6 Footswitch” for details.
3.6
Connecting USB Devices
WARNING: DO NOT directly remove a USB memory device,
as the USB device and/or the system may become
damaged.
When connecting a USB memory device to the ultrasound system via a USB port, a sound is
heard if it is connected successfully and the symbol
appears in the top-right corner of the
screen.
To remove the USB device: tap
to open the [Remove USB Device] screen. Select the
device to be removed and tap [OK]. A sound is heard when removing the USB memory device.
The system supports option of external DVD R/W drive. The DVD R/W drive is connected to
the ultrasound system via USB port.
NOTE:
If the USB flash drive cannot be recognized by the system, please try disconnecting
and then connecting again several times, or try another USB flash drive. If the problem
still exists, please contact Mindray service engineer.
Содержание TE5
Страница 1: ...TE7 TE5 Diagnostic Ultrasound System Operator s Manual Basic Volume ...
Страница 2: ......
Страница 6: ......
Страница 12: ......
Страница 24: ......
Страница 36: ......
Страница 54: ......
Страница 56: ...4 2 Exam Preparation 4 1 1 New Patient Information The Patient Info screen is shown as follows 2 1 3 ...
Страница 110: ......
Страница 115: ...Display Cine Review 6 5 6 Tap Return on the screen or tap Freeze to exit image compare ...
Страница 120: ......
Страница 124: ......
Страница 156: ......
Страница 174: ......
Страница 192: ...12 18 Setup Select Advanced and do as follows Select MAPS and do as follows ...
Страница 202: ...13 2 Probes and Biopsy C5 2s L12 4s L7 3s P4 2s L14 6s C11 3s L14 6Ns V11 3Ws P7 3Ts 7LT4s ...
Страница 203: ...Probes and Biopsy 13 3 7L4s P10 4s L20 5s P7 3s L14 5sp SC6 1s SP5 1s 6CV1s L9 3s C5 1s L11 3VNs C4 1s ...
Страница 222: ...13 22 Probes and Biopsy No Name Description 8 Grooves of the needle guided bracket Matched with the tabs of the probe ...
Страница 226: ...13 26 Probes and Biopsy NGB 034 NGB 035 ...
Страница 250: ......
Страница 272: ......
Страница 276: ...A 4 Wireless LAN Tap Add Manually create a network profile to set ...
Страница 282: ......
Страница 318: ......
Страница 322: ......
Страница 323: ...P N 046 006959 07 1 0 ...

