SDA Operator’s Manual
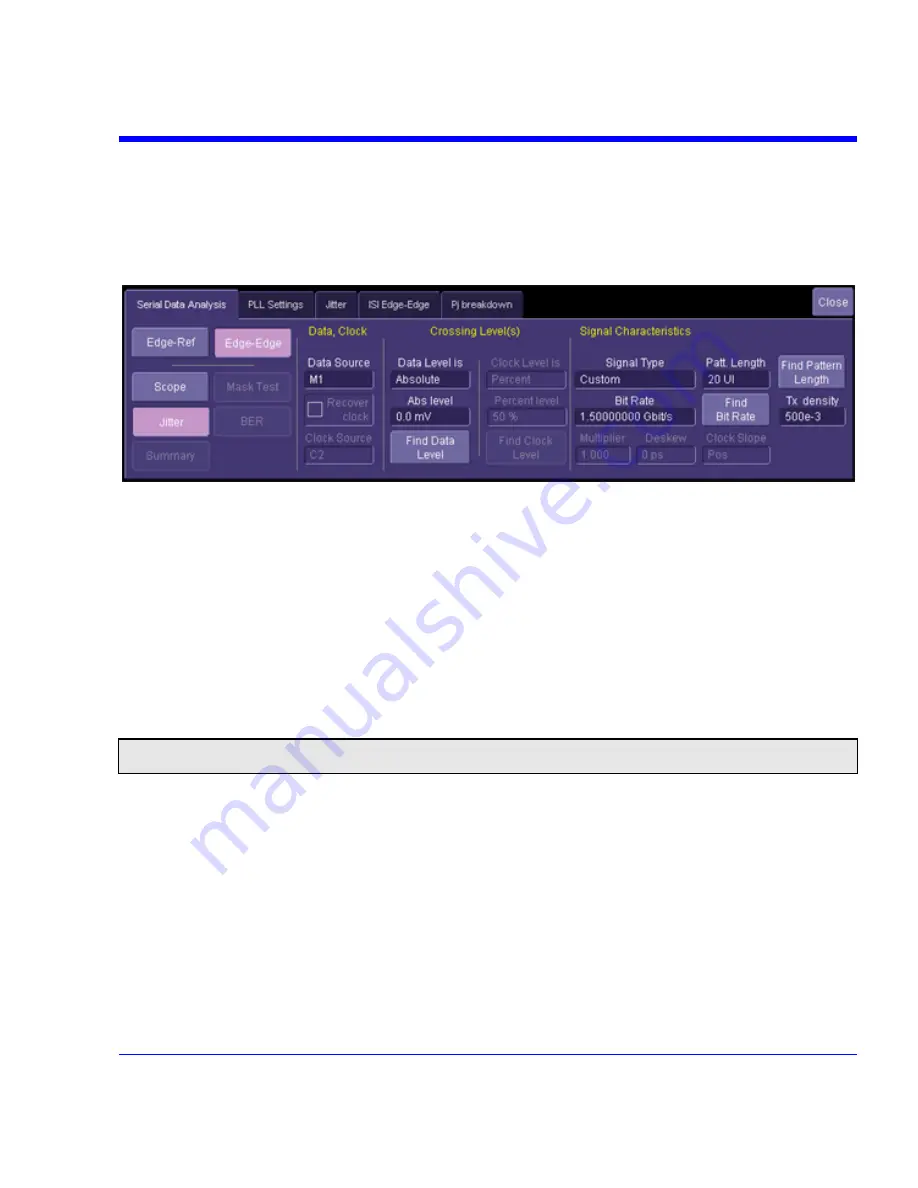
Edge-to-Edge Basic Setup
The ASDA-J option adds a second measurement mode defined as edge-to-edge. In this mode, all
jitter measurements are made between adjacent edges of the data pattern and no reference clock
is used. Only jitter measurements are available in this mode, so the mask test, bit error rate, and
summary buttons are inactive when the
Edge-Edge
mode is selected.
1. Touch
inside
the
Data Source
field and select a data source.
2. The “Crossing Level(s)” section in this dialog allows you to set the voltage level at which the
signal timing is measured. It can be set to either absolute or percent. The absolute crossing
level — in volts (or watts for an optical signal) — can be set directly or can be automatically
found by touching the
Find Data Level
button. This level is determined by locating the
midpoint between the highest and lowest signal levels in the current acquisition. The percent
level is automatically set to the selected percentage on each acquisition.
3. If you selected absolute, touch inside the
Abs level
field and enter a voltage value.
Alternatively, you can touch the
Find Data Level
or
Find Clock Level
button. If you selected
Percent, touch inside the
Percent level
field and enter a percentage value, using the pop-up
keypad. The level is automatically set to the selected percentage on each acquisition.
Note:
The absolute level setting should be used for jitter measurements over several acquisitions because the relative
setting can potentially remove jitter by tracking slowly, thereby varying level shifts that could occur between acquisitions.
4. Touch
inside
the
Signal Type
field and select a standard signal type from the pop-up menu.
The signal type defines the bit rates for the selected standard.
5. If you selected
Custom
from the
Signal Type
menu, touch inside the
Bit Rate
field and enter
a bit rate, using the pop-up keypad. By touching the
Find Bit Rate
button, you can have the
bit rate determined automatically. This button is also available when a standard data type is
selected.
SDA-OM-E Rev H
341
Содержание SDA
Страница 1: ...SERIAL DATA ANALYZER OPERATOR S MANUAL December 2007 ...
Страница 148: ...Standard Horizontal Parameter Help Markers Standard Vertical Parameter Help Markers 148 SDA OM E Rev H ...
Страница 223: ...SDA Operator s Manual Example 6 SDA OM E Rev H 223 ...
Страница 225: ...SDA Operator s Manual SDA OM E Rev H 225 ...
Страница 232: ...In this figure the panel has been pasted onto the Excel sheet for comparison 232 SDA OM E Rev H ...
Страница 243: ...SDA Operator s Manual This example used the CORREL Array1 Array2 function of Excel as depicted below SDA OM E Rev H 243 ...
Страница 246: ...246 SDA OM E Rev H ...
Страница 247: ...SDA Operator s Manual Excel Example 5 Using a Surface Plot SDA OM E Rev H 247 ...
Страница 279: ...SDA Operator s Manual Convolving two signals SDA OM E Rev H 279 ...
Страница 310: ...The jitter wizard is accessed from the Analysis drop down menu 310 SDA OM E Rev H ...
Страница 327: ...SDA Operator s Manual SDA OM E Rev H 327 ...
Страница 328: ...328 SDA OM E Rev H ...
Страница 394: ...394 SDA OM E Rev H ...
Страница 395: ...SDA Operator s Manual SDA OM E Rev H 395 ...


