


8-37
3. DISASSEMBLY AND ASSEMBLY
GENERAL PRECAUTIONS
All hydraulic components are manufactured to a high precision. Consequently, before
disassembling and assembling them, it is essential to select an especially clean place.
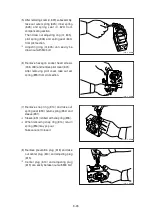
In handling a control valve, pay full attention to prevent dust, sand, etc. from entering into it.
When a control valve is to be remove from the machine, apply caps and masking seals to all
ports. Before disassembling the valve, recheck that these caps and masking seals are fitted
completely, and then clean the outside of the assembly. Use a proper bench for working.
Spread paper or a rubber mat on the bench, and disassemble the valve on it.
Support the body section carefully when carrying or transferring the control valve. Do not lift by
the exposed spool, end cover section etc.
After disassembling and assembling of the component it is desired to carry out various tests (for
the relief characteristics, leakage, flow resistance, etc.), but hydraulic test equipment is necessary
for these tests. Therefore, even when its disassembling can be carried out technically, do not
disassemble such components that cannot be tested, adjusted, and so on. Additionally one
should always prepare clean cleaning oil, hydraulic oil, grease, etc. beforehand.
TOOLS
Before disassembling the control valve, prepare the following tools beforehand.
1)
2)
(1)
(2)
(3)
(4)
(5)
Name of tool
Quantity
Size (mm)
Vice mounted on bench (soft jaws) 1 unit
Hexagon wrench
Each 1 piece
5, 6, 10, 12 and 14
Socket wrench
Each 1 piece
27 and 32
Spanner
Each 1 piece
32 (main relief valve, overload relief valve,
negative relief valve)
26 (holding valve)
Содержание HX145 LCR
Страница 11: ...SECTION 1 GENERAL SECTION 1 GENERAL Group 1 Safety Hints 1 1 Group 2 Specifications 1 10...
Страница 204: ...4 5 MEMORANDUM HYUNDAI HEAVY INDUSTRIES CO LTD CONSTRUCTION EQUIPMENT DIV...
Страница 553: ...8 82 Insert O rings to the relief valve 30 and reassemble them to rear cover 20 This completes assembly 17 32038SM42...
Страница 627: ...8 155 125LCR8TM30 Turn casing 1 upside down and remove oil seal 3 using jig 29...
Страница 636: ...8 164 125LCR8TM61 After assembling spring 44 in order clamp plug 41 Tightening torque 5 kgf m 36 lbf ft 31...
Страница 657: ...8 185 8 185 Remove lock nut 22 and then boot 23 14 36078RL14 2507ARL10...
Страница 668: ...8 196 14 15 3 Install cover 3 to body 1 and tighten bolts 14 Torque 10 12 5 kgf m 72 3 90 4 lbf ft 7 21078DA10...