5-71
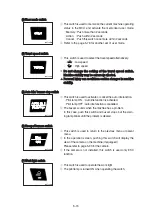
Turning the start key switch ON position starts preheating in
cold weather.
Start the engine after this lamp is OFF.
Preheat pilot lamp
Preheat pilot lamp
①
②
(3)
(3)
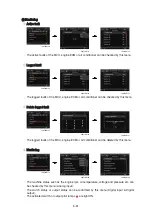
This lamp is turned ON when the coolant temperature is below
30˚C (86˚F ).
The automatic warming up is cancelled when the engine cool-
ant temperature is above 30˚C, or when 10 minutes have
passed since starting the engine.
Warming up pilot lamp
Warming up pilot lamp
①
②
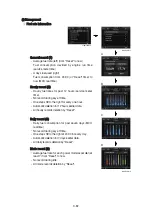
Operating one touch decel switch on the RCV lever makes the
lamp ON.
Also, the lamp will be ON and engine speed will be lowered
automatically to save fuel consumption when all levers and
pedals are at neutral position, and the auto idle function is
selected.
One touch decel is not available when the auto idle pilot
One touch decel is not available when the auto idle pilot
lamp is turned ON.
lamp is turned ON.
Refer to the operator's manual page 3-33.
Refer to the operator's manual page 3-33.
①
②
※
※
Decel pilot lamp
Decel pilot lamp
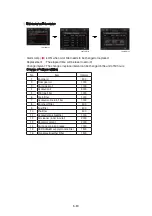
This lamp is turned ON when the coolant temperature is below
10˚C (50˚F ) or the hydraulic oil temperature 20˚C ( 68˚F ).
The automatic fuel warming is cancelled when the engine
coolant temperature is above 60˚C, and the hydraulic oil tem-
perature is above 45˚C since the start switch was ON position.
Fuel warmer pilot lamp
Fuel warmer pilot lamp
①
②
This lamp will be ON when the consuming parts are needed to
change or replace. It means that the change or replacement
interval of the consuming parts remains below 30 hours.
Check the message in maintenance information of main menu.
Also, this lamp lights ON for 3 minutes when the start switch is
ON position.
Refer to the page 5-83.
Refer to the page 5-83.
①
②
※
Maintenance pilot lamp
Maintenance pilot lamp
(4)
(4)
(5)
(5)
(6)
(6)
(7)
(7)
290F3CD79
290F3CD81
290F3CD80
290F3CD82
290F3CD83
Содержание HX145 LCR
Страница 11: ...SECTION 1 GENERAL SECTION 1 GENERAL Group 1 Safety Hints 1 1 Group 2 Specifications 1 10...
Страница 204: ...4 5 MEMORANDUM HYUNDAI HEAVY INDUSTRIES CO LTD CONSTRUCTION EQUIPMENT DIV...
Страница 553: ...8 82 Insert O rings to the relief valve 30 and reassemble them to rear cover 20 This completes assembly 17 32038SM42...
Страница 627: ...8 155 125LCR8TM30 Turn casing 1 upside down and remove oil seal 3 using jig 29...
Страница 636: ...8 164 125LCR8TM61 After assembling spring 44 in order clamp plug 41 Tightening torque 5 kgf m 36 lbf ft 31...
Страница 657: ...8 185 8 185 Remove lock nut 22 and then boot 23 14 36078RL14 2507ARL10...
Страница 668: ...8 196 14 15 3 Install cover 3 to body 1 and tighten bolts 14 Torque 10 12 5 kgf m 72 3 90 4 lbf ft 7 21078DA10...


