


5-73
SWITCHES
SWITCHES
Entertainment
quick touch switch
Main menu quick
touch switch
Power mode switch
Work mode switch
User mode switch
Rear camera(option)
Auto idle/Buzzer stop switch
Travel speed switch
Escape(previous or parent menu)
Work mode
pilot lamp
Auto idle pilot lamp
Travel speed pilot lamp
Power/User mode
pilot lamp
Work light switch
Cab light switch
Head light switch
Intermittent wiper switch
Washer switch
Overload switch(option)
Travel alarm switch
Beacon switch(option)
Wiper switch
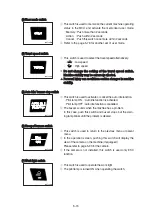
This switch is to select the machine work mode, which shifts
from general operation mode to optional attachment operation
mode.
·
: General operation mode
·
: Breaker operation mode (if equipped)
·
: Crusher operation mode (if equipped)
·
Not installed
: Breaker or crusher is not installed.
Refer to the operator's manual page 4-7 for details.
Refer to the operator's manual page 4-7 for details.
Work mode switch
Work mode switch
①
※
235F3CD86
290F3CD88
(2)
(2)
5)
5)
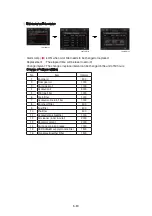
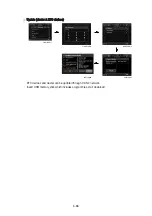
When some of the switches are selected, the pilot lamps are displayed on the LCD. Refer to
When some of the switches are selected, the pilot lamps are displayed on the LCD. Refer to
the page 5-70 for details.
the page 5-70 for details.
※
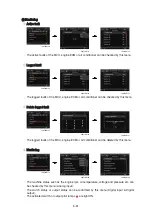
This switch is to select the machine power mode and selected
power mode pilot lamp is displayed on the pilot lamp position.
·
P : Heavy duty power work.
·
S : Standard power work.
·
E : Economy power work.
The pilot lamp changes E
→
S
→
P
→
E in order.
Power mode switch
Power mode switch
①
②
290F3CD76
(1)
(1)
Содержание HX145 LCR
Страница 11: ...SECTION 1 GENERAL SECTION 1 GENERAL Group 1 Safety Hints 1 1 Group 2 Specifications 1 10...
Страница 204: ...4 5 MEMORANDUM HYUNDAI HEAVY INDUSTRIES CO LTD CONSTRUCTION EQUIPMENT DIV...
Страница 553: ...8 82 Insert O rings to the relief valve 30 and reassemble them to rear cover 20 This completes assembly 17 32038SM42...
Страница 627: ...8 155 125LCR8TM30 Turn casing 1 upside down and remove oil seal 3 using jig 29...
Страница 636: ...8 164 125LCR8TM61 After assembling spring 44 in order clamp plug 41 Tightening torque 5 kgf m 36 lbf ft 31...
Страница 657: ...8 185 8 185 Remove lock nut 22 and then boot 23 14 36078RL14 2507ARL10...
Страница 668: ...8 196 14 15 3 Install cover 3 to body 1 and tighten bolts 14 Torque 10 12 5 kgf m 72 3 90 4 lbf ft 7 21078DA10...