


6-3
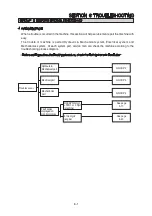
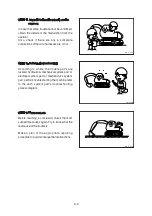
STEP 4. Inspect the trouble actually on the
machine
In case that some trouble cannot be confirmed,
obtain the details of the malfunction from the
operator.
Also, check if there are any in complete
connections of the wire harnesses are or not.
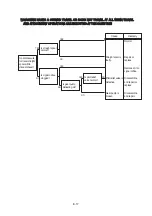
STEP 5. Perform troubleshooting
According to where the trouble parts are
located, hydraulic & mechanical system part or
electrical system part or mechatronics system
part, perform troubleshooting the machine refer
to the each system part's troubleshooting
process diagram.
STEP 6. Trace a cause
Before reaching a conclusion, check the most
suspectible causes again. Try to trace what the
real cause of the trouble is.
Make a plan of the appropriate repairing
procedure to avoid consequential malfunctions.
(210-7) 6-3(1)
13031SH05
(210-7) 6-3(3)
Содержание HX145 LCR
Страница 11: ...SECTION 1 GENERAL SECTION 1 GENERAL Group 1 Safety Hints 1 1 Group 2 Specifications 1 10...
Страница 204: ...4 5 MEMORANDUM HYUNDAI HEAVY INDUSTRIES CO LTD CONSTRUCTION EQUIPMENT DIV...
Страница 553: ...8 82 Insert O rings to the relief valve 30 and reassemble them to rear cover 20 This completes assembly 17 32038SM42...
Страница 627: ...8 155 125LCR8TM30 Turn casing 1 upside down and remove oil seal 3 using jig 29...
Страница 636: ...8 164 125LCR8TM61 After assembling spring 44 in order clamp plug 41 Tightening torque 5 kgf m 36 lbf ft 31...
Страница 657: ...8 185 8 185 Remove lock nut 22 and then boot 23 14 36078RL14 2507ARL10...
Страница 668: ...8 196 14 15 3 Install cover 3 to body 1 and tighten bolts 14 Torque 10 12 5 kgf m 72 3 90 4 lbf ft 7 21078DA10...