12 Computer Operations
394
Co
m
p
ut
e
r O
p
er
at
io
n
s
12
Changing Network Scanner Driver Settings
To learn about fields in the displayed dialog box, click [Help] to view the Network Scanner Driver's help.
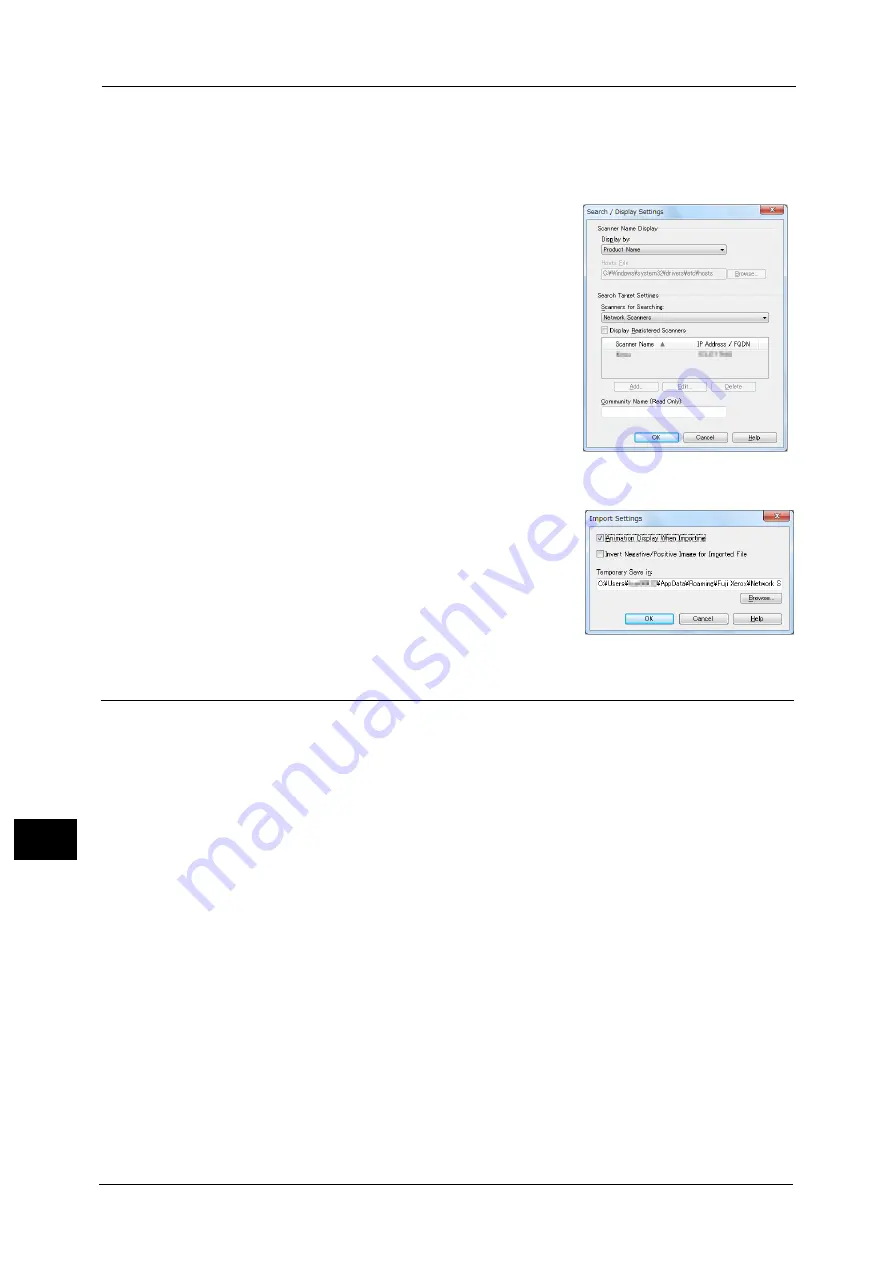
Changing the display of scanner names
You can change the display of scanner names listed.
To change the display of scanner names, use the dialog
box that appears by clicking [Search/Display Settings] in
the scanner selection dialog box.
Under [Scanner Name Display], you can change the
method in which scanner names are displayed in
[Scanners Detected].
Specify scanners to search for under [Search Target
Settings].
Note
•
If you click [Add] and then register a scanner, you can
display scanners from other networks.
Import method for scanned files
You can change the display and the import settings for
files scanned from a folder.
To change the import method, click [Import Settings]
from [File] menu in the file selection dialog box, and
configure the settings in the dialog box that appears.
Importing Using Stored File Manager 3
The following describes how to use Stored File Manager 3 to import files from a machine's
folder.
Stored File Manager 3 is software to import files from a machine's folder to a computer
without using any client-side application.
To use Stored File Manager 3, your computer must have Network Scanner Utility 3 installed.
Note
•
Network Scanner Utility 3 is included in the Software/Manual CD-ROM.
•
When Secondary Ethernet (optional) is installed on the machine and the IP address of Ethernet2 is
specified, Network Scanner Utility 3 cannot operate. For more information, refer to "TCP/IP -
Network Settings / TCP/IP - Network Settings (Ethernet 1), TCP/IP - Network Settings (Ethernet 2)"
(P.474).
To import files stored in a folder, prior settings are required, such as enabling ports. For more information, refer to
"Configuration of Store to Folder" (P.584). For information on the operation of the application, refer to the documentation
provided with the application.
For information on how to install Stored File Manager 3, refer to the "Readme" file included in the Software/Manual CD-
ROM.
To learn about fields in the displayed dialog box, click [Help] to view the Stored File Manager 3 help.
1
Click [Start] and select [Programs] > [Fuji Xerox] > [Network Scanner Utility 3] > [Stored File
Manager 3].
Note
•
If you used another directory for installation, specify the directory instead.
Содержание Versant 80 Press
Страница 1: ...User Guide Versant 80 Press ...
Страница 18: ...18 Index 1007 ...
Страница 159: ...Image Quality 159 Copy 4 2 Select a button to adjust the color tone ...
Страница 214: ...4 Copy 214 Copy 4 ...
Страница 304: ...5 Scan 304 Scan 5 ...
Страница 382: ...11 Job Status 382 Job Status 11 ...
Страница 562: ...14 CentreWare Internet Services Settings 562 CentreWare Internet Services Settings 14 ...
Страница 580: ...16 E mail Environment Settings 580 E mail Environment Settings 16 ...
Страница 618: ...18 Encryption and Digital Signature Settings 618 Encryption and Digital Signature Settings 18 ...
Страница 916: ...22 Problem Solving 916 Problem Solving 22 ...
Страница 980: ...23 Appendix 980 Appendix 23 11 Click Reboot Machine After rebooting the machine the setting will be enabled ...
Страница 1018: ...1018 Index ...
Страница 1019: ...Versant 80 Press User Guide ME6843E2 2 Edition 1 September 2014 Fuji Xerox Co Ltd Copyright 2014 by Fuji Xerox Co Ltd ...


