7 Job Flow Sheets
326
Jo
b
F
lo
w
S
h
e
et
s
7
Selecting/Changing a Job Flow Sheet
This section describes how to select or edit a job flow sheet created on a network computer
with Device Setup Tool.
Important •
If characters not supported by the machine are used in the name or description of a job flow sheet,
the characters will not be displayed or will be garbled on the screen. For information on characters
that can be used in the names or descriptions of job flow sheets, refer to "Notes and Restrictions on
the Use of the Machine" (P.981).
Note
•
To communicate with network computers, enable the SOAP port on the machine.
•
A job flow sheet created on a network computer can be deleted, but cannot be changed or
duplicated. However, you can temporarily change some items that are permitted to be changed.
For information on how to enable the port, refer to "Port Settings" (P.468).
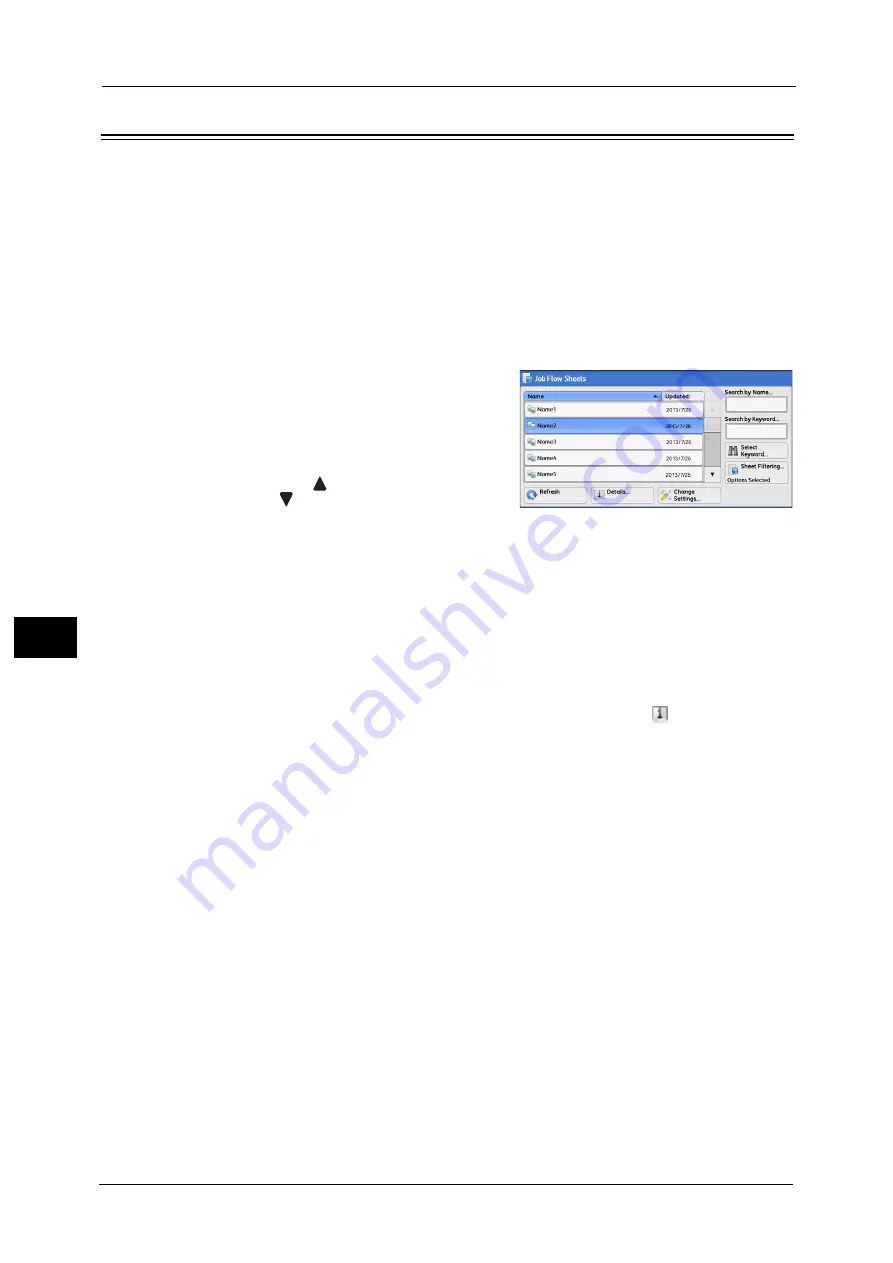
1
Select a job flow sheet.
Note
•
Displayed job flow sheets may vary
depending on the settings of the
Authentication feature. For more
information, refer to "Creating / Using Job
Flow Sheet" (P.647).
•
Select [
] to return to the previous screen or
[
] to move to the next screen.
•
Scroll the list by drag or flick operation to
switch the screen to be displayed. For information on how to drag or flick, refer to "Touch Screen"
(P.88).
•
You can sort the list in ascending or descending order by selecting either [Name] or [Updated].
Refresh
Displays refreshed information.
Details
Displays the [Details] screen. You can confirm the details of a job flow such as the name, last
updated date, target, owner, and save location. When you select the [
] button, the whole
text of the description which was registered when creating the job flow sheet is displayed.
Change Settings
Displays the [Change Settings] screen. You can change the job flow settings.
Refer to "[Change Settings] Screen" (P.327).
Search by Name
Searches for job flows that partially match the entry. The machine searches through job flow
names that were registered upon each job flow creation. The entry can be up to 128
characters long.
Search by Keyword
Searches for job flows that fully match the entry. The machine searches through keywords
that were registered upon each job flow creation. The entry can be up to 12 characters long.
You can select from preset keywords if they have been registered in the System
Administration mode.
Select Keyword
Displays the [Select Keyword] screen. Select a keyword registered in the System
Administration mode to search for job flows. Job flows that fully match the entry are
searched. The machine searches through keywords that were registered upon each job flow
creation.
Содержание Versant 80 Press
Страница 1: ...User Guide Versant 80 Press ...
Страница 18: ...18 Index 1007 ...
Страница 159: ...Image Quality 159 Copy 4 2 Select a button to adjust the color tone ...
Страница 214: ...4 Copy 214 Copy 4 ...
Страница 304: ...5 Scan 304 Scan 5 ...
Страница 382: ...11 Job Status 382 Job Status 11 ...
Страница 562: ...14 CentreWare Internet Services Settings 562 CentreWare Internet Services Settings 14 ...
Страница 580: ...16 E mail Environment Settings 580 E mail Environment Settings 16 ...
Страница 618: ...18 Encryption and Digital Signature Settings 618 Encryption and Digital Signature Settings 18 ...
Страница 916: ...22 Problem Solving 916 Problem Solving 22 ...
Страница 980: ...23 Appendix 980 Appendix 23 11 Click Reboot Machine After rebooting the machine the setting will be enabled ...
Страница 1018: ...1018 Index ...
Страница 1019: ...Versant 80 Press User Guide ME6843E2 2 Edition 1 September 2014 Fuji Xerox Co Ltd Copyright 2014 by Fuji Xerox Co Ltd ...


