Section 7 — Sampling/Signal Source Concepts
ASR-10 Musician’s Manual
146
Easy Sampling
For more information about Selecting, Enabling, and Disabling Audio Tracks, see Section 12 —
Sequencer and Audio Track Concepts.
Note:
Whenever the Sample•Source Select button is pressed, the current FX settings remain
unchanged.
Once you’ve selected the Record Source field values for your signal source, press either an
unloaded (no red LED lit) Instrument•Sequence Track button (the recommended way to select a
destination Instrument) or press the Enter•Yes button. If the Enter•Yes button is pressed, the
display will ask:
PICK SAMPLE INSTRUMENT
• Press an unloaded (no left red LED lit) Instrument•Sequence Track button. If you select an
Instrument•Sequence Track where there is already an instrument loaded, the ASR-10 will
display the multisampling screen. Don’t do that yet.
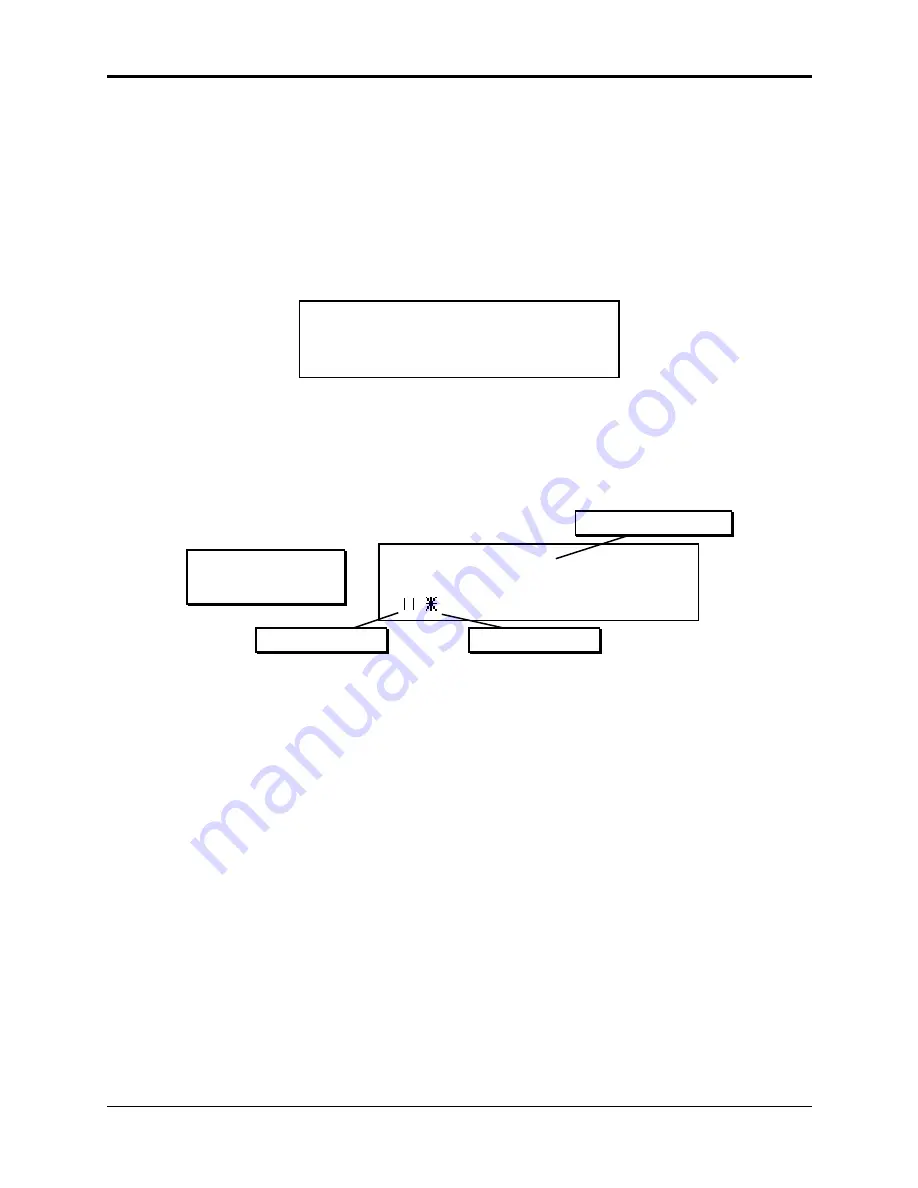
After you’ve pressed an unloaded Instrument•Sequence Track button, the ASR-10 goes into
Level-Detect (or VU) mode:
Level-Detect
(or VU) Mode:
Input signal level
Sampling Threshold
lights to indicate clipping
AMP
In Level-Detect mode the display acts like a peak-reading VU meter. The vertical bars on the
display lighting from left to right show the level of the incoming signal. The star represents the
sampling threshold — the ASR-10 will not begin recording until the signal crosses this level. The
sampling threshold provides a way to make the ASR-10 “wait” until the signal reaches a certain
level before it begins to record. The ASR-10 offers twenty possible sampling threshold levels.
Pressing the Up Arrow button raises the threshold; pressing the Down Arrow button lowers it.
The AMP indicator light will flash if the input source clips (i.e. if the dynamic range of the input
source exceeds the 96 dB dynamic range of the ASR-10).
Tip:
While in Level-Detect Mode, you can select, deselect and stack (double-click)
Instrument•Sequence Tracks, and can play them from the keyboard and/or via incoming MIDI,
even during sampling. You can also press Play and Stop•Continue to sample along with
sequence playback, or even to sample sequence playback when REC SRC= MAIN-OUT. This
way, what you are about to sample can “sync-up” to what you’ve already sequenced or sampled
(pitch, timing, etc.). If you scroll right or left to view any of the other sampling screens, you will
only hear the destination instrument (the instrument into which you are sampling).
Before you proceed, there are a number of sampling parameters you can adjust. These
parameters are explained in detail in Section 8 — Sampling/Signal Source Parameters.


