11-42
Cisco Wireless LAN Controller Configuration Guide
OL-17037-01
Chapter 11 Configuring Radio Resource ManagementWireless Device Access
Configuring Pico Cell Mode
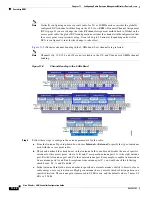
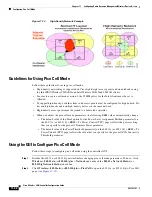
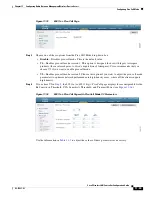
Figure 11-14
High-Density Network Example
Guidelines for Using Pico Cell Mode
Follow these guidelines for using pico cell mode:
•
High-density networking is supported on Cisco lightweight access points and on notebooks using
the Intel PRO/Wireless 3945ABG and Intel Wireless WiFi Link 4965AG clients.
•
In order to use pico cell mode version 2, the WMM policy for the Intel clients must be set to
Allowed.
•
To support high-density, both the client s and access points must be configured for high density. Do
not mix high-density and non-high-density devices in the same network.
•
High-density access points must be joined to a dedicated controller.
•
When you adjust the pico cell mode parameters, the following RRM values automatically change:
–
The default value of the Fixed option for the Power Level Assignment Method parameter [on
the 802.11a (or 802.11b) > RRM > Tx Power Control (TPC) page] reflects the power setting
that you specify for the pico cell Transmit Power parameter.
–
The default value of the Power Threshold parameter [on the 802.11a (or 802.11b) > RRM > Tx
Power Control (TPC) page] reflects the value that you specify for the pico cell CCA Sensitivity
Threshold parameter.
Using the GUI to Configure Pico Cell Mode
Follow these steps to configure pico cell mode using the controller GUI.
Step 1
Disable the 802.11a or 802.11b/g network before changing pico cell mode parameters. To do so, click
Wireless
>
802.11a/n
(or
802.11b/g/n
) >
Network
and uncheck the
802.11a Network Status
(or
802.11b/g Network Status
) check box.
Step 2
Click
Wireless
>
802.11a/n
(or
802.11b/g/n
) >
Pico Cell
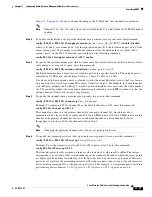
to open the 802.11a (or 802.11b/g) > Pico Cell
page (see

