background image


4-84

Cisco Wireless LAN Controller Configuration Guide

OL-17037-01

Chapter 4      Configuring Controller SettingsWireless Device Access

Configuring and Viewing Location Settings

nmsp

 configures debugging of RFID NMSP messages, and

receive

 configures debugging of incoming RFID tag messages.

Configuring and Viewing Location Settings

This section provides instructions for configuring and viewing location settings from the controller CLI.

Note

Access points in monitor mode should not be used for location purposes.

Installing the Location Appliance Certificate

A self-signed certificate (SSC) is required on the location appliance. This certificate, which is comprised 
of the location appliance MAC address and a 20-byte key hash, must be present on the controller. 
Otherwise, the controller cannot authenticate the location appliance, and they can never establish a 
connection. WCS usually pushes the certificate to the controller automatically, but you can install the 
certificate on the controller using the controller CLI if necessary (for example, if the controller is not 
connected to WCS or if an error or certificate mismatch occurs on WCS).

Note

If an error occurs on WCS and prevents the location appliance certificate from being pushed to the 
controller, make sure that the time zone has been synchronized on the controller and the location 
appliance before following this procedure. Follow the instructions in the 

“Synchronizing the Controller 

and Location Appliance” section on page 4-86

 to do so.

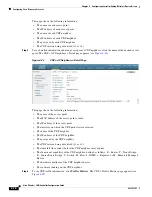
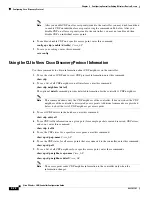
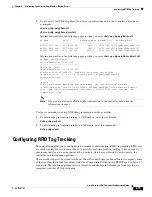
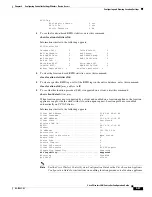
Follow these steps to install the location appliance certificate on the controller.

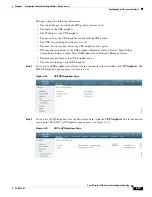
Step 1

To obtain the key hash value of the location appliance certificate, enter this command:

debug pm pki enable

Information similar to the following appears:

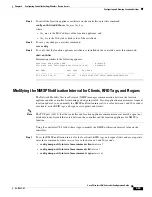
Thu Oct 11 08:52:26 2007: sshpmGetIssuerHandles: Calculate SHA1 hash on Public Key Data

Thu Oct 11 08:52:26 2007: sshpmGetIssuerHandles: Key Data  30820122 300d0609 2a864886 

f70d0101

Thu Oct 11 08:52:26 2007: sshpmGetIssuerHandles: Key Data  01050003 82010f00 3082010a 

02820101

Thu Oct 11 08:52:26 2007: sshpmGetIssuerHandles: Key Data  009a98b5 d2b7c77b 036cdb87 

5bd20e5a

Thu Oct 11 08:52:26 2007: sshpmGetIssuerHandles: Key Data  894c66f4 df1cbcfb fe2fcf01 

09b723aa

Thu Oct 11 08:52:26 2007: sshpmGetIssuerHandles: Key Data  5c0917f1 ec1d5061 2d386351 

573f2c5e

Thu Oct 11 08:52:30 2007: sshpmGetIssuerHandles: Key Data  b9020301 0001

Thu Oct 11 08:52:30 2007: sshpmGetIssuerHandles: 

SSC Key Hash is 

4869b32638c00ffca88abe9b1a8e0525b9344b8b

Содержание 2100 Series

Страница 1: ...Inc 170 West Tasman Drive San Jose CA 95134 1706 USA http www cisco com Tel 408 526 4000 800 553 NETS 6387 Fax 408 527 0883 Cisco Wireless LAN Controller Configuration Guide Software Release 5 2 November 2008 Text Part Number OL 17037 01 ...

Страница 2: ...NTAL DAMAGES INCLUDING WITHOUT LIMITATION LOST PROFITS OR LOSS OR DAMAGE TO DATA ARISING OUT OF THE USE OR INABILITY TO USE THIS MANUAL EVEN IF CISCO OR ITS SUPPLIERS HAVE BEEN ADVISED OF THE POSSIBILITY OF SUCH DAMAGES CCDE CCENT Cisco Eos Cisco Lumin Cisco Nexus Cisco StadiumVision Cisco TelePresence Cisco WebEx the Cisco logo DCE and Welcome to the Human Network are trademarks Changing the Way ...

Страница 3: ...on Wired Security 1 5 Layer 2 and Layer 3 Operation 1 6 Operational Requirements 1 6 Configuration Requirements 1 6 Cisco Wireless LAN Controllers 1 6 Client Location 1 7 Controller Platforms 1 7 Cisco 2100 Series Controllers 1 8 Features Not Supported 1 8 Cisco 4400 Series Controllers 1 8 Catalyst 6500 Series Wireless Services Module 1 9 Cisco 7600 Series Router Wireless Services Module 1 10 Cisc...

Страница 4: ...3 Using the CLI to Enable Web and Secure Web Modes 2 4 Loading an Externally Generated SSL Certificate 2 5 Using the CLI 2 7 Logging into the CLI 2 7 Using a Local Serial Connection 2 8 Using a Remote Ethernet Connection 2 8 Logging Out of the CLI 2 9 Navigating the CLI 2 9 Enabling Wireless Connections to the Web Browser and CLI Interfaces 2 9 C H A P T E R 3 Configuring Ports and Interfaces 3 1 ...

Страница 5: ...ion 3 33 Using the CLI to Enable Link Aggregation 3 34 Using the CLI to Verify Link Aggregation Settings 3 34 Configuring Neighbor Devices to Support LAG 3 34 Configuring a 4400 Series Controller to Support More Than 48 Access Points 3 34 Using Link Aggregation 3 35 Using Multiple AP Manager Interfaces 3 35 C H A P T E R 4 Configuring Controller SettingsWireless Device Access 4 1 Using the Configu...

Страница 6: ...efault Values 4 25 Using the CLI to Change the SNMP Community String Default Values 4 27 Changing the Default Values for SNMP v3 Users 4 27 Using the GUI to Change the SNMP v3 User Default Values 4 27 Using the CLI to Change the SNMP v3 User Default Values 4 29 Configuring Aggressive Load Balancing 4 29 Using the GUI to Configure Aggressive Load Balancing 4 30 Using the CLI to Configure Aggressive...

Страница 7: ...es 4 47 Configuring Quality of Service Roles 4 48 Using the GUI to Configure QoS Roles 4 48 Using the CLI to Configure QoS Roles 4 50 Configuring Voice and Video Parameters 4 52 Call Admission Control 4 52 Bandwidth Based CAC 4 52 Load Based CAC 4 52 Expedited Bandwidth Requests 4 53 U APSD 4 54 Traffic Stream Metrics 4 54 Using the GUI to Configure Voice Parameters 4 54 Using the GUI to Configure...

Страница 8: ...sor 4 90 Using the Wireless LAN Controller Network Module 4 91 C H A P T E R 5 Configuring Security Solutions 5 1 Cisco UWN Solution Security 5 2 Security Overview 5 2 Layer 1 Solutions 5 2 Layer 2 Solutions 5 2 Layer 3 Solutions 5 3 Integrated Security Solutions 5 3 Configuring RADIUS 5 3 Configuring RADIUS on the ACS 5 4 Using the GUI to Configure RADIUS 5 6 Using the CLI to Configure RADIUS 5 1...

Страница 9: ... List to an Interface 5 59 Applying an Access Control List to the Controller CPU 5 60 Applying an Access Control List to a WLAN 5 61 Applying a Preauthentication Access Control List to a WLAN 5 62 Using the CLI to Configure Access Control Lists 5 63 Using the CLI to Apply Access Control Lists 5 65 Configuring Management Frame Protection 5 66 Guidelines for Using MFP 5 67 Using the GUI to Configure...

Страница 10: ...ring IDS 5 103 Configuring IDS Sensors 5 103 Using the GUI to Configure IDS Sensors 5 103 Using the CLI to Configure IDS Sensors 5 105 Viewing Shunned Clients 5 106 Configuring IDS Signatures 5 107 Using the GUI to Configure IDS Signatures 5 109 Using the CLI to Configure IDS Signatures 5 115 Using the CLI to View IDS Signature Events 5 117 Configuring wIPS 5 119 Configuring wIPS on an Access Poin...

Страница 11: ... 18 Guidelines for Using Peer to Peer Blocking 6 19 Using the GUI to Configure Peer to Peer Blocking 6 19 Using the CLI to Configure Peer to Peer Blocking 6 20 Configuring Layer 2 Security 6 20 Static WEP Keys 6 21 Dynamic 802 1X Keys and Authorization 6 21 Configuring a WLAN for Both Static and Dynamic WEP 6 22 WPA1 and WPA2 6 22 CKIP 6 25 Configuring a Session Timeout 6 27 Using the GUI to Confi...

Страница 12: ...ling Accounting Servers per WLAN 6 53 Disabling Coverage Hole Detection per WLAN 6 54 Using the GUI to Disable Coverage Hole Detection on a WLAN 6 54 Using the CLI to Disable Coverage Hole Detection on a WLAN 6 55 Configuring NAC Out of Band Integration 6 55 Guidelines for Using NAC Out of Band Integration 6 56 Using the GUI to Configure NAC Out of Band Integration 6 57 Using the CLI to Configure ...

Страница 13: ...s Point Join Process 7 24 Configuring the Syslog Server for Access Points 7 26 Viewing Access Point Join Information 7 26 Using a Controller to Send Debug Commands to Access Points Converted to Lightweight Mode 7 28 Converted Access Points Send Crash Information to Controller 7 28 Converted Access Points Send Radio Core Dumps to Controller 7 28 Using the CLI to Retrieve Radio Core Dumps 7 29 Using...

Страница 14: ...and in Japan 7 58 Dynamic Frequency Selection 7 58 Optimizing RFID Tracking on Access Points 7 59 Using the GUI to Optimize RFID Tracking on Access Points 7 59 Using the CLI to Optimize RFID Tracking on Access Points 7 61 Configuring Probe Request Forwarding 7 62 Retrieving the Unique Device Identifier on Controllers and Access Points 7 63 Using the GUI to Retrieve the Unique Device Identifier on ...

Страница 15: ...s 8 16 Configuring Local Mesh Parameters 8 22 Client Roaming 8 24 Configuring Ethernet Bridging and Ethernet VLAN Tagging 8 25 Configuring Advanced Features 8 32 Configuring Voice Parameters in Mesh Networks 8 32 CAC 8 32 QoS and DSCP Marking 8 32 Guidelines for Using Voice on the Mesh Network 8 33 Voice Call Support in a Mesh Network 8 34 Using the CLI to View Voice Details for Mesh Networks 8 34...

Страница 16: ... 2 Guidelines for Upgrading Controller Software 9 2 Guidelines for Upgrading to Controller Software 5 2 in Mesh Networks 9 3 Mandatory Boot Variable Update for Networks with 1522 Access Points 9 4 Upgrade Compatibility Matrix 9 6 Using the GUI to Upgrade Controller Software 9 8 Using the CLI to Upgrade Controller Software 9 10 Transferring Files to and from a Controller 9 13 Downloading Device Cer...

Страница 17: ...Server 10 16 Using the GUI to Choose a Customized Web Authentication Login Page from an External Web Server 10 16 Using the CLI to Choose a Customized Web Authentication Login Page from an External Web Server 10 17 Downloading a Customized Web Authentication Login Page 10 17 Using the GUI to Download a Customized Web Authentication Login Page 10 18 Using the CLI to Download a Customized Web Authen...

Страница 18: ...to Configure RRM 11 19 Using the CLI to View RRM Settings 11 23 Using the CLI to Debug RRM Issues 11 25 Overriding RRM 11 25 Statically Assigning Channel and Transmit Power Settings to Access Point Radios 11 26 Using the GUI to Statically Assign Channel and Transmit Power Settings 11 26 Using the CLI to Statically Assign Channel and Transmit Power Settings 11 30 Disabling Dynamic Channel and Power...

Страница 19: ...Configure Mobility Groups 12 14 Viewing Mobility Group Statistics 12 16 Using the GUI to View Mobility Group Statistics 12 16 Using the CLI to View Mobility Group Statistics 12 19 Configuring Auto Anchor Mobility 12 20 Guidelines for Using Auto Anchor Mobility 12 21 Using the GUI to Configure Auto Anchor Mobility 12 21 Using the CLI to Configure Auto Anchor Mobility 12 23 WLAN Mobility Security Va...

Страница 20: ...allation Warning A 20 More Than One Power Supply Warning for 4400 Series Controllers A 23 A P P E N D I X B Declarations of Conformity and Regulatory Information B 1 Regulatory Information for Lightweight Access Points B 2 Manufacturers Federal Communication Commission Declaration of Conformity Statement B 2 Department of Communications Canada B 3 Canadian Compliance Statement B 3 European Communi...

Страница 21: ...D 5 Configuring System and Message Logging D 6 Using the GUI to Configure System and Message Logging D 7 Using the GUI to View Message Logs D 9 Using the CLI to Configure System and Message Logging D 10 Using the CLI to View System and Message Logs D 12 Viewing Access Point Event Logs D 13 Uploading Logs and Crash Files D 14 Using the GUI to Upload Logs and Crash Files D 14 Using the CLI to Upload...

Страница 22: ...UI to Configure Sniffing on an Access Point D 39 Using the CLI to Configure Sniffing on an Access Point D 41 Troubleshooting Access Points Using Telnet or SSH D 42 Debugging the Access Point Monitor Service D 43 Using the CLI to Debug Access Point Monitor Service Issues D 43 A P P E N D I X E Logical Connectivity Diagrams E 1 Cisco WiSM E 2 Cisco 28 37 38xx Integrated Services Router E 3 Catalyst ...

Страница 23: ...iguration Guide Release 5 2 references related publications and explains how to obtain other documentation and technical assistance if necessary It contains these sections Audience page xxiv Purpose page xxiv Organization page xxiv Conventions page xxv Related Publications page xxvii Obtaining Documentation and Submitting a Service Request page xxvii ...

Страница 24: ...ons for configuring them Chapter 4 Configuring Controller SettingsWireless Device Access describes how to configure settings on the controllers Chapter 5 Configuring Security Solutions describes application specific solutions for wireless LANs Chapter 6 Configuring WLANsWireless Device Access describes how to configure wireless LANs and SSIDs on your system Chapter 7 Controlling Lightweight Access...

Страница 25: ... that can be used to troubleshoot problems on the controller Appendix E Logical Connectivity Diagrams provides logical connectivity diagrams and related software commands for controllers that are integrated into other Cisco products Conventions This publication uses these conventions to convey instructions and information Command descriptions use these conventions Commands and keywords are in bold...

Страница 26: ...e publication veuillez consulter l annexe intitulée Translated Safety Warnings Traduction des avis de sécurité Warnung Dieses Warnsymbol bedeutet Gefahr Sie befinden sich in einer Situation die zu einer Körperverletzung führen könnte Bevor Sie mit der Arbeit an irgendeinem Gerät beginnen seien Sie sich der mit elektrischen Stromkreisen verbundenen Gefahren und der Standardpraktiken zur Vermeidung ...

Страница 27: ... revised Cisco technical documentation at http www cisco com en US docs general whatsnew whatsnew html Subscribe to the What s New in Cisco Product Documentation as a Really Simple Syndication RSS feed and set content to be delivered directly to your desktop using a reader application The RSS feeds are a free service and Cisco currently supports RSS version 2 0 Advertencia Este símbolo de aviso si...

Страница 28: ...xxviii Cisco Wireless LAN Controller Configuration Guide OL 17037 01 Preface ...

Страница 29: ...m Security page 1 5 Layer 2 and Layer 3 Operation page 1 6 Cisco Wireless LAN Controllers page 1 7 Controller Platforms page 1 8 Cisco UWN Solution Wired Connections page 1 12 Cisco UWN Solution WLANs page 1 13 Identity Networking page 1 13 File Transfers page 1 14 Power over Ethernet page 1 14 Startup Wizard page 1 15 Cisco Wireless LAN Controller Memory page 1 16 Cisco Wireless LAN Controller Fa...

Страница 30: ...ured command line interface CLI can be used to configure and monitor individual Cisco Wireless LAN Controllers See Chapter 2 The Cisco Wireless Control System WCS which you use to configure and monitor one or more Cisco Wireless LAN Controllers and associated access points WCS has tools to facilitate large system monitoring and control WCS runs on Windows 2000 Windows 2003 and Red Hat Enterprise L...

Страница 31: ...hey are added to the network Full control of lightweight access points Lightweight access points connect to controllers through the network The network equipment may or may not provide Power over Ethernet to the access points Note that some controllers use redundant Gigabit Ethernet connections to bypass single network failures Note Some controllers can connect through multiple physical ports to m...

Страница 32: ... added to the network Same Subnet Layer 2 Roaming and Inter Subnet Layer 3 Roaming Automatic access point failover to any redundant controller with a reduced access point load refer to the Cisco Wireless LAN Controller Failover Protection section on page 1 16 Figure 1 3 shows a typical multiple controller deployment The figure also shows an optional dedicated Management Network and the three physi...

Страница 33: ...addresses In automated disabling which is always active the operating system software automatically blocks access to network services for an operator defined period of time when a client fails to authenticate for a fixed number of consecutive attempts This can be used to deter brute force login attacks These and other security features use industry standard authorization and authentication methods...

Страница 34: ...troller and lightweight access points can be connected through Layer 2 devices on the same subnet or connected through Layer 3 devices across subnets Another requirement is that the IP addresses of access points should be either statically assigned or dynamically assigned through an external DHCP server The requirement for Layer 3 CAPWAP communications across subnets is that the controller and lig...

Страница 35: ...reless LAN Solution controllers periodically determine client rogue access point rogue access point client radio frequency ID RFID tag location and store the locations in the Cisco WCS database For more information on location solutions refer to the Cisco Wireless Control System Configuration Guide and the Cisco Location Appliance Configuration Guide at these URLs Cisco Wireless Control System Con...

Страница 36: ...port Doing so may damage the controller Note Wait at least 20 seconds before reconnecting an access point to the controller Otherwise the controller may fail to detect the device Features Not Supported This hardware feature is not supported on 2100 series controllers Service port separate out of band management 10 100 Mbps Ethernet interface These software features are not supported on 2100 series...

Страница 37: ...controller run separate software versions which must be upgraded separately Note Without any other service module installed the Catalyst 6509 switch chassis can support up to seven Cisco WiSMs and the Catalyst 6506 with a Supervisor 720 can support up to four Cisco WiSMs If one or more service modules are installed the chassis can support up to a maximum of four service modules WiSMs included Redu...

Страница 38: ...he controller The router and the internal controller run separate software versions which must be upgraded separately Note The WiSM is supported on Cisco 7600 series routers running only Cisco IOS Release 12 2 18 SXF5 or later Note Without any other service module installed the Cisco 7609 router chassis can support up to seven Cisco WiSMs and any other Cisco 7600 series router chassis can support ...

Страница 39: ...ss point version An internal Fast Ethernet port on the NM AIR WLC6 K9 6 access point version or an internal Gigabit Ethernet port on the 8 12 and 25 access point versions and on the NME AIR WLC6 K9 6 access point version connects the router and the integrated controller The router and the internal controller run separate software versions which must be upgraded separately Refer to the following do...

Страница 40: ...on the router The controller in the Catalyst 3750G Integrated Wireless LAN Controller Switch connects to the network through the ports on the switch Cisco lightweight access points connects to the network using 10 100BASE T Ethernet cables The standard CAT 5 cable can also be used to conduct power for the lightweight access points from a network device equipped with Power over Ethernet PoE capabil...

Страница 41: ...US or other Override However when Allow AAA Override is enabled the RADIUS or other AAA server can alternatively be configured to return QoS DSCP 802 1p priority tag values and ACL on a per MAC Address basis Allow AAA Override gives the AAA Override precedence over the MAC Filtering parameters set in the controller if there are no AAA Overrides available for a given MAC Address the operating syste...

Страница 42: ...sferring Files to and from a Controller section on page 8 7 To use Cisco WCS to upgrade software refer to the Cisco Wireless Control System Configuration Guide Click this URL to browse to this document http www cisco com en US products ps6305 products_installation_and_configuration_guides_lis t html Power over Ethernet Lightweight access points can receive power via their Ethernet cables from 802 ...

Страница 43: ...port interface Collects the Virtual Gateway IP Address any fictitious unassigned IP address such as 1 1 1 1 to be used by Layer 3 Security and Mobility managers Allows you to enter the Mobility Group RF Group Name Collects the wireless LAN 1 802 11 SSID or Network Name Asks you to define whether or not clients can use static IP addresses Yes more convenient but lower security session can be hijack...

Страница 44: ...ntrollers in the Mobility group This prevents the access points from spending time sending out blind polling messages resulting in a faster recovery period In multiple controller deployments this means that if one controller fails its dropped access points reboot and do the following under direction of the radio resource management RRM Obtain an IP address from a local DHCP server one on the local...

Страница 45: ... page 1 17 Cisco 4400 Series Wireless LAN Controllers page 1 18 Note Chapter 3 provides information on configuring the controller s ports and assigning interfaces to them Cisco 2100 Series Wireless LAN Controllers Cisco 2100 series controllers can communicate with the network through any one of their physical data ports as the logical management interface can be assigned to one of the ports The ph...

Страница 46: ...thernet front panel LC physical port multi mode 850nM SX fiber optic links using LC physical connectors 1000BASE LX Gigabit Ethernet front panel LC physical port multi mode 1300nM LX LH fiber optic links using LC physical connectors For the 4404 controller up to four of the following connections are supported in any combination 1000BASE T Gigabit Ethernet front panel RJ 45 physical port UTP cable ...

Страница 47: ...b Browser and CLI Interfaces This chapter describes the web browser and CLI interfaces that you use to configure the controller It contains these sections Using the Web Browser Interface page 2 2 Using the CLI page 2 7 Enabling Wireless Connections to the Web Browser and CLI Interfaces page 2 9 ...

Страница 48: ...for using web authentication You can use either the service port interface or the management interface to access the GUI Cisco recommends that you use the service port interface Refer to Chapter 3 for instructions on configuring the service port interface Click Help at the top of any page in the GUI to display online help You might need to disable your browser s pop up blocker to view the online h...

Страница 49: ...o access the controller GUI using https ip address choose Enabled from the HTTPS Access drop down box Otherwise choose Disabled The default value is Enabled Secure web mode is a secure connection Step 4 In the Web Session Timeout field enter the amount of time in minutes before the web session times out due to inactivity You can enter a value between 30 and 160 minutes inclusive and the default va...

Страница 50: ...ecurity enter this command config network secureweb cipher option high enable disable This command allows users to access the controller GUI using https ip address but only from browsers that support 128 bit or larger ciphers The default value is disabled Step 4 To enable or disable SSLv2 for web administration enter this command config network secureweb cipher option sslv2 enable disable If you d...

Страница 51: ...ou must create static routes on the controller Also if you load the certificate through the distribution system network port the TFTP server can be on any subnet A third party TFTP server cannot run on the same computer as the Cisco WCS because the WCS built in TFTP server and the third party TFTP server require the same communication port Note Every HTTPS certificate contains an embedded RSA key ...

Страница 52: ...ad an SSL Certificate Follow these steps to load an externally generated SSL certificate using the controller CLI Step 1 Use a password to encrypt the HTTPS certificate in a PEM encoded file The PEM encoded file is called a web administration certificate file webadmincert_name pem Step 2 Move the webadmincert_name pem file to the default directory on your TFTP server Step 3 To view the current dow...

Страница 53: ...d reset system Using the CLI The Cisco UWN Solution command line interface CLI is built into each controller The CLI allows you to use a VT 100 emulator to locally or remotely configure monitor and control individual controllers and its associated lightweight access points The CLI is a simple text based tree structured interface that allows up to five users with Telnet capable terminal emulators t...

Страница 54: ...te and a short timeout If you would like to change either of these values enter config serial baudrate baudrate and config serial timeout timeout to make your changes If you enter config serial timeout 0 serial sessions never time out Using a Remote Ethernet Connection You need these items to connect to a controller remotely A computer with access to the controller over the Ethernet network The IP...

Страница 55: ...terfaces You can monitor and configure controllers using a wireless client This feature is supported for all management tasks except uploads from and downloads to the controller Before you can open the GUI or the CLI from a wireless client device you must configure the controller to allow the connection Follow these steps to enable wireless connections to the GUI or CLI Step 1 Log into the CLI Ste...

Страница 56: ...p 3 Use a wireless client to associate to a lightweight access point connected to the controller Step 4 On the wireless client open a Telnet session to the controller or browse to the controller GUI Tip To use the controller GUI to enable wireless connections click Management Mgmt Via Wireless page and check the Enable Controller Management to be accessible from Wireless Clients check box ...

Страница 57: ...nd provides instructions for configuring them It contains these sections Overview of Ports and Interfaces page 3 2 Configuring the Management AP Manager Virtual and Service Port Interfaces page 3 10 Configuring Dynamic Interfaces page 3 16 Configuring Ports page 3 19 Enabling Link Aggregation page 3 29 Configuring a 4400 Series Controller to Support More Than 48 Access Points page 3 34 ...

Страница 58: ...sco Integrated Services Router and the controllers on the Cisco WiSM do not have external physical ports They connect to the network through ports on the router or switch Figure 3 1 Ports on the Cisco 2100 Series Wireless LAN Controllers Figure 3 2 Ports on the Cisco 4400 Series Wireless LAN Controllers Note Figure 3 2 shows a Cisco 4404 controller The Cisco 4402 controller is similar but has only...

Страница 59: ...ce port STACK1 STACK2 SWITCH CONSOLE CONTROLLER CONSOLE SERVICE Table 3 1 Controller Ports Controller Service Ports Distribution System Ethernet Ports Serial Console Port 2100 series None 8 6 2 PoE ports 1 4402 1 2 1 4404 1 4 1 Cisco WiSM 2 ports 9 and 10 8 ports 1 8 2 Controller Network Module within the Cisco 28 37 38xx Series Integrated Services Routers None 1 11 Catalyst 3750G Integrated Wirel...

Страница 60: ...points to join the controller Note The Gigabit Ethernet ports on the 4402 and 4404 controllers accept these SX LC T small form factor plug in SFP modules 1000BASE SX SFP modules which provide a 1000 Mbps wired connection to a network through an 850nM SX fiber optic link using an LC physical connector 1000BASE LX SFP modules which provide a 1000 Mbps wired connection to a network through a 1300nM L...

Страница 61: ...tion LAG which bundles all of the controller s distribution system ports into a single 802 3ad port channel Cisco 4400 series controllers support LAG in software release 3 2 and higher and LAG is enabled automatically on the Cisco WiSM controllers Refer to the Enabling Link Aggregation section on page 3 29 for more information Service Port Cisco 4400 series controllers also have a 10 100 copper Et...

Страница 62: ...igure primary and secondary ports for each interface Management Interface The management interface is the default interface for in band management of the controller and connectivity to enterprise services such as AAA servers The management interface has the only consistently pingable in band interface IP address on the controller You can access the controller s GUI by entering the controller s man...

Страница 63: ...rtual interface is used to support mobility management Dynamic Host Configuration Protocol DHCP relay and embedded Layer 3 security such as guest web authentication It also maintains the DNS gateway host name used by Layer 3 security and mobility managers to verify the source of certificates when Layer 3 web authorization is enabled Specifically the virtual interface plays these two primary roles ...

Страница 64: ...st configure an IP address on the service port interface of both Cisco WiSM controllers Otherwise the neighbor switch is unable to check the status of each controller Dynamic Interface Dynamic interfaces also known as VLAN interfaces are created by users and designed to be analogous to VLANs for wireless LAN clients A controller can support up to 512 dynamic interfaces VLANs Each dynamic interface...

Страница 65: ...igured per controller Note Chapter 6 provides instructions for configuring WLANs Figure 3 4 illustrates the relationship between ports interfaces and WLANs Figure 3 4 Ports Interfaces and WLANs As shown in Figure 3 4 each controller port connection is an 802 1Q trunk and should be configured as such on the neighbor switch On Cisco switches the native VLAN of an 802 1Q trunk is an untagged VLAN The...

Страница 66: ...portant for optimal performance of the controller Note Cisco recommends that you assign one set of VLANs for WLANs and a different set of VLANs for management interfaces to ensure that controllers properly route VLAN traffic Follow the instructions on the pages indicated to configure your controller s interfaces and ports Configuring the Management AP Manager Virtual and Service Port Interfaces pa...

Страница 67: ...3 Configure the following parameters for each interface type Management Interface Note The management interface uses the controller s factory set distribution system MAC address Quarantine and quarantine VLAN ID if applicable Note Check the Quarantine check box if you want to configure this VLAN as unhealthy or you want to configure network access control NAC out of band integration Doing so cause...

Страница 68: ...tion Physical port assignment Primary and secondary DHCP servers Access control list ACL name if required Note To create ACLs follow the instructions in Chapter 5 Virtual Interface Any fictitious unassigned and unused gateway IP address such as 1 1 1 1 DNS gateway host name Note To ensure connectivity and web authentication the DNS server should always point to the virtual interface If a DNS host ...

Страница 69: ... config wlan disable wlan number to disable each WLAN that uses the management interface for distribution system communication Step 3 Enter these commands to define the management interface config interface address management ip addr ip netmask gateway config interface quarantine vlan management vlan_id Note Use this command to configure a quarantine VLAN on the management interface config interfa...

Страница 70: ...ce address ap manager ip addr ip netmask gateway config interface vlan ap manager vlan id 0 Note Enter 0 for an untagged VLAN or a non zero value for a tagged VLAN Cisco recommends using tagged VLANs for the AP manager interface config interface port ap manager physical ds port number config interface dhcp ap manager ip address of primary dhcp server ip address of secondary dhcp server config inte...

Страница 71: ... Step 1 Enter show interface detailed service port to view the current service port interface settings Note The service port interface uses the controller s factory set service port MAC address Step 2 Enter these commands to define the service port interface To configure the DHCP server config interface dhcp service port ip address of primary dhcp server ip address of secondary dhcp server To disa...

Страница 72: ... page see Figure 3 5 Step 2 Perform one of the following To create a new dynamic interface click New The Interfaces New page appears see Figure 3 6 Go to Step 3 To modify the settings of an existing dynamic interface click the name of the interface The Interfaces Edit page for that interface appears see Figure 3 7 Go to Step 5 To delete an existing dynamic interface hover your cursor over the blue...

Страница 73: ...ntegration Doing so causes the data traffic of any client that is assigned to this VLAN to pass through the controller See Chapter 6 for more information about NAC out of band integration Physical port assignment VLAN identifier Fixed IP address IP netmask and default gateway Primary and secondary DHCP servers Access control list ACL name if required Note See Chapter 5 for more information on ACLs...

Страница 74: ... ip_netmask gateway config interface vlan operator_defined_interface_name vlan_id 0 config interface port operator_defined_interface_name physical_ds_port_number config interface dhcp operator_defined_interface_name ip_address_of_primary_dhcp_server ip_address_of_secondary_dhcp_server config interface quarantine vlan interface_name vlan_id Note Use this command to configure a quarantine VLAN on an...

Страница 75: ...Ports Page This page shows the current configuration for each of the controller s ports Step 2 If you want to change the settings of any port click the number for that specific port The Port Configure page appears see Figure 3 9 Note If the management and AP manager interfaces are mapped to the same port and are members of the same VLAN you must disable the WLAN before making a port mapping change...

Страница 76: ... The number of the current port Physical Status The data rate being used by the port The available data rates vary based on controller type Controller Available Data Rates 4400 series 1000 Mbps full duplex 2100 series 10 or 100 Mbps half or full duplex WiSM 1000 Mbps full duplex Controller network module 100 Mbps full duplex Catalyst 3750G Integrated Wireless LAN Controller Switch 1000 Mbps full d...

Страница 77: ...he link can be brought down only by other Cisco devices On other Cisco products however administratively disabling a port brings the link down Physical Mode Determines whether the port s data rate is set automatically or specified by the user The supported data rates vary based on controller type Default Auto Controller Supported Data Rates 4400 series Auto or 1000 Mbps full duplex 2100 series Aut...

Страница 78: ...come unresponsive Note The 2100 series controllers controller network modules and Cisco WiSM controllers do not support mirror mode Also a controller s service port cannot be used as a mirrored port Note Port mirroring is not supported when link aggregation LAG is enabled on the controller Note Cisco recommends that you do not mirror traffic from one controller port to another as this setup could ...

Страница 79: ...tive path at a time between network devices but establishes redundant links as a backup if the initial link should fail The spanning tree algorithm calculates the best loop free path throughout a Layer 2 network Infrastructure devices such as controllers and switches send and receive spanning tree frames called bridge protocol data units BPDUs at regular intervals The devices do not forward these ...

Страница 80: ...ing the GUI to Configure Spanning Tree Protocol Follow these steps to configure STP using the GUI Step 1 Click Controller Ports to open the Ports page see Figure 3 8 Step 2 Click the number of the port for which you want to configure STP The Port Configure page appears see Figure 3 9 This page shows the STP status of the port and enables you to configure STP parameters Table 3 4 interprets the cur...

Страница 81: ...th this port Options Off 802 1D or Fast Default Off STP Mode Description Off Disables STP for this port 802 1D Enables this port to participate in the spanning tree and go through all of the spanning tree states when the link state transitions from down to up Fast Enables this port to participate in the spanning tree and puts it in the forwarding state when the link state transitions from down to ...

Страница 82: ... Controller Spanning Tree Configuration Page This page allows you to enable or disable the spanning tree algorithm for the controller modify its characteristics and view the STP status Table 3 6 interprets the current STP status for the controller STP Port Path Cost The speed at which traffic is passed through the port This parameter must be set if the STP Port Path Cost Mode parameter is set to U...

Страница 83: ...Port The number of the port that offers the lowest cost path from this bridge to the root bridge Root Cost The cost of the path to the root as seen from this bridge Max Age seconds The maximum age of STP information learned from the network on any port before it is discarded Hello Time seconds The amount of time between the transmission of configuration BPDUs by this node on any port when it is th...

Страница 84: ...mber all config spanningtree port mode fast port number all config spanningtree port mode off port number all Table 3 7 Controller Spanning Tree Parameters Parameter Description Spanning Tree Algorithm Enables or disables STP for the controller Options Enable or Disable Default Disable Priority The location of the controller in the network topology and how well the controller is located to pass tr...

Страница 85: ...ngs for the ports enter config spanningtree switch mode enable to enable STP for the controller The controller automatically detects logical network loops places redundant ports on standby and builds a network with the most efficient pathways Step 11 Enter save config to save your settings Step 12 Enter show spanningtree port and show spanningtree switch to verify that your changes have been saved...

Страница 86: ...50 controller is connected to two different Gigabit modules slots 2 and 3 within the Catalyst 6500 The controller s port 1 is connected to Gigabit interface 3 1 and the controller s port 2 is connected to Gigabit interface 2 1 on the Catalyst 6500 Both switch ports are assigned to the same channel group When a 4404 controller or WiSM controller module LAG port is connected to a Catalyst 3750G or a...

Страница 87: ...C operating mode The following example shows a Catalyst 6500 series switch in PFC3B mode when you enter the global configuration port channel load balance src dst ip command for proper LAG functionality show platform hardware pfc mode PFC operating mode PFC operating mode PFC3B show EtherChannel load balance EtherChannel Load Balancing Configuration src dst ip The following example shows Catalyst ...

Страница 88: ...ou must configure LAG for all of the connected ports in the neighbor switch When you enable LAG on the Cisco WiSM you must enable port channeling Ether channeling for all of the controller s ports on the switch When you enable LAG port mirroring is not supported When you enable LAG if any single link goes down traffic migrates to the other links When you enable LAG only one functional physical por...

Страница 89: ...ow these steps to enable LAG on your controller using the GUI Step 1 Click Controller General to open the General page see Figure 3 13 Figure 3 13 General Page Step 2 Set the LAG Mode on Next Reboot parameter to Enabled Note Choose Disabled if you want to disable LAG LAG is disabled by default on the Cisco 4400 series controllers but enabled by default on the Cisco WiSM Step 3 Click Apply to commi...

Страница 90: ...ort LAG The controller s neighbor devices must also be properly configured to support LAG Each neighbor port to which the controller is connected should be configured as follows interface GigabitEthernet interface id switchport channel group id mode on no shutdown The port channel on the neighbor switch should be configured as follows interface port channel id switchport switchport trunk encapsula...

Страница 91: ... Controller Switch controllers Using Multiple AP Manager Interfaces Note This method can be used only with Cisco 4400 series stand alone controllers When you create two or more AP manager interfaces each one is mapped to a different port see Figure 3 14 The ports should be configured in sequential order such that AP manager interface 2 is on port 2 AP manager interface 3 is on port 3 and AP manage...

Страница 92: ...rfaces see Figure 3 14 because a controller can support only 48 access points on one port 2 The 4404 100 controller supports up to 100 access points and has four ports To support the maximum number of access points you would need to create three or more AP manager interfaces see Figure 3 15 If the port of one of the AP manager interfaces fails the controller clears the access points state and the ...

Страница 93: ... 17037 01 Chapter 3 Configuring Ports and Interfaces Configuring a 4400 Series Controller to Support More Than 48 Access Points Figure 3 15 Three AP Manager Interfaces Figure 3 16 illustrates the use of four AP manager interfaces to support 100 access points ...

Страница 94: ... to the controller would be evenly distributed among the three available AP manager interfaces For example if AP manager interface 2 fails the remaining AP manager interfaces 1 3 and 4 would each manage approximately 33 access points Follow these steps to create multiple AP manager interfaces Step 1 Click Controller Interfaces to open the Interfaces page Step 2 Click New The Interfaces New page ap...

Страница 95: ...P manager interface Port redundancy is not supported for AP manager interfaces If the AP manager interface fails all of the access points connected to the controller through that interface are evenly distributed among the other configured AP manager interfaces Step 6 To make the interface an AP manager interface check the Enable Dynamic AP Management check box Step 7 Click Save Configuration to sa...

Страница 96: ...3 40 Cisco Wireless LAN Controller Configuration Guide OL 17037 01 Chapter 3 Configuring Ports and Interfaces Configuring a 4400 Series Controller to Support More Than 48 Access Points ...

Страница 97: ... Changing the Default Values of SNMP Community Strings page 4 25 Changing the Default Values for SNMP v3 Users page 4 27 Configuring Aggressive Load Balancing page 4 29 Configuring Fast SSID Changing page 4 31 Enabling 802 3X Flow Control page 4 31 Configuring 802 3 Bridging page 4 32 Configuring Multicast Mode page 4 34 Configuring Client Roaming page 4 40 Configuring IP MAC Address Binding page ...

Страница 98: ...rds optional Distribution system network port static IP address netmask and optional default gateway IP address Service port static IP address and netmask optional Distribution system physical port 1000BASE T 1000BASE SX or 10 100BASE T Note Each 1000BASE SX connector provides a 100 1000 Mbps wired connection to a network through an 850nM SX fiber optic link using an LC physical connector Distribu...

Страница 99: ...re the factory default configuration The controller reboots and displays this message Welcome to the Cisco WLAN Solution Wizard Configuration Tool Step 3 Use the configuration wizard to enter configuration settings Resetting to Default Settings Using the GUI Follow these steps to return to default settings using the GUI Step 1 Open your Internet browser The GUI is fully compatible with Microsoft I...

Страница 100: ...us command line Step 1 Connect your computer to the controller using a DB 9 null modem serial cable Step 2 Open a terminal emulator session using these settings 9600 baud 8 data bits 1 stop bit no parity no hardware flow control Step 3 At the prompt log into the CLI The default username is admin and the default password is admin Step 4 If necessary enter reset system to reboot the unit and start t...

Страница 101: ...ifferent purposes All of the controllers in an RF group are usually also in the same mobility group and vice versa However a mobility group facilitates scalable system wide mobility and controller redundancy while an RF group facilitates scalable system wide dynamic RF management See Chapter 11 and Chapter 12 for more information Step 19 Enable or disable symmetric mobility tunneling by entering y...

Страница 102: ... that does not have a configuration the AutoInstall feature can download a configuration file from a TFTP server and then load the configuration onto the controller automatically Note The Cisco WiSM controllers do not support the AutoInstall feature Overview of AutoInstall If you create a configuration file on a controller that is already on the network or through a WCS filter place that configura...

Страница 103: ...This file includes the domain name and the list of DNS servers that have been received The Domain Name Server option provides the list of DNS servers and the Domain Name option provides the domain name If the domain servers are not on the same subnet as the controller static route entries are installed for each domain server These static routes point to the gateway that is learned through the DHCP...

Страница 104: ...stall performs three full download iterations on each interface that obtains a DHCP IP address For example if a 4400 series controller obtains DHCP IP addresses on both eth0 and dtl0 each interface tries to download a configuration If the interface cannot download a configuration file successfully after three attempts the interface does not attempt further The first configuration file that is down...

Страница 105: ...port setting DHCP Domain Name engtest com AUTO INSTALL interface service port setting DHCP yiaddr 172 19 29 253 AUTO INSTALL interface service port setting DHCP Netmask 255 255 255 0 AUTO INSTALL interface service port setting DHCP Gateway 172 19 29 1 AUTO INSTALL interface service port registered AUTO INSTALL interation 1 interface service port AUTO INSTALL DNS reverse lookup 172 19 29 253 wlc 1 ...

Страница 106: ...er searches for an NTP server and obtains the current time upon reboot and at each user defined polling interval daily to weekly Use these commands to configure an NTP server to obtain the date and time 1 To specify the NTP server for the controller enter this command config time ntp server index ip_address 2 To specify the polling interval in seconds enter this command config time ntp interval Co...

Страница 107: ...he year in the Year field Step 5 In the Time section choose the current local hour from the Hour drop down box and enter the minutes and seconds in the Minutes and Seconds fields Note If you change the time zone location after setting the date and time the values in the Time section are updated to reflect the time in the new time zone location For example if the controller is currently configured ...

Страница 108: ...anada 6 GMT 7 00 Mountain Time US and Canada 7 GMT 6 00 Central Time US and Canada 8 GMT 5 00 Eastern Time US and Canada 9 GMT 4 00 Atlantic Time Canada 10 GMT 3 00 Buenos Aires Argentina 11 GMT 2 00 Mid Atlantic 12 GMT 1 00 Azores 13 GMT London Lisbon Dublin Edinburgh default value 14 GMT 1 00 Amsterdam Berlin Rome Vienna 15 GMT 2 00 Jerusalem 16 GMT 3 00 Baghdad 17 GMT 4 00 Muscat Abu Dhabi 18 G...

Страница 109: ...enter the time difference of the local current time zone with respect to GMT For example Pacific time in the United States is 8 hours behind GMT Therefore it is entered as 8 Note You can manually set the time zone and prevent DST from being set only on the controller CLI Step 3 To save your changes enter this command save config Step 4 To verify that the controller shows the current local time wit...

Страница 110: ...802 11b g band check the 802 11a or 802 11b g Network Status check box To disable the band uncheck the check box The default value is enabled You can enable both the 802 11a and 802 11b g bands Step 3 If you enabled the 802 11b g band in Step 2 check the 802 11g Support check box if you want to enable 802 11g network support The default value is enabled If you disable this feature the 802 11b band...

Страница 111: ...rates are available 802 11a 6 9 12 18 24 36 48 and 54 Mbps 802 11b g 1 2 5 5 6 9 11 12 18 24 36 48 or 54 Mbps For each data rate choose one of these options Mandatory Clients must support this data rate in order to associate to an access point on the controller Supported Any associated clients that support this data rate may communicate with the access point using that rate However the clients are...

Страница 112: ...DTPC to adjust its channel and power settings automatically when it travels to Italy and joins a network there Note On access points that run Cisco IOS software this feature is called world mode Step 6 To specify the rates at which data can be transmitted between the controller and the client enter this command config 802 11a 802 11b rate disabled mandatory supported rate where disabled The client...

Страница 113: ... Default Channel 36 Default Tx Power Level 1 DTPC Status Enabled Fragmentation Threshold 2346 Configuring 802 11n Parameters This section provides instructions for managing 802 11n devices such as the Cisco Aironet 1140 and 1250 Series Access Points on your network The 802 11n devices support the 2 4 and 5 GHz bands and offer high throughput data rates Note The 802 11n high throughput rates are av...

Страница 114: ...upport on the network The default value is enabled Step 3 To specify the modulation and coding scheme MCS rates at which data can be transmitted between the access point and the client check the check boxes of the desired rates These data rates which are calculated for a 20 MHz channel width using a short guard interval are available 0 7 Mbps 1 14 Mbps 2 21 Mbps 3 29 Mbps 4 43 Mbps 5 58 Mbps 6 65 ...

Страница 115: ...vices that do not support WMM cannot join the WLAN e Click Apply to commit your changes Step 6 Click Save Configuration to save your changes Note To determine if an access point supports 802 11n look at the 11n Supported field on either the 802 11a n or 802 11b g n Cisco APs Configure page or the 802 11a n or 802 11b g n AP Interfaces Details page Using the CLI to Configure 802 11n Parameters Usin...

Страница 116: ...ly or you can use the all parameter to configure all of the priority levels at once When you use the enable command the traffic associated with that priority level uses A MPDU transmission When you use the disable command the traffic associated with that priority level uses A MSDU transmission Configure the priority levels to match the aggregation method used by the clients By default only priorit...

Страница 117: ...sabled Priority 6 Disabled Priority 7 Enabled A MSDU Tx Enabled Rifs Tx Enabled Guard Interval Short Beacon Interval 100 CF Pollable mandatory Disabled CF Poll Request mandatory Disabled CFP Period 4 CFP Maximum Duration 60 Default Channel 36 Default Tx Power Level 1 DTPC Status Enabled Fragmentation Threshold 2346 Long Retry Limit 4 Maximum Rx Life Time 512 Max Tx MSDU Life Time 512 Medium Occupa...

Страница 118: ...on the upstream VLAN converted to 802 11 and transmitted through a CAPWAP tunnel toward the client As a result the internal DHCP server cannot be used when DHCP proxy is disabled The ability to disable DHCP proxy allows organizations to use DHCP servers that do not support Cisco s native proxy mode of operation It should be disabled only when required by the existing infrastructure You can use the...

Страница 119: ...iguring Administrator Usernames and Passwords You can configure administrator usernames and passwords to prevent unauthorized users from reconfiguring the controller and viewing configuration information This section provides instructions for initial configuration and for password recovery Configuring Usernames and Passwords Using the controller CLI follow these steps to configure administrator us...

Страница 120: ...er your new password The controller logs you in with your new username and password Configuring SNMP Cisco recommends that you use the GUI to configure SNMP settings on the controller To use the CLI follow these steps Step 1 Enter config snmp community create name to create an SNMP community name Step 2 Enter config snmp community delete name to delete an SNMP community name Step 3 Enter config sn...

Страница 121: ...ame of the SNMP contact Enter up to 31 alphanumeric characters for the contact name Step 11 Enter config snmp syslocation syslocation name to configure the SNMP system location Enter up to 31 alphanumeric characters for the location Step 12 Use the show snmpcommunity and show snmptrap commands to verify that the SNMP traps and communities are correctly configured Step 13 Use the show trapflags com...

Страница 122: ...1 v2c Community New Page Step 4 In the Community Name field enter a unique name containing up to 16 alphanumeric characters Do not enter public or private Step 5 In the next two fields enter the IP address from which this device accepts SNMP packets with the associated community and the IP mask Step 6 Choose Read Only or Read Write from the Access Mode drop down box to specify the access level for...

Страница 123: ...enter this command config snmp community ipaddr ip_address ip_mask name Step 5 To specify the access level for this community enter this command where ro is read only mode and rw is read write mode config snmp community accessmode ro rw name Step 6 To enable or disable this SNMP community enter this command config snmp community mode enable disable name Step 7 To save your changes enter save confi...

Страница 124: ...tion Protocol drop down box choose the desired authentication method None HMAC MD5 Hashed Message Authentication Coding Message Digest 5 or HMAC SHA Hashed Message Authentication Coding Secure Hashing Algorithm The default value is HMAC SHA Step 7 In the Auth Password and Confirm Auth Password fields enter the shared secret key to be used for authentication You must enter at least 12 characters St...

Страница 125: ...ha are the authentication protocol options none des and aescfb128 are the privacy protocol options auth_key is the authentication shared secret key and encrypt_key is the encryption shared secret key Do not enter default for the username auth_key and encrypt_key parameters Step 4 To save your changes enter save config Step 5 To reboot the controller so that the SNMP v3 user that you added takes ef...

Страница 126: ...p down box choose either Enabled or Disabled to configure this feature Step 3 Click Apply to commit your changes Step 4 Click Save Configuration to save your changes Using the CLI to Configure Aggressive Load Balancing Follow these steps to configure aggressive load balancing using the CLI Step 1 To enable or disable aggressive load balancing enter this command config load balancing status enable ...

Страница 127: ... the controller GUI follow these steps to configure fast SSID changing for mobile clients Step 1 Click Controller to open the General page Step 2 From the Fast SSID Change drop down box choose Enabled to enable this feature or Disabled to disable it The default value is disabled Step 3 Click Apply to commit your changes Step 4 Click Save Configuration to save your changes Using the CLI to Configur...

Страница 128: ...I in software release 4 0 or later Note In controller software release 5 2 the software based forwarding architecture for 2100 series based controllers is being replaced with a new forwarding plane architecture As a result 2100 series controllers and the Cisco Wireless LAN Controller Network Module for Cisco Integrated Services Routers bridge 802 3 packets by default Therefore 802 3 bridging can n...

Страница 129: ...atalyst 3750G Wireless LAN Controller Switch Step 3 Click Apply to commit your changes Step 4 Click Save Configuration to save your changes Using the CLI to Configure 802 3 Bridging Follow these steps to configure 802 3 bridging using the controller CLI Step 1 To see the current status of 802 3 bridging for all WLANs enter this command show network Step 2 To enable or disable 802 3 bridging global...

Страница 130: ... a broadcast to all SSIDs In controller software release 4 2 or later Internet Group Management Protocol IGMP snooping is introduced to better direct multicast packets When this feature is enabled the controller gathers IGMP reports from the clients processes them creates unique multicast group IDs MGIDs from the IGMP reports after checking the Layer 3 multicast address and the VLAN number and sen...

Страница 131: ... of the client to avoid the reverse path filtering RPF check The anchor then forwards the multicast packets to the infrastructure switch Note The MGIDs are controller specific The same multicast group packets coming from the same VLAN in two different controllers may be mapped to two different MGIDs Note If Layer 2 multicast is enabled a single MGID is assigned to all the multicast addresses comin...

Страница 132: ... except when access points are connected directly to the local port of a 2100 series controller Using the GUI to Enable Multicast Mode Follow these steps to enable multicast mode using the controller GUI Step 1 Click Controller to open the General page see Figure 4 10 Figure 4 10 General Page Step 2 Choose one of the following options from the Ethernet Multicast Mode drop down box Disabled Disable...

Страница 133: ...ntroller times out the client entry from the MGID table When no clients are left for a particular multicast group the controller waits for the IGMP timeout value to expire and then deletes the MGID entry from the controller The controller always generates a general IGMP query that is to destination address 224 0 0 1 and sends it on all WLANs with an MGID value of 1 Step 8 Click Apply to commit you...

Страница 134: ...ticast packets to a CAPWAP multicast group enter this command config network multicast mode multicast multicast_group_ip_address Step 3 To enable or disable IGMP snooping enter this command config network multicast igmp snooping enable disable The default value is disabled Step 4 To set the IGMP timeout value enter this command config network multicast igmp timeout timeout You can enter a timeout ...

Страница 135: ...parameter is a number between 550 and 4095 Information similar to the following appears Mgid 550 Multicast Group Address 239 255 255 250 Vlan 0 Rx Packet Count 807399588 No of clients 1 Client List Client MAC Expire Time mm ss 00 13 02 23 82 ad 0 20 Using the CLI to View an Access Point s Multicast Client Table To help troubleshoot roaming events you can view an access point s multicast client tab...

Страница 136: ...wn and the client must reauthenticate when the client sends a DHCP Discover with a 0 0 0 0 client IP address or a 169 254 client auto IP address or when the operator set session timeout is exceeded Inter Subnet Roaming Multiple controller deployments support client roaming across access points managed by controllers in the same mobility group on different subnets This roaming is transparent to the...

Страница 137: ... enables Intel clients to request a neighbor list at will When this occurs the access point forwards the request to the controller The controller receives the request and replies with the current CCX roaming sublist of neighbors for the access point to which the client is associated Note To see whether a particular client supports E2E click Wireless Clients on the controller GUI click the Detail l...

Страница 138: ...able communication is usually impossible Therefore clients must already have found and roamed to another access point with a stronger signal before the minimum RSSI value is reached Range 80 to 90 dBm Default 85 dBm Step 4 In the Hysteresis field enter a value to indicate how much greater the signal strength of a neighboring access point must be in order for the client to roam to it This parameter...

Страница 139: ...io band 802 11a or 802 11b g Using the CLI to Configure CCX Client Roaming Parameters To configure CCX Layer 2 client roaming parameters enter this command config 802 11a 802 11b l2roam rf params default custom min_rssi roam_hyst scan_thresh trans_time Note See the description range and default value of each RF parameter in the Using the GUI to Configure CCX Client Roaming Parameters section on pa...

Страница 140: ...oller software release 5 2 the controller enforces strict IP address to MAC address binding in client packets The controller checks the IP address and MAC address in a packet compares them to the addresses that are registered with the controller and forwards the packet only if they both match In previous releases the controller checks only the MAC address of the client and ignores the IP address N...

Страница 141: ...ndwidth for clients This is the default setting Bronze Background Provides the lowest bandwidth for guest services VoIP clients should be set to Platinum Gold or Silver while low bandwidth clients can be set to Bronze You can configure the bandwidth of each QoS level using QoS profiles and then apply the profiles to WLANs The profile settings are pushed to the clients associated to that WLAN In ad...

Страница 142: ... define the average real time rate for UDP traffic on a per user basis enter the rate in Kbps in the Average Real Time Rate field You can enter a value between 0 and 60 000 Kbps inclusive A value of 0 imposes no bandwidth restriction on the profile Step 8 To define the peak real time rate for UDP traffic on a per user basis enter the rate in Kbps in the Burst Real Time Rate field You can enter a v...

Страница 143: ...you can configure the QoS profiles enter these commands config 802 11a disable network config 802 11b disable network Step 2 To change the profile description enter this command config qos description bronze silver gold platinum description Step 3 To define the average data rate in Kbps for TCP traffic per user enter this command config qos average data rate bronze silver gold platinum rate Note F...

Страница 144: ...s and guest users In order to prevent guest users from using the same level of bandwidth as regular users you can create QoS roles with different and presumably lower bandwidth contracts and assign them to guest users You can use the controller GUI or CLI to configure up to ten QoS roles for guest users Note If you choose to create an entry on the RADIUS server for a guest user and enable RADIUS a...

Страница 145: ... QoS user such as Contractor Vendor and so on Step 4 Click Apply to commit your changes Step 5 To edit the bandwidth of a QoS role click the name of the QoS role The Edit QoS Role Data Rates page appears see Figure 4 16 Figure 4 16 Edit QoS Role Data Rates Page Note The values that you configure for the per user bandwidth contracts affect only the amount of bandwidth going downstream from the acce...

Страница 146: ...an or equal to the Average Real Time Rate Otherwise the QoS policy may block traffic to and from the wireless client Step 10 Click Apply to commit your changes Step 11 Click Save Configuration to save your changes Step 12 To apply a QoS role to a guest user follow the steps in the Using the GUI to Configure Local Network Users section on page 5 30 Using the CLI to Configure QoS Roles Follow these ...

Страница 147: ...guest user enter this command config netuser guest role apply username role_name For example the role of Contractor could be applied to guest user jsmith Note If you do not assign a QoS role to a guest user the Role field in the User Details shows the role as default The bandwidth contracts for this user are defined in the QoS profile for the WLAN Note If you want to unassign a QoS role from a gue...

Страница 148: ...d based CAC Bandwidth Based CAC Bandwidth based or static CAC enables the client to specify how much bandwidth or shared medium time is required to accept a new call and in turn enables the access point to determine whether it is capable of accommodating this particular call The access point rejects the call if necessary in order to maintain the maximum allowed number of calls with acceptable qual...

Страница 149: ...hat are in progress You can apply expedited bandwidth requests to both bandwidth based and load based CAC Expedited bandwidth requests are disabled by default When this feature is disabled the controller ignores all expedited requests and processes TSPEC requests as normal TSPEC requests See Table 4 2 for examples of TSPEC request handling for normal TSPEC requests and expedited bandwidth requests...

Страница 150: ...link statistics are captured The client and access point measure these metrics The access point also collects the measurements every 5 seconds prepares 90 second reports and then sends the reports to the controller The controller organizes the uplink measurements on a client basis and the downlink measurements on an access point basis and maintains an hour s worth of historical data To store this ...

Страница 151: ...w calls on this radio band Range 40 to 85 Default 75 Step 8 In the Reserved Roaming Bandwidth field enter the percentage of maximum allocated bandwidth reserved for roaming voice clients The controller reserves this much bandwidth from the maximum allocated bandwidth for roaming voice clients Range 0 to 25 Default 6 Step 9 To enable expedited bandwidth requests check the Expedited Bandwidth check ...

Страница 152: ...fault value is disabled Step 6 In the Max RF Bandwidth field enter the percentage of the maximum bandwidth allocated to clients for video applications on this radio band Once the client reaches the value specified the access point rejects new requests on this radio band Range 0 to 100 However the maximum RF bandwidth cannot exceed 100 for voice video Default 0 Note If this parameter is set to zero...

Страница 153: ...s Step 12 Repeat this procedure if you want to configure video parameters for another radio band 802 11a or 802 11b g Using the GUI to View Voice and Video Settings Follow these steps to view voice and video settings using the GUI Step 1 Click Monitor Clients to open the Clients page see Figure 4 19 Figure 4 19 Clients Page Step 2 Click the MAC address of the desired client to open the Clients Det...

Страница 154: ...er 4 Configuring Controller SettingsWireless Device Access Configuring Voice and Video Parameters Figure 4 20 Clients Detail Page This page shows the U APSD status if enabled for this client under Quality of Service Properties Step 3 Click Back to return to the Clients page ...

Страница 155: ... particular client and the access point to which this client is associated a Hover your cursor over the blue drop down arrow for the desired client and choose 802 11aTSM or 802 11b gTSM The Clients AP page appears see Figure 4 21 Figure 4 21 Clients AP Page b Click the Detail link for the desired access point to open the Clients AP Traffic Stream Metrics page see Figure 4 22 Figure 4 22 Clients AP...

Страница 156: ...eld shows the specific interval when the statistics were collected Step 5 Follow these steps to see the TSM statistics for a particular access point and a particular client associated to this access point a Click Wireless Access Points Radios 802 11a n or 802 11b g n The 802 11a n Radios or 802 11b g n Radios page appears see Figure 4 23 Figure 4 23 802 11a n Radios Page b Hover your cursor over t...

Страница 157: ...figuring Controller SettingsWireless Device Access Configuring Voice and Video Parameters Figure 4 24 AP Clients Page c Click the Detail link for the desired client to open the AP Clients Traffic Stream Metrics page see Figure 4 25 Figure 4 25 AP Clients Traffic Stream Metrics Page ...

Страница 158: ...command save config Step 6 To enable or disable bandwidth based voice CAC for the 802 11a or 802 11b g network enter this command config 802 11a 802 11b cac voice acm enable disable Step 7 To set the percentage of maximum bandwidth allocated to clients for voice applications on the 802 11a or 802 11b g network enter this command config 802 11a 802 11b cac voice max bandwidth bandwidth The bandwidt...

Страница 159: ...le disable Step 14 To re enable all WLANs with WMM enabled enter this command config wlan enable wlan_id Step 15 To re enable the radio network enter this command config 802 11a 802 11b enable network Step 16 To save your settings enter this command save config Using the CLI to Configure Video Parameters Follow these steps to configure video parameters using the CLI Step 1 To see all of the WLANs ...

Страница 160: ...bandwidth from the maximum allocated bandwidth for roaming video clients Step 9 To process or ignore the TSPEC inactivity timeout received from an access point enter this command config 802 11a 802 11b cac video tspec inactivity timeout enable ignore Step 10 To re enable all WLANs with WMM enabled enter this command config wlan enable wlan_id Step 11 To re enable the radio network enter this comma...

Страница 161: ...t is associated enter this command show client tsm 802 11a 802 11b client_mac ap_mac all The optional all command shows all access points to which this client has associated Information similar to the following appears AP Interface Mac 00 0b 85 01 02 03 Client Interface Mac 00 01 02 03 04 05 Measurement Duration 90 seconds Timestamp 1st Jan 2006 06 35 80 UpLink Stats Average Delay 5sec intervals 3...

Страница 162: ...ay bet 10 20 ms 20 Delay bet 20 40 ms 20 Delay greater than 40 ms 20 Total packet Count 80 Total packet lost count 5sec 10 Maximum Lost Packet count 5sec 5 Average Lost Packet count 5secs 2 DownLink Stats Average Delay 5sec intervals 35 Delay less than 10 ms 20 Delay bet 10 20 ms 20 Delay bet 20 40 ms 20 Delay greater than 40 ms 20 Total packet Count 80 Total packet lost count 5sec 10 Maximum Lost...

Страница 163: ...CA Parameters under 802 11a n or 802 11b g n The 802 11a or 802 11b g EDCA Parameters page appears see Figure 4 26 Figure 4 26 802 11a EDCA Parameters Page Step 3 Choose one of the following options from the EDCA Profile drop down box WMM Enables the Wi Fi Multimedia WMM default parameters This is the default value Choose this option when voice or video services are not deployed on your network Sp...

Страница 164: ... the data packets are retried at the data rate specified multiple times without downshifting the rates We also recommend that you not use the low latency MAC feature if you are using the 1120 1130 1230 and 1240 series access points not based on the Marvell platform If used the number of retries is reduced to 3 with the first retry at the initial rate Step 5 Click Apply to commit your changes Step ...

Страница 165: ...ice calls serviced per access point The default value is disabled Step 5 To re enable the radio network enter this command config 802 11a 802 11b enable network Step 6 To save your settings enter this command save config Configuring Cisco Discovery Protocol Cisco Discovery Protocol CDP is a device discovery protocol that runs on all Cisco manufactured equipment A device enabled with CDP sends out ...

Страница 166: ... TLVs are supported by both the controller and the access point Device ID TLV 0x0001 The host name of the controller the access point or the CDP neighbor Address TLV 0x0002 The IP address of the controller the access point or the CDP neighbor Port ID TLV 0x0003 The name of the interface on which CDP packets are sent out Capabilities TLV 0x0004 The capabilities of the device The controller sends ou...

Страница 167: ... that are connected directly to a 2100 series controller Power Consumption TLV 0x0010 The maximum amount of power consumed by the access point This TLV is not supported on access points that are connected directly to a 2100 series controller You can configure CDP and view CDP information using the GUI in controller software release 4 1 or later or the CLI in controller software release 4 0 or late...

Страница 168: ...v2 to specify the highest CDP version supported on the controller The default value is v1 Step 4 In the Refresh time Interval field enter the interval at which CDP messages are to be generated The range is 5 to 254 seconds and the default value is 60 seconds Step 5 In the Holdtime field enter the amount of time to be advertised as the time to live value in generated CDP packets The range is 10 to ...

Страница 169: ... the controller follow these steps a Click Wireless Access Points Global Configuration to open the Global Configuration page b Check the CDP State check box to enable CDP on all access points associated to the controller or uncheck it to disable CDP on all access points The default value is checked c Click Apply to commit your changes Step 9 Click Save Configuration to save your changes Using the ...

Страница 170: ...rt used by each CDP neighbor for transmitting CDP packets The time left in seconds before each CDP neighbor entry expires The functional capability of each CDP neighbor defined as follows R Router T Trans Bridge B Source Route Bridge S Switch H Host I IGMP r Repeater or M Remotely Managed Device The hardware platform of each CDP neighbor device Step 2 To see more detailed information about each in...

Страница 171: ... CDP neighbor entry expires The functional capability of the CDP neighbor defined as follows Router Trans Bridge Source Route Bridge Switch Host IGMP Repeater or Remotely Managed Device The hardware platform of the CDP neighbor device The software running on the CDP neighbor Step 3 To see a list of CDP neighbors for all access points connected to the controller click AP Neighbors The CDP AP Neighb...

Страница 172: ... AP Neighbors Detail Page This page shows the following information The name of the access point The MAC address of the access point s radio The IP address of the access point The interface on which the CDP packets were received The name of the CDP neighbor The IP address of the CDP neighbor The port used by the CDP neighbor The CDP version being advertised v1 or v2 The time left in seconds before...

Страница 173: ...al at which CDP messages are to be generated enter this command config cdp timer seconds The range is 5 to 254 seconds and the default value is 60 seconds 3 To specify the amount of time to be advertised as the time to live value in generated CDP packets enter this command config cdp holdtime seconds The range is 10 to 255 seconds and the default value is 180 seconds 4 To specify the highest CDP v...

Страница 174: ...ors on all interfaces enter this command show cdp neighbors detail The optional detail command provides detailed information for the controller s CDP neighbors Note This command shows only the CDP neighbors of the controller It does not show the CDP neighbors of the controller s associated access points Additional commands are provided below to show the list of CDP neighbors per access point 3 To ...

Страница 175: ... Software IOS tm s72033_rp Software s72033_rp PSV M Version 12 2 18 SXD5 RELEASE SOFTWARE fc3 Technical Support http www cisco com techsupport Copyright c 1986 2005 by cisco Systems Inc Compiled Fri 13 Ma Note The access point sends CDP neighbor information to the controller only when the information changes Use these commands to obtain CDP debug information for the controller 1 To obtain debug in...

Страница 176: ...ry data Many telemetry data types provide support for sensory networks and a large range of applications for RFID tags Measurement notifications Enable you to deploy chokepoints at strategic points within your buildings or campuses Whenever an RFID tag moves to within a defined proximity of a chokepoint the tag begins transmitting packets that advertise its location in relation to the chokepoint T...

Страница 177: ... times the beacon value The default value is 1200 seconds Step 3 To enable or disable RFID tag mobility for specific tags enter these commands config rfid mobility vendor_name enable Enables client mobility for a specific vendor s tags When you enter this command tags are unable to obtain a DHCP address for client mode when attempting to check and or download a configuration config rfid mobility v...

Страница 178: ...where mac_address is the tag s MAC address Information similar to the following appears RFID address 00 12 b8 00 20 52 Vendor G2 Last Heard 51 seconds ago Packets Received 2 Bytes Received 324 Cisco Type Content Header Version 1 Tx Power 12 dBm Channel 1 Reg Class 12 Burst Length 1 CCX Payload Last Sequence Control 0 Payload length 127 Payload Data Hex Dump 01 09 00 00 00 00 0b 85 52 52 52 02 07 4...

Страница 179: ... 4d Pango cisco1242 66 298 seconds ago 4 To see a list of RFID tags that are associated to the controller as clients enter this command show rfid client When the RFID tag is in client mode information similar to the following appears Heard RFID Mac VENDOR Sec Ago Associated AP Chnl Client State 00 14 7e 00 0b b1 Pango 35 AP0019 e75c fef4 1 Probing When the RFID tag is not in client mode the above ...

Страница 180: ...on WCS Note If an error occurs on WCS and prevents the location appliance certificate from being pushed to the controller make sure that the time zone has been synchronized on the controller and the location appliance before following this procedure Follow the instructions in the Synchronizing the Controller and Location Appliance section on page 4 86 to do so Follow these steps to install the loc...

Страница 181: ...on Interval for Clients RFID Tags and Rogues The Network Mobility Services Protocol NMSP manages communication between the location appliance and the controller for incoming and outgoing traffic If your application requires more frequent location updates you can modify the NMSP notification interval to a value between 1 and 30 seconds for clients active RFID tags and rogue access points and client...

Страница 182: ...ances Refer to the Managing the System Date and Time section on page 4 10 for instructions on setting the time and date on the controller Note The time zone can be different for the controller and the location appliance but the time zone delta must be configured accordingly based on GMT Using the CLI to View Location Settings The controller determines the location of client devices by gathering re...

Страница 183: ...nd clear location rfid mac_address all 5 To see whether location presence S69 is supported on a client enter this command show client detail client_mac When location presence is supported by a client and enabled on a location appliance the location appliance can provide the client with its location upon request Location presence is enabled automatically on CCXv5 clients Information similar to the ...

Страница 184: ...ig msg 0 Failed SSL write 0 Partial SSL write 0 SSL write attempts to want write Transmit Q full 0 Max Measure Notify Msg 0 Max Info Notify Msg 0 Max Tx Q Size 2 Max Rx Size 1 Max Info Notify Q Size 0 Max Client Info Notify Delay 0 Max Rogue AP Info Notify Delay 0 Max Rogue Client Info Notify Delay 0 Max Client Measure Notify Delay 0 Max Tag Measure Notify Delay 0 Max Rogue AP Measure Notify Delay...

Страница 185: ...rs for the show services mobility detail all command Mobility Services Subscribed by 172 19 35 218 Application Services Client Tracking RSSI Info Statistics Tag Tracking RSSI Statistics Rogue Tracking RSSI Info Handover Client Tracking RSSI Info FMC Handover AP Monitor AP Status IDS Services WIPS Configuring the Supervisor 720 to Support the WiSM When you install a WiSM in a Cisco Catalyst 6500 sw...

Страница 186: ...interface vlan Create a VLAN to communicate with the data ports on the WiSM and enter interface config mode Step 3 ip address ip address gateway Assign an IP address and gateway to the VLAN Step 4 ip helper address ip address Assign a helper address to the VLAN Step 5 end Return to global config mode Step 6 wism module module_number controller 1 2 allowed vlan vlan_number Create Gigabit port chann...

Страница 187: ...t powers up When you install the module the configuration wizard prompts you for NTP server information To access the CNM bootloader Cisco recommends that you reset the CNM from the router If you reset the CNM from a CNM user interface the router might reset the CNM while you are using the bootloader When you reset the CNM from a CNM interface you have 17 minutes to use the bootloader before the r...

Страница 188: ...4 92 Cisco Wireless LAN Controller Configuration Guide OL 17037 01 Chapter 4 Configuring Controller SettingsWireless Device Access Using the Wireless LAN Controller Network Module ...

Страница 189: ... 5 33 Configuring Local EAP page 5 38 Configuring the System for SpectraLink NetLink Telephones page 5 50 Using Management over Wireless page 5 52 Configuring DHCP Option 82 page 5 53 Configuring and Applying Access Control Lists page 5 54 Configuring Management Frame Protection page 5 66 Configuring Client Exclusion Policies page 5 73 Configuring Identity Networking page 5 74 Managing Rogue Devic...

Страница 190: ...f add on security solutions has prevented many IT managers from embracing the benefits of the latest advances in WLAN security Layer 1 Solutions The Cisco UWN security solution ensures that all clients gain access within an operator set number of attempts Should a client fail to gain access within that limit it is automatically excluded blocked from access until the operator set timer expires The ...

Страница 191: ...nd degrade system throughput Operating system security uses the RRM function to continually monitor the air space for interference and security breaches and notify the operator when they are detected Operating system security works with industry standard authorization authentication and accounting AAA servers making system integration simple and easy Configuring RADIUS Remote Authentication Dial I...

Страница 192: ...ase must be identical in all the servers for the backup to work properly The primary RADIUS server the server with lowest server index is assumed to be the most preferable server for the controller If the primary server becomes unresponsive the controller switches to the next active backup server the server with the next lowest server index The controller continues to use this backup server foreve...

Страница 193: ...et key must be the same on both the server and the controller Step 6 Choose RADIUS Cisco Aironet from the Authenticate Using drop down box Step 7 Click Submit Apply to save your changes Step 8 Click Interface Configuration on the ACS main page Step 9 Click RADIUS Cisco Aironet The RADIUS Cisco Aironet page appears Step 10 Under User Group check the Cisco Aironet Session Timeout check box Step 11 C...

Страница 194: ...e Service Type attribute on the ACS make sure to check the Management check box on the RADIUS Authentication Servers page of the controller GUI See Step 17 in the next section for more information Note The RADIUS Authentication Attributes Sent by the Access Point section on page 5 15 lists the RADIUS attributes that are sent by a lightweight access point to a client in access request and access ac...

Страница 195: ...pe drop down box choose IP Address System MAC Address or AP MAC Address to specify whether the IP address system MAC address or AP MAC address of the originator will be sent to the RADIUS server in the Access Request message Step 4 To enable RADIUS to controller key transport using AES key wrap protection check the Use AES Key Wrap check box The default value is unchecked This feature is required ...

Страница 196: ...ed Secret fields enter the shared secret key to be used for authentication between the controller and the server Note The shared secret key must be the same on both the server and the controller Step 11 If you are configuring a new RADIUS authentication server and want to enable AES key wrap which makes the shared secret between the controller and the RADIUS server more secure follow these steps A...

Страница 197: ... RADIUS authentication server check the Management check box to enable management authentication or uncheck it to disable this feature The default value is checked If you enable this feature this entry is considered the RADIUS authentication server for management users and authentication requests go to the RADIUS server Step 18 Check the IPSec check box to enable the IP security mechanism or unche...

Страница 198: ...number size Step 20 Click Apply to commit your changes Step 21 Click Save Configuration to save your changes Step 22 Repeat the previous steps if you want to configure any additional services on the same server or any additional RADIUS servers Step 23 To specify the RADIUS server fallback behavior follow these steps a Click Security AAA RADIUS Fallback to open the RADIUS Fallback Parameters page s...

Страница 199: ...r to the RADIUS server if configured for Radius The default setting is local and then Radius Step 26 Click Apply to commit your changes Step 27 Click Save Configuration to save your changes Using the CLI to Configure RADIUS Using the controller CLI follow these steps to configure RADIUS Note Refer to the Using the GUI to Configure RADIUS section on page 5 6 for the valid ranges and default values ...

Страница 200: ...f you enable this feature this entry is considered the RADIUS authentication server for management users and authentication requests go to the RADIUS server config radius auth ipsec enable disable index Enables or disables the IP security mechanism config radius auth ipsec authentication hmac md5 hmac sha1 index Configures the authentication protocol to be used for IP security config radius auth i...

Страница 201: ...ntroller to revert to a server with a lower priority from the available backup servers by using RADIUS probe messages to proactively determine whether a server that has been marked inactive is back online The controller simply ignores all inactive servers for all active RADIUS requests Once the primary server receives a response from the recovered ACS server the active fallback RADIUS server no lo...

Страница 202: ... following appears for the show radius acct statistics command Accounting Servers Server Index 1 Server Address 10 10 10 1 Msg Round Trip Time 0 msec First Requests 1 Retry Requests 0 Accounting Responses 0 Malformed Msgs 0 Bad Authenticator Msgs 0 Pending Requests 0 Timeout Requests 0 Unknowntype Msgs 0 Other Drops 0 Information similar to the following appears for the show radius auth statistics...

Страница 203: ...ess 5 NAS Port 6 Service Type1 12 Framed MTU 30 Called Station ID MAC address 31 Calling Station ID MAC address 32 NAS Identifier 33 Proxy State 60 CHAP Challenge 61 NAS Port Type 79 EAP Message 243 TPLUS Role 1 To specify read only or read write access to controllers through RADIUS authentication you must set the Service Type attribute 6 on the RADIUS server to Callback NAS Prompt for read only a...

Страница 204: ...Type 64 Tunnel Type 79 EAP Message 81 Tunnel Group ID 1 To specify read only or read write access to controllers through RADIUS authentication you must set the Service Type attribute 6 on the RADIUS server to Callback NAS Prompt for read only access or to Administrative for read write privileges See Step 19 in the Configuring RADIUS on the ACS section for more information Table 5 4 Authentication ...

Страница 205: ...ntract 9 Data Bandwidth Burst Contract 10 Real Time Bandwidth Burst Contract 11 Guest Role Name Table 5 6 Accounting Attributes for Accounting Requests Attribute ID Description 1 User Name 4 NAS IP Address 5 NAS Port 8 Framed IP Address 25 Class 30 Called Station ID MAC address 31 Calling Station ID MAC address 32 NAS Identifier 40 Accounting Status Type 41 Accounting Delay Time Stop and interim m...

Страница 206: ... Note When multiple databases are configured you can use the controller GUI or CLI to specify the sequence in which the backend databases should be tried Authorization The process of determining the actions that users are allowed to take on the controller based on their level of access For TACACS authorization is based on privilege or role rather than specific actions The available roles correspon...

Страница 207: ...unting server becomes unreachable users are able to continue their sessions uninterrupted TACACS uses Transmission Control Protocol TCP for its transport unlike RADIUS which uses User Datagram Protocol UDP It maintains a database and listens on TCP port 49 for incoming requests The controller which requires access control acts as the client and requests AAA services from the server The traffic bet...

Страница 208: ...your controller Step 4 In the AAA Client IP Address field enter the IP address of your controller Step 5 In the Shared Secret field enter the shared secret key to be used for authentication between the server and the controller Note The shared secret key must be the same on both the server and the controller Step 6 Choose TACACS Cisco IOS from the Authenticate Using drop down box Step 7 Click Subm...

Страница 209: ...ck the Advanced TACACS Features check box Step 13 Click Submit to save your changes Step 14 Click System Configuration on the ACS main page Step 15 Click Logging Step 16 When the Logging Configuration page appears enable all of the events that you want to be logged and save your changes Step 17 Click Group Setup on the ACS main page Step 18 Choose a previously created group from the Group drop dow...

Страница 210: ...rst seven correspond to the menu options on the controller GUI and allow access to those particular controller features You can enter one or multiple roles depending on the group s needs Use ALL to specify all seven roles or LOBBY to specify the lobby ambassador role Enter the roles using this format rolex ROLE For example to specify the WLAN CONTROLLER and SECURITY roles for a particular user gro...

Страница 211: ...r for authorization click Authorization If you want to configure a TACACS server for accounting click Accounting Note The GUI pages used to configure authentication authorization and accounting all contain the same fields Therefore these instructions walk through the configuration only once using the Authentication pages as examples You would follow the same steps to configure multiple services an...

Страница 212: ...cannot reach the first server it tries the second one in the list and then the third if necessary Step 5 If you are adding a new server enter the IP address of the TACACS server in the Server IP Address field Step 6 From the Shared Secret Format drop down box choose ASCII or Hex to specify the format of the shared secret key to be used between the controller and the TACACS server The default value...

Страница 213: ...re 5 11 Figure 5 11 Priority Order Management User Page Step 15 For Authentication Priority choose either Radius or TACACS to specify which server has priority over the other when the controller attempts to authenticate management users By default the local database is always queried first If the username is not found the controller switches to the TACACS server if configured for TACACS or to the ...

Страница 214: ...ecret Adds a TACACS accounting server config tacacs acct delete index Deletes a previously added TACACS accounting server config tacacs acct enable disable index Enables or disables a TACACS accounting server config tacacs acct server timeout index timeout Configures the retransmission timeout value for a TACACS accounting server 4 Use these commands to see TACACS statistics show tacacs summary Sh...

Страница 215: ...acct index all 6 To configure the order of authentication when multiple databases are configured enter this command The default setting is local and then radius config aaa auth mgmt radius tacacs To see the current management authentication server order enter this command show aaa auth Information similar to the following appears Management authentication server order 1 local 2 tacacs 7 To make su...

Страница 216: ...ch the user belongs The specific action that the user took The privilege level of the user who executed the action The IP address of the controller The IP address of the laptop or workstation from which the action was executed Sometimes a single action or command is logged multiple times once for each parameter in the command For example if the user enters the snmp community ipaddr ip_address subn...

Страница 217: ...rd of all the local network users These credentials are then used to authenticate the users For example local EAP may use the local user database as its backend database to retrieve user credentials Refer to the Configuring Local EAP section on page 5 38 for more information Note The controller passes client information to the RADIUS authentication server first If the client information does not m...

Страница 218: ...rs that can be added to the local user database the next time the controller reboots The currently configured value appears in parentheses to the right of the field The valid range is 512 to 2048 and the default setting is 512 c Click Apply to commit your changes Step 2 Click Security AAA Local Net Users to open the Local Net Users page see Figure 5 15 Figure 5 15 Local Net Users Page This page li...

Страница 219: ... a new user and you checked the Guest User check box enter the amount of time in seconds that the guest user account is to remain active in the Lifetime field The valid range is 60 to 2 592 000 seconds 30 days inclusive and the default setting is 86 400 seconds Step 8 If you are adding a new user you checked the Guest User check box and you want to assign a QoS role to this guest user check the Gu...

Страница 220: ...onds description description Adds a guest user on a WLAN or wired guest LAN to the local user database on the controller Note Instead of adding a permanent user or a guest user to the local user database from the controller you can choose to create an entry on the RADIUS server for the user and enable RADIUS authentication for the WLAN on which web authentication is performed config netuser delete...

Страница 221: ...text password For example Microsoft Active Directory is not supported because it does not return a clear text password If the LDAP server cannot be configured to return a clear text password LEAP EAP FAST MSCHAPv2 and PEAPv0 MSCHAPv2 are not supported You can configure LDAP through either the GUI or the CLI Using the GUI to Configure LDAP Follow these steps to configure LDAP using the controller G...

Страница 222: ...onymous Step 8 If you chose Authenticated in Step 7 follow these steps a In the Bind Username field enter a username to be used for local authentication to the LDAP server The username can contain up to 80 characters Note If the username starts with cn in lowercase letters the controller assumes that the username includes the entire LDAP database path and therefore does not append the user base DN...

Страница 223: ...s box The database that appears at the top of the right User Credentials box is used when retrieving user credentials Note If both LDAP and LOCAL appear in the right User Credentials box with LDAP on the top and LOCAL on the bottom local EAP attempts to authenticate clients using the LDAP backend database and fails over to the local user database if the LDAP servers are not reachable If the user i...

Страница 224: ...used by local EAP e Click Apply to commit your changes f Click Save Configuration to save your changes Using the CLI to Configure LDAP Use the commands in this section to configure LDAP using the controller CLI Note Refer to the Using the GUI to Configure LDAP section on page 5 33 for the valid ranges and default values of the parameters used in the CLI commands 1 Use these commands to configure a...

Страница 225: ...P attempts to authenticate clients using the LDAP backend database and fails over to the local user database if the LDAP servers are not reachable If the user is not found the authentication attempt is rejected If you enter config local auth user credentials local ldap local EAP attempts to authenticate using only the local user database It does not fail over to the LDAP backend database 3 Optiona...

Страница 226: ...er Index 2 5 To make sure the controller can reach the LDAP server enter this command ping server_ip_address 6 To save your changes enter this command save config 7 To enable or disable debugging for LDAP enter this command debug aaa ldap enable disable Configuring Local EAP Local EAP is an authentication method that allows users and wireless clients to be authenticated locally It is designed for ...

Страница 227: ...US servers first Local EAP is attempted only if no RADIUS servers are found either because the RADIUS servers timed out or no RADIUS servers were configured If four RADIUS servers are configured the controller attempts to authenticate the client with the first RADIUS server then the second RADIUS server and then local EAP If the client attempts to then reauthenticate manually the controller tries ...

Страница 228: ...ackend database make sure that you have properly configured an LDAP server on the controller See the Configuring LDAP section on page 5 33 for instructions Step 4 Follow these steps to specify the order in which user credentials are retrieved from the backend database servers a Click Security Local EAP Authentication Priority to open the Priority Order Local Auth page see Figure 5 22 Figure 5 22 P...

Страница 229: ...ime in seconds in which the controller attempts to send an EAP request to wireless clients using local EAP The valid range is 1 to 120 seconds and the default setting is 30 seconds g In the Request Max Retries field enter the maximum number of times that the controller attempts to retransmit the EAP request to wireless clients using local EAP The valid range is 1 to 120 retries and the default set...

Страница 230: ...name your new profile and then click Apply Note You can enter up to 63 alphanumeric characters for the profile name Make sure not to include spaces d When the Local EAP Profiles page reappears click the name of your new profile The Local EAP Profiles Edit page appears see Figure 5 25 Figure 5 25 Local EAP Profiles Edit Page e Check the LEAP EAP FAST EAP TLS and or PEAP check boxes to specify the E...

Страница 231: ...re mandatory for EAP TLS h If you chose EAP FAST with certificates EAP TLS or PEAP choose which certificates will be sent to the client the ones from Cisco or the ones from another Vendor from the Certificate Issuer drop down box The default setting is Cisco i If you chose EAP FAST with certificates or EAP TLS and want the incoming certificate from the client to be validated against the CA certifi...

Страница 232: ... In the Authority ID Information field enter the authority identifier of the local EAP FAST server in text format f If you want to enable anonymous provisioning check the Anonymous Provision check box This feature allows PACs to be sent automatically to clients that do not have one during PAC provisioning If you disable this feature PACS must be manually provisioned The default setting is enabled ...

Страница 233: ... MSCHAPv2 and PEAPv1 GTC use certificates for authentication and EAP FAST uses either certificates or PACs The controller is shipped with Cisco installed device and Certificate Authority CA certificates However if you wish to use your own vendor specific certificates they must be imported on the controller If you are configuring local EAP to use one of these EAP types make sure that the appropriat...

Страница 234: ...ty request to wireless clients using local EAP The valid range is 1 to 20 retries and the default setting is 20 retries config advanced eap key index index Specifies the key index used for dynamic wired equivalent privacy WEP The default setting is 0 config advanced eap request timeout timeout Specifies the amount of time in seconds in which the controller attempts to send an EAP request to wirele...

Страница 235: ...e enter this command config local auth method fast where is one of the following anon prov enable disable Configures the controller to allow anonymous provisioning which allows PACs to be sent automatically to clients that do not have one during PAC provisioning authority id auth_id Specifies the authority identifier of the local EAP FAST server pac ttl days Specifies the number of days for the PA...

Страница 236: ...ficate is still valid and has not expired Step 10 To enable local EAP and attach an EAP profile to a WLAN enter this command config wlan local auth enable profile_name wlan_id Note To disable local EAP for a WLAN enter this command config wlan local auth disable wlan_id Step 11 To save your changes enter this command save config Step 12 To view information pertaining to local EAP enter these comma...

Страница 237: ... 1 EAPOL Key Max Retries 2 show ap stats wlan Cisco_AP Shows the EAP timeout and failure counters for a specific access point for each WLAN Information similar to the following appears WLAN 1 EAP Id Request Msg Timeouts 0 EAP Id Request Msg Timeouts Failures 0 EAP Request Msg Timeouts 2 EAP Request Msg Timeouts Failures 1 EAP Key Msg Timeouts 0 EAP Key Msg Timeouts Failures 0 WLAN 2 EAP Id Request...

Страница 238: ...extra operating system configuration step enable long preambles The radio preamble sometimes called a header is a section of data at the head of a packet that contains information that wireless devices need when sending and receiving packets Short preambles improve throughput performance so they are enabled by default However some wireless devices such as SpectraLink NetLink phones require long pr...

Страница 239: ...g into the controller CLI Step 2 Enter show 802 11b and check the Short preamble mandatory parameter If the parameter indicates that short preambles are enabled continue with this procedure This example shows that short preambles are enabled Short Preamble mandatory Enabled However if the parameter shows that short preambles are disabled which means that long preambles are enabled the controller i...

Страница 240: ...er wireless you must properly configure the controller using one of these sections Using the GUI to Enable Management over Wireless page 5 52 Using the CLI to Enable Management over Wireless page 5 52 Using the GUI to Enable Management over Wireless Step 1 Click Management Mgmt Via Wireless to open the Management Via Wireless page Step 2 Check the Enable Controller Management to be accessible from...

Страница 241: ...or an illustration of this process Figure 5 28 DHCP Option 82 The access point forwards all DHCP requests from a client to the controller The controller adds the DHCP option 82 payload and forwards the request to the DHCP server The payload can contain the MAC address or the MAC address and SSID of the access point depending on how you configure this option Note In order for DHCP option 82 to oper...

Страница 242: ...d AP Manager Yes Configuring and Applying Access Control Lists An access control list ACL is a set of rules used to limit access to a particular interface for example if you want to restrict a wireless client from pinging the management interface of the controller After ACLs are configured on the controller they can be applied to the management interface the AP manager interface any of the dynamic...

Страница 243: ...hat have been configured for this controller Note If you want to delete an existing ACL hover your cursor over the blue drop down arrow for that ACL and choose Remove Step 2 If you want to see if packets are hitting any of the ACLs configured on your controller check the Enable Counters check box and click Apply Otherwise leave the check box unchecked which is the default value This feature is use...

Страница 244: ...pports up to 64 rules for each ACL These rules are listed in order from 1 to 64 In the Sequence field enter a value between 1 and 64 to determine the order of this rule in relation to any other rules defined for this ACL Note If rules 1 through 4 are already defined and you add rule 29 it is added as rule 5 If you add or change a sequence number for a rule the sequence numbers for other rules adju...

Страница 245: ... of the desired protocol in the Protocol edit box You can find the list of available protocols and their corresponding numbers here http www iana org assignments protocol numbers protocol numbers xml Note The controller can permit or deny only IP packets in an ACL Other types of packets such as ARP packets cannot be specified e If you chose TCP or UDP in the previous step two additional parameters...

Страница 246: ... rules for this ACL See Figure 5 32 Figure 5 32 Access Control Lists Edit Page The Deny Counters field shows the number of times that packets have matched the explicit deny ACL rule The Number of Hits field shows the number of times that packets have matched an ACL rule You must enable ACL counters on the Access Control Lists page to enable these fields Note If you want to edit a rule click the se...

Страница 247: ...n Access Control List to a WLAN page 5 62 Note If you apply an ACL to an interface or a WLAN wireless throughput is degraded when downloading from a 1 Gbps file server To improve throughput remove the ACL from the interface or WLAN move the ACL to a neighboring wired device with a policy rate limiting restriction or connect the file server using 100 Mbps rather than 1 Gbps Applying an Access Contr...

Страница 248: ...ck Apply None is the default value Note See Chapter 3 for more information on configuring controller interfaces Step 4 Click Save Configuration to save your changes Applying an Access Control List to the Controller CPU Follow these steps to apply an ACL to the controller CPU to control traffic to the CPU using the controller GUI Step 1 Choose Security Access Control Lists CPU Access Control Lists ...

Страница 249: ... CPU ACL Enable check box is checked an error message appears indicating that you must choose an ACL Note This parameter is available only if you checked the CPU ACL Enable check box Step 4 From the CPU ACL Mode drop down box choose the type of traffic wired wireless or both that will be restricted from reaching the controller CPU Wired is the default value Note This parameter is available only if...

Страница 250: ...he default value Note See Chapter 6 for more information on configuring WLANs Step 5 Click Apply to commit your changes Step 6 Click Save Configuration to save your changes Applying a Preauthentication Access Control List to a WLAN Follow these steps to apply a preauthentication ACL to a WLAN using the controller GUI Step 1 Click WLANs to open the WLANs page Step 2 Click the ID number of the desir...

Страница 251: ...ppears ACL Counter Status Enabled ACL Name Applied acl1 Yes acl2 Yes acl3 Yes Step 2 To see detailed information for a particular ACL enter this command show acl detailed acl_name Information similar to the following appears Source Destination Source Port Dest Port I Dir IP Address Netmask IP Address Netmask Prot Range Range DSCP Action Counter 1 Any 0 0 0 0 0 0 0 0 0 0 0 0 0 0 0 0 Any 0 65535 0 6...

Страница 252: ...onfig acl rule action acl_name rule_index permit deny change index acl_name old_index new_index destination address acl_name rule_index ip_address netmask destination port range acl_name rule_index start_port end_port direction acl_name rule_index in out any dscp acl_name rule_index dscp protocol acl_name rule_index protocol source address acl_name rule_index ip_address netmask source port range a...

Страница 253: ...r more information on configuring controller interfaces To apply an ACL to the data path enter this command config acl apply acl_name To apply an ACL to the controller CPU to restrict the type of traffic wired wireless or both reaching the CPU enter this command config acl cpu acl_name wired wireless both Note To see the ACL that is applied to the controller CPU enter show acl cpu To remove the AC...

Страница 254: ...nding with valid clients Specifically client MFP encrypts management frames sent between access points and CCXv5 clients so that both the access points and clients can take preventative action by dropping spoofed class 3 management frames that is management frames passed between an access point and a client that is authenticated and associated Client MFP leverages the security mechanisms defined b...

Страница 255: ...gh SNMP traps to the network management system Note Error reports generated on a hybrid REAP access point in stand alone mode cannot be forwarded to the controller and are dropped Note Client MFP uses the same event reporting mechanisms as infrastructure MFP Infrastructure MFP is enabled by default and can be disabled globally When you upgrade from a previous software release infrastructure MFP is...

Страница 256: ...ly for the controller choose Management Frame Protection from the Protection Type drop down box Step 3 Click Apply to commit your changes Note If more than one controller is included in the mobility group you must configure a Network Time Protocol NTP server on all controllers in the mobility group that are configured for infrastructure MFP Step 4 Follow these steps if you want to disable or re en...

Страница 257: ...y to commit your changes Step 5 Follow these steps if you want to disable or re enable infrastructure MFP validation for a particular access point after infrastructure MFP has been enabled globally for the controller a Click Wireless Access Points All APs to open the All APs page b Click the name of the desired access point c Click the Advanced tab The All APs Details for Advanced page appears d U...

Страница 258: ...cture Protection field shows if infrastructure MFP is enabled for individual WLANs The Client Protection field shows if client MFP is enabled for individual WLANs and whether it is optional or required The Infrastructure Validation field shows if infrastructure MFP is enabled for individual access points Using the CLI to Configure MFP Use these commands to configure MFP using the controller CLI 1 ...

Страница 259: ... test1 Enabled Disabled Disabled 2 open Enabled Enabled Required 3 testpsk Enabled Enabled Optional but inactive WPA2 not configured Infra Operational Infra Capability AP Name Validation Radio State Protection Validation mapAP Disabled a Up Full Full b g Up Full Full rootAP2 Enabled a Up Full Full b g Up Full Full HReap Enabled b g Up Full Full a Down Full Full 2 To see the current MFP configurati...

Страница 260: ...rsion 4 0 2 0 Boot Version 2 1 78 0 Mini IOS Version Stats Reporting Period 180 LED State Enabled ILP Pre Standard Switch Disabled ILP Power Injector Disabled Number Of Slots 2 AP Model AP1020 AP Serial Number WCN09260057 AP Certificate Type Manufacture Installed Management Frame Protection Validation Enabled 4 To see whether client MFP is enabled for a specific client enter this command show clie...

Страница 261: ...gging for client MFP messages capwap Configures debugging for MFP messages between the controller and access points detail Configures detailed debugging for MFP messages report Configures debugging for MFP reporting mm Configures debugging for MFP mobility inter controller messages Configuring Client Exclusion Policies Follow these steps to configure the controller to exclude clients under certain...

Страница 262: ... which allows the network to advertise a single SSID but allows specific users to inherit different QoS or security policies based on their user profiles The specific policies that you can control using identity networking include Quality of Service When present in a RADIUS Access Accept the QoS Level value overrides the QoS value specified in the WLAN profile ACL When the ACL attribute is present...

Страница 263: ...rom left to right 0 1 2 3 0 1 2 3 4 5 6 7 8 9 0 1 2 3 4 5 6 7 8 9 0 1 2 3 4 5 6 7 8 9 0 1 Type Length Vendor Id Vendor Id cont Vendor type Vendor length QoS Level Type 26 for Vendor Specific Length 10 Vendor Id 14179 Vendor type 2 Vendor length 4 Value Three octets 0 Bronze Background 1 Silver Best Effort 2 Gold Video 3 Platinum Voice ACL Name This attribute indicates the ACL name to be applied to...

Страница 264: ...ty policy VLAN Tag This attribute indicates the group ID for a particular tunneled session and is also known as the Tunnel Private Group ID attribute This attribute might be included in the Access Request packet if the tunnel initiator can predetermine the group resulting from a particular connection and should be included in the Access Accept packet if this tunnel session is to be treated as belo...

Страница 265: ...ed VLAN by including tunnel attributes within the Access Accept However the IEEE 802 1X Authenticator may also provide a hint as to the VLAN to be assigned to the Supplicant by including Tunnel attributes within the Access Request For use in VLAN assignment the following tunnel attributes are used Tunnel Type VLAN 13 Tunnel Medium Type 802 Tunnel Private Group ID VLANID Note that the VLANID is 12 ...

Страница 266: ...meter using the GUI or CLI Enabling this parameter allows the controller to accept the attributes returned by the RADIUS server The controller then applies these attributes to its clients Updating the RADIUS Server Dictionary File for Proper QoS Values If you are using a Steel Belted RADIUS SBR FreeRadius or similar RADIUS server clients may not obtain the correct QoS values after the AAA override...

Страница 267: ...he vendor ini file in the same directory and add the following text vendor product Cisco WLAN Controller dictionary ciscowlan ignore ports no port number usage per port type help id Step 6 Save and close the vendor ini file Step 7 Start the SBR service or other RADIUS service Step 8 Launch the SBR Administrator or other RADIUS Administrator Step 9 Add a RADIUS client if not already added Choose Ci...

Страница 268: ...ons by hijacking legitimate clients and using plain text or other denial of service or man in the middle attacks That is a hacker can use a rogue access point to capture sensitive information such as usernames and passwords The hacker can then transmit a series of clear to send CTS frames This action mimics an access point informing a particular client to transmit and instructing all others to wai...

Страница 269: ...es that the rogue is on your network you can choose to either manually or automatically contain the detected rogue Classifying Rogue Access Points Controller software release 5 0 or later improves the classification and reporting of rogue access points through the use of rogue states and user defined classification rules that enable rogues to automatically move between states In previous releases ...

Страница 270: ...ven if no rules are configured You can then manually contain the rogue unless you have configured RLDP to automatically contain the rogue which would change the rogue state to Contained If the rogue access point is not on the network the controller marks the rogue state as Alert and you can manually contain the rogue 8 If desired you can manually move the access point to a different classification...

Страница 271: ... Unclassified you must delete the access point and allow the controller to reclassify it Unclassified Pending On first detection the unknown access point is put in the Pending state for 3 minutes During this time the managed access points determine if the unknown access point is a neighbor access point Alert The unknown access point is moved to Alert if it is not in the neighbor list or in the use...

Страница 272: ...cess points categorized as Malicious Alert Threat or Unclassified Alert The controller does not remove rogue entries with the following rogue states Contained Contained Pending Internal and External Configuring RLDP You can configure RLDP to detect and automatically contain rogue devices using the controller GUI or CLI Using the GUI to Configure RLDP Using the controller GUI follow these steps to ...

Страница 273: ...s in the Industrial Scientific and Medical ISM band are open to the public and can be used without a license As such containing devices on another party s network could have legal consequences Rogue on Wire Automatically contains rogues that are detected on the wired network Using Our SSID Automatically contains rogues that are advertising your network s SSID If you leave this parameter unchecked ...

Страница 274: ...er any of these commands the following warning appears Using this feature may have legal consequences Do you want to continue The 2 4 and 5 GHz frequencies in the Industrial Scientific and Medical ISM band are open to the public and can be used without a license As such containing devices on another party s network could have legal consequences config rogue ap rldp enable auto contain Automaticall...

Страница 275: ... that have already been created are listed in priority order The name type and status of each rule is provided Note If you ever want to delete a rule hover your cursor over the blue drop down arrow for that rule and click Remove Step 2 To create a new rule follow these steps a Click Add Rule An Add Rule section appears at the top of the page b In the Rule Name field enter a name for the new rule M...

Страница 276: ...t the SSID and click Remove RSSI Requires that the rogue access point have a minimum received signal strength indication RSSI value For example if the rogue access point has an RSSI that is greater than the configured value then the access point could be classified as malicious If you choose this option enter the minimum RSSI value in the Minimum RSSI field The valid range is 95 to 50 dBm inclusiv...

Страница 277: ...itions configured the rogue access points are never classified as friendly or malicious because one of the conditions can never be met You can add up to six conditions per rule When you add a condition it appears under the Conditions section see Figure 5 44 Figure 5 44 Rogue Rule Edit Page Note If you ever want to delete a condition from this rule hover your cursor over the blue drop down arrow fo...

Страница 278: ...add them to the friendly MAC address list follow these steps a Click Security Wireless Protection Policies Rogue Policies Friendly Rogue to access the Friendly Rogue Create page see Figure 5 46 Figure 5 46 Friendly Rogue Create Page b In the MAC Address field enter the MAC address of the friendly rogue access point c Click Apply to commit your changes d Click Save Configuration to save your change...

Страница 279: ... enter this command config rogue rule condition ap delete ssid all ssid rule_name rssi Requires that the rogue access point have a minimum RSSI value For example if the rogue access point has an RSSI that is greater than the configured value then the access point could be classified as malicious If you choose this option enter the minimum RSSI value for the condition_value parameter The valid rang...

Страница 280: ...d a new friendly access point entry to the friendly MAC address list or delete an existing friendly access point entry from the list enter this command config rogue ap friendly add delete ap_mac_address Step 7 To save your changes enter this command save config Step 8 To view the rogue classification rules that are configured on the controller enter this command show rogue rule summary Information...

Страница 281: ...e used without a license As such containing devices on another party s network could have legal consequences Using the GUI to View and Classify Rogue Devices Using the controller GUI follow these steps to view and classify rogue devices Step 1 Click Monitor Rogues Step 2 Click the following options to view the different types of rogue access points detected by the controller Friendly APs Malicious...

Страница 282: ...ccess point that matches the user defined friendly rules or an existing known and acknowledged rogue access point Friendly access points cannot be contained Malicious An unknown access point that matches the user defined malicious rules or is moved manually by the user from the Friendly or Unclassified classification type Note Once an access point is classified as Malicious you cannot apply rules ...

Страница 283: ...stem administrator for further action This option is available if the Class Type is set to Malicious or Unclassified The bottom of the page provides information on both the access points that detected this rogue access point and any clients that are associated to it To see more details for any of the clients click Edit to open the Rogue Client Detail page Step 6 Click Apply to commit your changes ...

Страница 284: ...ith authorized clients Alert The controller forwards an immediate alert to the system administrator for further action The bottom of the page provides information on the access points that detected this rogue client Step 11 Click Apply to commit your changes Step 12 If desired you can test the controller s connection to this client by clicking Ping Step 13 Click Save Configuration to save your cha...

Страница 285: ...ts Alert The controller forwards an immediate alert to the system administrator for further action Internal The controller trusts this rogue access point External The controller acknowledges the presence of this rogue access point Step 17 From the Maximum Number of APs to Contain the Rogue drop down box choose one of the following options to specify the maximum number of access points used to cont...

Страница 286: ...S sends a command to the controller to add this access point to the rogue ignore list This access point is then ignored in future rogue reports If a user removes an autonomous access point from WCS WCS sends a command to the controller to remove this access point from the rogue ignore list Using the CLI to View and Classify Rogue Devices Using the controller CLI enter these commands to view and cl...

Страница 287: ...er this command show rogue ap unclassified summary Information similar to the following appears Number of APs 164 MAC Address State APs Clients Last Heard 00 0b 85 63 cd bd Alert 1 0 Fri Nov 30 11 12 52 2007 00 0b 85 63 cd e7 Alert 1 0 Fri Nov 30 11 29 01 2007 00 0b 85 63 ce 05 Alert 1 0 Fri Nov 30 11 26 23 2007 00 0b 85 63 ce 07 Alert 1 0 Fri Nov 30 11 26 23 2007 5 To view detailed information fo...

Страница 288: ...gue ap clients ap_mac_address Information similar to the following appears MAC Address State APs Last Heard 00 bb cd 12 ab ff Alert 1 Fri Nov 30 11 26 23 2007 8 To view a list of all rogue clients detected by the controller enter this command show rogue client summary Information similar to the following appears Validate rogue clients against AAA Disabled MAC Address State APs Last Heard 00 0a 8a ...

Страница 289: ...dress Information similar to the following appears Adhoc Rogue MAC address 02 61 ce 8e a8 8c Adhoc Rogue BSSID 02 61 ce 8e a8 8c State Alert First Time Adhoc Rogue was Reported Tue Dec 11 20 45 45 2007 Last Time Adhoc Rogue was Reported Tue Dec 11 20 45 45 2007 Reported By AP 1 MAC Address 00 14 1b 58 4a e0 Name AP0014 1ced 2a60 Radio Type 802 11b SSID rf4k3ap Channel 3 RSSI 56 dBm SNR 15 dB Encry...

Страница 290: ... state is Contain 15 To mark a rogue access point as unclassified enter this command config rogue ap classify unclassified state alert contain ap_mac_address Note A rogue access point cannot be moved to the Unclassified class if its current state is Contain 16 To specify how the controller should respond to a rogue client enter one of these commands config rogue client alert client_mac_address The...

Страница 291: ... information Configuring IDS Sensors You can configure IDS sensors to detect various types of IP level attacks in your network When the sensors identify an attack they can alert the controller to shun the offending client When you add a new IDS sensor you register the controller with that IDS sensor so that the controller can query the sensor to get the list of shunned clients You can configure ID...

Страница 292: ...tep 6 In the Username field enter the name that the controller uses to authenticate to the IDS sensor Note This username must be configured on the IDS sensor and have at least a read only privilege Step 7 In the Password and Confirm Password fields enter the password that the controller uses to authenticate to the IDS sensor Step 8 In the Query Interval field enter the time in seconds for how ofte...

Страница 293: ... the port number parameter you can enter a value between 1 and 65535 The default value is 443 This step is optional because Cisco recommends that you use the default value of 443 The sensor uses this value to communicate by default Step 3 To specify how often the controller should query the IDS server for IDS events enter this command config wps cids sensor interval index interval For the interval...

Страница 294: ...n list and the foreign controller removes the client The next time the client tries to connect to a controller the anchor controller rejects the handoff and informs the foreign controller that the client is being excluded See Chapter 12 for more information on mobility groups You can view the list of clients that the IDS sensors have identified to be shunned through either the GUI or the CLI Using...

Страница 295: ...roup for the shun list enter this command config wps shun list re sync Configuring IDS Signatures You can configure IDS signatures or bit pattern matching rules used to identify various types of attacks in incoming 802 11 packets on the controller When the signatures are enabled the access points joined to the controller perform signature analysis on the received 802 11 data or management frames a...

Страница 296: ...fies the wireless client and alerts the controller The NULL probe response signatures include NULL probe resp 1 precedence 2 NULL probe resp 2 precedence 3 Management frame flood signatures During a management frame flood attack a hacker floods an access point with 802 11 management frames The result is a denial of service to all clients associated or attempting to associate to the access point Th...

Страница 297: ...is attached If NetStumbler succeeds in authenticating and associating to an access point it sends a data frame with the following strings depending on the NetStumbler version When a NetStumbler signature is used to detect such an attack the access point identifies the offending device and alerts the controller The NetStumbler signatures include NetStumbler 3 2 0 precedence 13 NetStumbler 3 2 3 pre...

Страница 298: ... Cisco WCS because the WCS built in TFTP server and the third party TFTP server require the same communication port Step 3 If you are downloading a custom signature file sig copy it to the default directory on your TFTP server Step 4 Click Commands to open the Download File to Controller page see Figure 5 57 Figure 5 57 Download File to Controller Page Step 5 Perform one of the following If you wa...

Страница 299: ...ile called ids1 the controller automatically generates and uploads both ids1_std sig and ids1_custom sig to the TFTP server If desired you can then modify ids1_custom sig on the TFTP server making sure to set Revision custom and download it by itself Step 12 If you are using an FTP server follow these steps a In the Server Login Username field enter the username to log into the FTP server b In the...

Страница 300: ...e possible action are None and Report The state of the signature which indicates whether the signature is enabled to detect security attacks A description of the type of attack that the signature is trying to detect Step 2 Perform one of the following If you want to allow all signatures both standard and custom whose individual states are set to Enabled to remain enabled check the Enable Check for...

Страница 301: ...are tracked and reported on a per signature and per channel basis as well as on a per MAC address and per channel basis The pattern that is being used to detect a security attack Step 5 In the Measurement Interval field enter the number of seconds that must elapse before the signature frequency threshold is reached within the configured interval The range is 1 to 3600 seconds and the default value...

Страница 302: ...events using the controller GUI Step 1 Click Security Wireless Protection Policies Signature Events Summary The Signature Events Summary page appears see Figure 5 60 Figure 5 60 Signature Events Summary Page This page shows the number of attacks detected by the enabled signatures Step 2 To see more information on the attacks detected by a particular signature click the signature type link for that...

Страница 303: ...me when the access point reported the attack Using the CLI to Configure IDS Signatures Follow these steps to configure IDS signatures using the controller CLI Step 1 If desired create your own custom signature file Step 2 Make sure that you have a TFTP server available See the guidelines for setting up a TFTP server in Step 2 of the Using the GUI to Upload or Download IDS Signatures section on pag...

Страница 304: ...e varies per signature Step 11 To specify the number of matching packets per interval that must be identified at the individual access point level before an attack is detected enter this command config wps signature frequency signature_id frequency The range is 1 to 32 000 packets per interval and the default value varies per signature Step 12 To specify the number of matching packets per interval...

Страница 305: ...ailures Enabled Excessive 802 11 authentication failures Enabled Excessive 802 1x authentication Enabled IP theft Enabled Excessive Web authentication failure Enabled Signature Policy Signature Processing Enabled Note If IDS signature processing is disabled all signatures are disabled regardless of the state configured for individual signatures 2 To see individual summaries of all of the standard ...

Страница 306: ...03 04 01 Per Signature 4 3 Tue Dec 6 00 17 44 2005 00 01 02 03 04 01 Per Mac 6 2 Tue Dec 6 00 30 04 2005 5 To see information on attacks that are tracked by access points on a per signature and per channel basis enter this command show wps signature events standard custom precedence detailed per signature source_mac 6 To see information on attacks that are tracked by access points on an individual...

Страница 307: ...ead WCS forwards the profile configuration to the wIPS service which in turn forwards the profile to the controller The profile is stored in flash memory on the controller and sent to access points when they join the controller When an access point disassociates and joins another controller it receives the wIPS profile from the new controller Access points in monitor mode periodically send alarms ...

Страница 308: ...wed in the access point s country of operation The 802 11a or 802 11b Monitor Channels field in the output of the show advanced 802 11a 802 11b monitor command shows the monitor configuration channel set Default 802 11b AP monitoring 802 11b Monitor Mode enable 802 11b Monitor Channels Country channels 802 11b AP Coverage Interval 180 seconds 802 11b AP Load Interval 60 seconds 802 11b AP Noise In...

Страница 309: ... NA NA 3 To view the wIPS configuration forwarded by WCS to the controller enter this command show wps wips summary Information similar to the following appears Policy Name Default Policy Version 3 4 To view the current state of wIPS operation on the controller enter this command show wps wips statistics Information similar to the following appears Policy Assignment Requests 1 Policy Assignment Re...

Страница 310: ...ase Entries You can use the controller GUI or CLI to specify the maximum local database entries used for storing user authentication information The information in the database is used in conjunction with the controller s web authentication feature Using the GUI to Configure Maximum Local Database Entries Follow these steps to configure a controller to use the maximum local database entries using ...

Страница 311: ...troller Configuration Guide OL 17037 01 6 Configuring WLANsWireless Device Access This chapter describes how to configure up to 512 WLANs for your Cisco UWN Solution It contains these sections WLAN Overview page 6 2 Configuring WLANs page 6 2 ...

Страница 312: ...fer to the Creating Access Point Groups section on page 6 44 for more information on access point groups Note Controller software releases prior to 5 2 support up to only 16 WLANs Cisco does not support downgrading the controller from software release 5 2 to a previous release as inconsistencies might occur for WLANs and wired guest LANs As a result you would need to reconfigure your WLAN mobility...

Страница 313: ...ontroller to access Creating WLANs with the same SSID enables you to assign different Layer 2 security policies within the same wireless LAN To distinguish among WLANs with the same SSID you must create a unique profile name for each WLAN WLANs with the same SSID must have unique Layer 2 security policies so that clients can make a WLAN selection based on information advertised in beacon and probe...

Страница 314: ...er your cursor over the blue drop down arrow for that WLAN and choose Remove or check the check box to the left of the WLAN choose Remove Selected from the drop down box and click Go A message appears asking you to confirm your decision If you proceed the WLAN is removed from any access point group to which it is assigned and from the access point s radio Step 2 To create a new WLAN choose Create ...

Страница 315: ... Step 8 Use the parameters on the General Security QoS and Advanced tabs to configure this WLAN Refer to the sections in the rest of this chapter for instructions on configuring specific features for WLANs Step 9 On the General tab check the Status check box to enable this WLAN Be sure to leave it unchecked until you have finished making configuration changes to the WLAN Note You can also enable o...

Страница 316: ...r this command config wlan disable wlan_id foreign_ap all where wlan_id is a WLAN ID between 1 and 512 inclusive foreign_ap is a third party access point and all is all WLANs Note If the management and AP manager interfaces are mapped to the same port and are members of the same VLAN you must disable the WLAN before making a port mapping change to either interface If the management and AP manager ...

Страница 317: ...sed on profile name check the Profile Name check box and enter the desired profile name in the edit box To search for WLANs based on SSID check the SSID check box and enter the desired SSID in the edit box To search for WLANs based on their status check the Status check box and choose Enabled or Disabled from the drop down box To close the Search WLANs window without making any changes click the X...

Страница 318: ...cal subnet broadcast DNS priming or over the air discovery Note Refer to Chapter 7 or the Controller Deployment Guide at this URL for more information on how access points find controllers http www cisco com en US products ps6366 prod_technical_reference_list html External DHCP Servers The operating system is designed to appear as a DHCP Relay to the network and as a DHCP server to clients with in...

Страница 319: ...ic IP address or obtaining an IP address from a designated DHCP server You are also allowed to create separate WLANs with DHCP Addr Assignment Required disabled then define the primary secondary DHCP server as 0 0 0 0 on the interface assigned to the WLAN These WLANs drop all DHCP requests and force clients to use a static IP address Note that these WLANs do not support management over wireless co...

Страница 320: ...eral tab check the Status check box and click Apply to re enable the WLAN Step 12 Click Save Configuration to save your changes Using the CLI to Configure DHCP Follow these steps to configure DHCP using the CLI Step 1 Follow the instructions in the Using the GUI to Configure the Management AP Manager Virtual and Service Port Interfaces section on page 3 11 or Using the GUI to Configure Dynamic Int...

Страница 321: ...ovide a range of IP addresses DHCP scopes are needed for internal DHCP to work Once DHCP is defined on the controller we can then point the primary DHCP server IP address on the management AP manager and dynamic interfaces to controller s management interface You can configure up to 16 DHCP scopes using the controller GUI or CLI Using the GUI to Configure DHCP Scopes Follow these steps to configur...

Страница 322: ...ep 9 In the Lease Time field enter the amount of time from 0 to 65536 seconds that an IP address is granted to a client Step 10 In the Default Routers field enter the IP address of the optional router s connecting the controllers Each router must include a DHCP forwarding agent which allows a single controller to serve the clients of multiple controllers Step 11 In the DNS Domain Name field enter ...

Страница 323: ...ool scope start end Note This pool must be unique for each DHCP scope and must not include the static IP addresses of routers or other servers Step 3 To specify the network served by this DHCP scope the IP address used by the management interface with Netmask applied and the subnet mask assigned to all wireless clients enter this command config dhcp network scope network netmask Step 4 To specify ...

Страница 324: ...10 To save your changes enter this command save config Step 11 To see the list of configured DHCP scopes enter this command show dhcp summary Information similar to the following appears Scope Name Enabled Address Range Scope 1 No 0 0 0 0 0 0 0 0 Scope 2 No 0 0 0 0 0 0 0 0 Step 12 To display the DHCP information for a particular scope enter this command show dhcp scope Information similar to the f...

Страница 325: ...nter config macfilter ip address mac_addr IP_addr to assign an IP address to an existing MAC filter entry if one was not assigned in the config macfilter add command Enter show macfilter to verify that MAC addresses are assigned to the WLAN Configuring a Timeout for Disabled Clients You can configure a timeout for disabled clients Clients who fail to authenticate three times when attempting to ass...

Страница 326: ...t to listen for broadcasts and multicasts less frequently resulting in longer battery life For instance if the beacon period is 100 ms and the DTIM value is set to 100 the access point transmits buffered broadcast and multicast frames once every 10 seconds allowing the power saving clients to sleep longer before they have to wake up and listen for broadcasts and multicasts resulting in longer batt...

Страница 327: ...re the DTIM Period Using the CLI follow these steps to configure the DTIM period for a WLAN Step 1 To disable the WLAN enter this command config wlan disable wlan_id Step 2 To configure the DTIM period for either the 802 11a n or 802 11b g n radio network on a specific WLAN enter this command config wlan dtim 802 11a 802 11b dtim wlan_id where dtim is a value between 1 and 255 inclusive The defaul...

Страница 328: ...ard packets out the same port on which they are received In controller software release 4 2 or later peer to peer blocking is applied to individual WLANs and each client inherits the peer to peer blocking setting of the WLAN to which it is associated In 4 2 or later you also have more control over how traffic is directed For example you can choose to have traffic bridged locally within the control...

Страница 329: ...l peer to peer blocking each WLAN is configured with the peer to peer blocking action of forwarding traffic to the upstream VLAN Using the GUI to Configure Peer to Peer Blocking Follow these steps to configure a WLAN for peer to peer blocking using the GUI Step 1 Click WLANs to open the WLANs page Step 2 Click the ID number of the WLAN for which you want to configure peer to peer blocking Step 3 C...

Страница 330: ...ng the GUI to Configure Peer to Peer Blocking section above Step 2 To save your changes enter this command save config Step 3 To see the status of peer to peer blocking for a WLAN enter this command show wlan wlan_id Information similar to the following appears WLAN Identifier 1 Profile Name test Network Name SSID test Status Enabled Peer to Peer Blocking Action Disabled Radio Policy All Local EAP...

Страница 331: ...nd Authorization Controllers can control 802 1X dynamic WEP keys using Extensible Authentication Protocol EAP across access points and support 802 1X dynamic key settings for WLANs Note To use LEAP with lightweight access points and wireless clients make sure to choose Cisco Aironet as the RADIUS server type when configuring the CiscoSecure Access Control Server ACS Enter show wlan wlan_id to chec...

Страница 332: ...erver such as a RADIUS server to which the access point communicates over the wired network If 802 1X is selected only 802 1X clients are supported PSK When you choose PSK also known as WPA pre shared key or WPA passphrase you need to configure a pre shared key or a passphrase This key is used as the pairwise master key PMK between the clients and the authentication server CCKM Cisco Centralized K...

Страница 333: ... open the WLANs page Step 2 Click the ID number of the desired WLAN to open the WLANs Edit page Step 3 Click the Security and Layer 2 tabs to open the WLANs Edit Security Layer 2 page see Figure 6 11 Figure 6 11 WLANs Edit Security Layer 2 Page Step 4 Choose WPA WPA2 from the Layer 2 Security drop down box Step 5 Under WPA WPA2 Parameters check the WPA Policy check box to enable WPA1 check the WPA...

Страница 334: ...le AES or TKIP data encryption for WPA1 or WPA2 config wlan security wpa wpa1 ciphers aes tkip enable disable wlan_id config wlan security wpa wpa2 ciphers aes tkip enable disable wlan_id The default values are TKIP for WPA1 and AES for WPA2 Step 6 Enter this command to enable or disable 802 1X PSK or CCKM authenticated key management config wlan security wpa akm 802 1X psk cckm enable disable wla...

Страница 335: ...negotiation bits key permutation and multi modular hash message integrity check MMH MIC Key permutation is a data encryption technique that uses the basic encryption key and the current initialization vector IV to create a new key MMH MIC prevents bit flip attacks on encrypted packets by using a hash function to compute message integrity code The CKIP settings specified in a WLAN are mandatory for...

Страница 336: ...ain 5 ASCII text characters or 10 hexadecimal characters 104 bit keys must contain 13 ASCII text characters or 26 hexadecimal characters Step 12 Check the MMH Mode check box to enable MMH MIC data protection for this WLAN The default value is disabled or unchecked Step 13 Check the Key Permutation check box to enable this form of CKIP data protection The default value is disabled or unchecked Step...

Страница 337: ...rization Using the GUI to Configure a Session Timeout Using the controller GUI follow these steps to configure a session timeout for wireless clients on a WLAN Step 1 Click WLANs to open the WLANs page Step 2 Click the ID number of the WLAN for which you want to assign a session timeout Step 3 When the WLANs Edit page appears click the Advanced tab The WLANs Edit Advanced page appears Step 4 To co...

Страница 338: ...f 0 is equivalent to no timeout Note When using WPA1 or WPA2 if the timeout is set to infinite the clients still reauthenticate at a frequency of 12 hours The workaround is to enable the AAA override and push through the radius server a longer session timeout period The timeout period can be longer than one day which is the maximum period you can manually configure Step 2 To save your changes ente...

Страница 339: ... drop down box Step 5 In the VPN Gateway Address field enter the IP address of the gateway router that is terminating the VPN tunnels initiated by the client and passed through the controller Step 6 Click Apply to commit your changes Step 7 Click Save Configuration to save your settings Using the CLI to Configure VPN Passthrough Enter these commands to configure a WLAN for VPN passthrough using th...

Страница 340: ...Using the GUI to Configure Web Authentication Follow these steps to configure a WLAN for web authentication using the controller GUI Step 1 Click WLANs to open the WLANs page Step 2 Click the ID number of the WLAN for which you want to configure web authentication The WLANs Edit page appears Step 3 Click the Security and Layer 3 tabs to open the WLANs Edit Security Layer 3 page Step 4 Check the We...

Страница 341: ...rofiles using the instructions in the Using the GUI to Configure QoS Profiles section on page 4 45 Step 2 Click WLANs to open the WLANs page Step 3 Click the ID number of the WLAN to which you want to assign a QoS profile Step 4 When the WLANs Edit page appears click the QoS tab Step 5 From the Quality of Service QoS drop down box choose one of the following Platinum voice Gold video Silver best e...

Страница 342: ...nformation similar to the following appears WLAN Identifier 1 Profile Name test Network Name SSID test Status Enabled MAC Filtering Disabled Broadcast SSID Enabled AAA Policy Override Disabled Number of Active Clients 0 Exclusionlist Disabled Session Timeout 0 Interface management WLAN ACL unconfigured DHCP Server 1 100 163 24 DHCP Address Assignment Required Disabled Quality of Service Silver bes...

Страница 343: ...on and advertised by the client device these are typically older 7920 phones Support for 7920 phones that require CAC to be configured on and advertised by the access point these are typically newer 7920 phones When access point controlled CAC is enabled the access point sends out a Cisco proprietary CAC Information Element IE and does not send out the standard QBSS IE You can use the controller G...

Страница 344: ... Guidelines for Using 7921 and 7920 Wireless IP Phones Follow these guidelines to use Cisco 7921 and 7920 Wireless IP Phones with controllers Aggressive load balancing must be disabled for each controller Otherwise the initial roam attempt by the phone may fail causing a disruption in the audio path The Dynamic Transmit Power Control DTPC information element IE must be enabled using the config 802...

Страница 345: ...nt to enable WMM mode for 7921 phones and other devices that meet the WMM standard Disabled Disables WMM on the WLAN This is the default value Allowed Allows client devices to use WMM on the WLAN Required Requires client devices to use WMM Devices that do not support WMM cannot join the WLAN Step 5 Check the 7920 AP CAC check box if you want to enable 7920 support mode for phones that require acce...

Страница 346: ...upport client cac limit enable disable wlan_id Note You cannot enable both WMM mode and client controlled CAC mode on the same WLAN Step 5 To enable or disable 7920 support mode for phones that require access point controlled CAC enter this command config wlan 7920 support ap cac limit enable disable wlan_id Step 6 To re enable the WLAN enter this command config wlan enable wlan_id Step 7 To save ...

Страница 347: ...ging If symmetric mobility tunneling is enabled all IPv4 traffic is bidirectionally tunneled to and from the client but the IPv6 client traffic is bridged locally In controller software release 4 2 or later you can enable IPv6 bridging and IPv4 web authentication on the same WLAN a combination that previously was not supported The controller bridges IPv6 traffic from all clients on the WLAN while ...

Страница 348: ...from the Clients Detail page on the GUI or from the show client detail CLI command Using the GUI to Configure IPv6 Bridging Follow these steps to configure a WLAN for IPv6 bridging using the GUI Step 1 Click WLANs to open the WLANs page Step 2 Click the ID number of the desired WLAN to open the WLANs Edit page Step 3 Click the Advanced tab to open the WLANs Edit Advanced tab page see Figure 6 16 W...

Страница 349: ...not including those related to increased security enhanced performance fast roaming and superior power management The 4 2 or later release of controller software supports CCX versions 1 through 5 which enables controllers and their access points to communicate wirelessly with third party client devices that support CCX CCX support is enabled automatically for every WLAN on the controller and canno...

Страница 350: ...his check box The default value is enabled or checked Step 5 Click Apply to commit your changes Step 6 Click Save Configuration to save your changes Using the GUI to View a Client s CCX Version A client device sends its CCX version in association request packets to the access point The controller then stores the client s CCX version in its database and uses it to limit the features for this client...

Страница 351: ...figuring WLANs Figure 6 17 Clients Detail Page The CCX Version field shows the CCX version supported by this client device Not Supported appears if the client does not support CCX Step 3 Click Back to return to the previous screen Step 4 Repeat this procedure to view the CCX version supported by any other client devices ...

Страница 352: ...ts to better manage your wireless network In a typical deployment all users on a WLAN are mapped to a single interface on the controller Therefore all users associated with that WLAN are on the same subnet or VLAN However you can choose to distribute the load among several interfaces or to a group of users based on specific criteria such as individual departments such as Marketing by creating acce...

Страница 353: ...d each is a member of a different VLAN but all are members of the same SSID A client within the wireless SSID is assigned an IP address from the VLAN subnet on which its access point is a member For example any user that associates with an access point that is a member of access point group VLAN 61 is assigned an IP address from that subnet In the example in Figure 6 18 the controller internally t...

Страница 354: ...joined the controller you can create up to 150 access point groups and assign up to 16 WLANs to each group Each access point advertises only the enabled WLANs that belong to its access point group The access point does not advertise disabled WLANs in its access point group or WLANs that belong to another group Note If you clear the configuration on the controller all of the access point groups dis...

Страница 355: ...ction appears at the top of the page Step 3 In the AP Group Name field enter the group s name Step 4 In the Description field enter the group s description Step 5 Click Add The newly created access point group appears in the list of access point groups on the AP Groups page Note If you ever want to delete this group hover your cursor over the blue drop down arrow for the group and choose Remove A ...

Страница 356: ...ed which is the default value Refer to the Configuring NAC Out of Band Integration section on page 6 55 for more information on NAC Step 13 Click Add to add this WLAN to the access point group This WLAN appears in the list of WLANs that are assigned to this access point group Note If you ever want to remove this WLAN from the access point group hover your cursor over the blue drop down arrow for t...

Страница 357: ...drop down box and click Apply Step 17 Click Save Configuration to save your changes Using the CLI to Create Access Point Groups Using the controller CLI follow these steps to create access point groups Step 1 To create an access point group enter this command config wlan apgroup add group_name Note To delete an access point group enter this command config wlan apgroup delete group_name A warning m...

Страница 358: ... wlan apgroups Information similar to the following appears Site Name AP2 Site Description Access Point 2 WLAN ID Interface Network Admission Control 1 management Disabled 2 management Disabled 3 management Disabled 4 management Disabled 9 management Disabled 10 management Disabled 11 management Disabled 12 management Disabled 13 management Disabled 14 management Disabled 15 management Disabled 16...

Страница 359: ...he redirect page and the conditions under which the redirect occurs on your RADIUS server Conditions might include the user s password reaching expiration or the user needing to pay his or her bill for continued usage If the RADIUS server returns the Cisco AV pair url redirect then the user is redirected to the specified URL upon opening a browser If the server also returns the Cisco AV pair url r...

Страница 360: ...ized at this point and is allowed to pass traffic even if the RADIUS server does not return a url redirect Note The splash page web redirect feature is available only for WLANs that are configured for 802 1X or WPA WPA2 Layer 2 security After you configure the RADIUS server you can then configure the splash page web redirect on the controller using either the controller GUI or CLI Configuring the ...

Страница 361: ...nfiguring conditional web redirect the conditions under which the redirect takes place respectively url redirect http url url redirect acl acl_name Using the GUI to Configure Web Redirect Using the controller GUI follow these steps to configure conditional or splash page web redirect Step 1 Click WLANs to open the WLANs page Step 2 Click the ID number of the desired WLAN The WLANs Edit page appear...

Страница 362: ...lt value is disabled for both parameters Step 10 If the user is to be redirected to a site external to the controller choose the ACL that was configured on your RADIUS server from the Preauthentication ACL drop down list Step 11 Click Apply to commit your changes Step 12 Click Save Configuration to save your changes Using the CLI to Configure Web Redirect Using the controller CLI follow these step...

Страница 363: ... Redirect Enabled Disabling Accounting Servers per WLAN This section provides instructions for disabling all accounting servers on a WLAN Disabling accounting servers disables all accounting operations and prevents the controller from falling back to the default RADIUS server for the WLAN Follow these steps to disable all accounting servers for a RADIUS authentication server Step 1 Click WLANs to ...

Страница 364: ... In software release 5 2 you can disable coverage hole detection on a per WLAN basis When you disable coverage hole detection on a WLAN a coverage hole alert is still sent to the controller but no other processing is done to mitigate the coverage hole This feature is useful for guest WLANs where guests are connected to your network for short periods of time and are likely to be highly mobile Using...

Страница 365: ...ard certain types of access in band for supporting wireless users and out of band for supporting wired users for example In controller software releases prior to 5 1 the controller integrates with the NAC appliance only in in band mode where the NAC appliance must remain in the data path For in band mode a NAC appliance is required at each authentication location such as at each branch or for each...

Страница 366: ...f band integration The NAC appliance supports up to 3500 users and the controller supports up to 5000 users Therefore multiple NAC appliances might need to be deployed CCA software release 4 5 or later is required for NAC out of band integration Because the NAC appliance supports static VLAN mapping you must configure a unique quarantine VLAN for each interface configured on the controller For exa...

Страница 367: ...occurs in the quarantine VLAN To use external web authentication you must configure the NAC appliance to allow HTTP traffic to and from external web servers and to allow the redirect URL in the quarantine VLAN Note Refer to the Cisco NAC appliance configuration guides for configuration instructions http www cisco com en US products ps6128 products_installation_and_configuration_gu ides_list html U...

Страница 368: ...quarantine VLAN if there is only one NAC appliance in the network If multiple controllers are configured in the same mobility group and access interfaces on all controllers are in different subnets it is mandatory to have different quarantine VLANs if there is only one NAC appliance in the network g Configure any remaining fields for this interface such as the IP address netmask and default gatewa...

Страница 369: ...ck box unchecked which is the default value e Click Apply to commit your changes Step 3 To configure NAC out of band support for a specific access point group follow these steps a Click WLANs Advanced AP Groups to open the AP Groups page see Figure 6 30 Figure 6 30 AP Groups Page b Click the name of the desired access point group c Click the WLANs tab to open the AP Groups Edit WLANs page d Click ...

Страница 370: ...emove this WLAN from the access point group hover your cursor over the blue drop down arrow for the WLAN and choose Remove Step 4 Click Save Configuration to save your changes Step 5 To see the current state of the client either Quarantine or Access follow these steps a Click Monitor Clients to open the Clients page b Click the MAC address of the desired client to open the Clients Detail page The ...

Страница 371: ... this command save config Step 5 To see the configuration of a WLAN or guest LAN including the NAC state enter this command show wlan wlan_ id guest lan guest_lan_id Information similar to the following appears WLAN Identifier 1 Profile Name wlan Network Name SSID wlan Status Disabled MAC Filtering Disabled Broadcast SSID Enabled AAA Policy Override Disabled Network Admission Control NAC State Ena...

Страница 372: ...6 62 Cisco Wireless LAN Controller Configuration Guide OL 17037 01 Chapter 6 Configuring WLANsWireless Device Access Configuring WLANs ...

Страница 373: ...to Lightweight Mode page 7 16 Cisco Workgroup Bridges page 7 34 Configuring Backup Controllers page 7 41 Configuring Failover Priority for Access Points page 7 46 Configuring Country Codes page 7 49 Migrating Access Points from the J Regulatory Domain to the U Regulatory Domain page 7 55 Using the W56 Band in Japan page 7 58 Dynamic Frequency Selection page 7 58 Optimizing RFID Tracking on Access ...

Страница 374: ... Aironet 1140 Series Access Point which supports only CAPWAP and therefore joins only controllers running CAPWAP For example an 1130 series access point can join a controller running either CAPWAP or LWAPP whereas an 1140 series access point can join only a controller running CAPWAP Guidelines for Using CAPWAP Follow these guidelines when using CAPWAP If your firewall is currently configured to al...

Страница 375: ...ler discovery processes Layer 3 CAPWAP or LWAPP discovery Can occur on different subnets from the access point and uses IP addresses and UDP packets rather the MAC addresses used by Layer 2 discovery Over the air provisioning OTAP This feature is supported by Cisco 4400 series controllers If this feature is enabled on the controller on the controller General page all associated access points trans...

Страница 376: ...ode check box c Click Apply to commit your changes d Click Save Configuration to save your changes Step 2 Optional Flush the ARP and MAC address tables within the network infrastructure Ask your network administrator for more information about this step Step 3 Restart the access points Step 4 Once all the access points have joined the new controller configure the controller not to be a master cont...

Страница 377: ...wap info enable disable Enables or disables debugging of CAPWAP information debug capwap packet enable disable Enables or disables debugging of CAPWAP packets debug capwap payload enable disable Enables or disables debugging of CAPWAP payloads debug capwap hexdump enable disable Enables or disables debugging of the CAPWAP hexadecimal dump Configuring Global Credentials for Access Points Cisco IOS ...

Страница 378: ... point retains the global username and password configured for the first controller Note You need to keep careful track of the credentials used by the access points Otherwise you might not be able to log into an access point s console port If you ever need to return the access points to the default Cisco Cisco username and password you must clear the controller s configuration and the access point...

Страница 379: ...ame password and enable password to this access point Follow these steps to do so a Click Access Points All APs to open the All APs page b Click the name of the access point for which you want to override the global credentials c Click the Credentials tab The All APs Details for Credentials page appears see Figure 7 2 Figure 7 2 All APs Details for Credentials Page d Check the Over ride Global Cre...

Страница 380: ...t enable_password Cisco_AP The credentials that you enter in this command are retained across controller and access point reboots and if the access point joins a new controller Note If you ever want to force this access point to use the controller s global credentials enter this command config ap mgmtuser delete Cisco_AP The following message appears after you execute this command AP reverted to g...

Страница 381: ...is not supported Note In hybrid REAP mode you cannot configure local switching with 802 1X authentication you can configure central switching only All Cisco switches that support authentication Note Refer to the Release Notes for Cisco Wireless LAN Controllers and Lightweight Access Points for Release 5 2 for a list of supported switch hardware and minimum supported software You can configure glob...

Страница 382: ...e GUI to Configure Authentication for Access Points section on page 7 10 or the Using the CLI to Configure Authentication for Access Points section on page 7 12 for information on configuring authentication on the controller 5 Configure the switch to allow authentication See the Configuring the Switch for Authentication section on page 7 14 for information on configuring the switch for authenticat...

Страница 383: ...our changes Step 7 If desired you can choose to override the global authentication settings and assign a unique username and password to a specific access point Follow these steps to do so a Click Access Points All APs to open the All APs page b Click the name of the access point for which you want to override the authentication settings c Click the Credentials tab to open the All APs Details for ...

Страница 384: ...r the password parameter Strong passwords have the following characteristics They are at least eight characters long They contain a combination of upper and lowercase letters numbers and symbols They are not a word in any language Step 2 If desired you can choose to override the global authentication settings and assign a unique username and password to a specific access point To do so enter this ...

Страница 385: ...enter this command show ap summary Information similar to the following appears Number of APs 1 Global AP User Name globalap Global AP Dot1x User Name globalDot1x Note If global authentication settings are not configured the Global AP Dot1x User Name field shows Not Configured Step 6 To view the authentication settings for a specific access point enter this command show ap config general Cisco_AP ...

Страница 386: ...rate as an autonomous access point that is configured and managed locally or it can operate as a centrally managed access point utilizing the CAPWAP or LWAPP protocol The AP801 is preloaded with both an autonomous Cisco IOS release and a recovery image for the unified mode Note Before you use an AP801 Series Lightweight Access Point with controller software release 5 2 you must upgrade the softwar...

Страница 387: ...ration from the controller The router can provide DHCP server functionality the DHCP pool to reach the controller and setup option 43 for the controller IP address in the DHCP pool configuration Use the following configuration to perform this task ip dhcp pool pool_name network ip_address subnet_mask dns server ip_address default router ip_address option 43 hex controller_ip_address_in_hex Example...

Страница 388: ...Cisco wireless LAN controllers and cannot communicate with WDS devices However the controller provides functionality equivalent to WDS when the access point associates to it In controller software release 4 2 or later all Cisco lightweight access points support 16 BSSIDs per radio and a total of 16 wireless LANs per access point In previous releases they supported only 8 BSSIDs per radio and a tot...

Страница 389: ...t name Step 3 Wait until the access point reboots and reconfigure the access point using the CLI or GUI Using the MODE Button and a TFTP Server to Return to a Previous Release Follow these steps to revert from lightweight mode to autonomous mode by using the access point MODE reset button to load a Cisco IOS release from a TFTP server Step 1 The PC on which your TFTP server software runs must be c...

Страница 390: ...s on a priori provisioning of the X 509 certificates Cisco Aironet access points shipped before July 18 2005 do not have a MIC so these access points create an SSC when upgraded to operate in lightweight mode Controllers are programmed to accept local SSCs for authentication of specific access points and do not forward those authentication requests to a RADIUS server This behavior is acceptable an...

Страница 391: ...ntroller acts as a CA proxy and receives the certRequest signed by the CA for the access point Note Access points that are configured for bridge mode are not supported Using the GUI to Configure LSC Using the controller GUI follow these steps to enable the use of LSC on the controller Step 1 Click Security Certificate LSC to open the Local Significant Certificates LSC page see Figure 7 5 Figure 7 ...

Страница 392: ... 10 Click Apply to commit your changes Using the CLI to Configure LSC Using the controller CLI follow these steps to enable the use of LSC on the controller Step 1 To enable LSC on the system enter this command config certificate lsc enable disable Step 2 To configure the URL to the CA server enter this command config certificate lsc ca server http url port path where url can be either a domain na...

Страница 393: ...ig certificate lsc ap provision revert cert retries where retries is a value from 0 to 255 and the default value is 3 If you set the number of retries to a non zero value and the access point fails to join the controller using an LSC after the configured number of retries the access point reverts to the default certificate If you set the number of retries to 0 and the access point fails to join th...

Страница 394: ...o open the AP Policies page see Figure 7 6 Figure 7 6 AP Policies Page Step 2 If you want the access point to accept self signed certificates SSCs manufactured installed certificates MICs or local significant certificates LSCs check the appropriate check box Step 3 If you want the access points to be authorized using a AAA RADIUS server check the Authorize MIC APs against auth list or AAA check bo...

Страница 395: ... enable disable Step 2 To configure an access point to accept manufactured installed certificates MICs self signed certificates SSCs or local significant certificates LSCs enter this command config auth list ap policy mic ssc lsc enable disable Step 3 To add an access point to the authorization list enter this command config auth list add mic ssc lsc ap_mac ap_key where ap_key is an optional key h...

Страница 396: ...ware release 5 2 enables you to configure the access points to send all CAPWAP related errors to a syslog server You do not need to enable any debug commands on the controller because all of the CAPWAP error messages can be viewed from the syslog server itself The state of the access point is not maintained on the controller until it receives a CAPWAP join request from the access point Therefore i...

Страница 397: ...ver_IP_address When the access point joins a controller for the first time the controller pushes the global syslog server IP address the default is 255 255 255 255 to the access point After that the access point sends all syslog messages to this IP address until it is overridden by one of the following scenarios The access point is still connected to the same controller and the global syslog serve...

Страница 398: ...log_server_IP_address Note By default the syslog server IP address for each access point is 0 0 0 0 indicating that it is not yet set When the default value is used the global access point syslog server IP address is pushed to the access point Step 2 To save your changes enter this command save config Step 3 To see the global syslog server settings for all access points that join the controller en...

Страница 399: ...ollected for a specific access point enter this command show ap join stats detailed ap_mac Information similar to the following appears Discovery phase statistics Discovery requests received 2 Successful discovery responses sent 2 Unsuccessful discovery request processing 0 Reason for last unsuccessful discovery attempt Not applicable Time at last successful discovery attempt Aug 21 12 50 23 335 T...

Страница 400: ...o Controller When a converted access point unexpectedly reboots the access point stores a crash file on its local flash memory at the time of the crash After the unit reboots it sends the reason for the reboot to the controller If the unit rebooted because of a crash the controller pulls up the crash file using existing CAPWAP messages and stores it in the controller flash memory The crash info co...

Страница 401: ...s command show ap crash file Information similar to the following appears Local Core Files lrad_AP1130 rdump0 156 The number in parentheses indicates the size of the file The size should be greater than zero if a core dump file is available Using the GUI to Upload Radio Core Dumps Using the controller GUI follow these steps to upload the radio core dump file to a TFTP or FTP server Step 1 Click Co...

Страница 402: ...ge appears indicating the status of the upload Using the CLI to Upload Radio Core Dumps Using the controller CLI follow these steps to upload the radio core dump file to a TFTP or FTP server Step 1 To transfer the file from the controller to a TFTP or FTP server enter these commands transfer upload mode tftp ftp transfer upload datatype radio core dump transfer upload serverip server_ip_address tr...

Страница 403: ...e access point Step 1 Click Wireless Access Points All APs access point name the Advanced tab to open the All APs Details for Advanced page see Figure 7 8 Figure 7 8 All APs Details for Advanced Page Step 2 To upload a core dump of the access point check the AP Core Dump check box Step 3 In the TFTP Server IP field enter the IP address of the TFTP server Step 4 In the File Name field enter a name ...

Страница 404: ... point to send compressed core files whereas uncompress configures the access point to send uncompressed core files and Note When you choose compress the file is saved with a gz extension for example dump log gz This file can be opened with WinZip ap_name is the name of a specific access point for which core dumps are uploaded whereas all is all access points converted to lightweight mode Step 2 T...

Страница 405: ...ess point falls back to a DHCP address after the access point reboots If the access point falls back to a DHCP address the show ap config general Cisco_AP CLI command correctly shows that the access point is using a fallback IP address However the GUI shows both the static IP address and the DHCP address but it does not identify the DHCP address as a fallback address Supporting Oversized Access Po...

Страница 406: ...o Workgroup Bridges A workgroup bridge WGB is a mode that can be configured on an autonomous IOS access point to provide wireless connectivity to a lightweight access point on behalf of clients that are connected by Ethernet to the WGB access point A WGB connects a wired network over a single wireless segment by learning the MAC addresses of its wired clients on the Ethernet interface and reportin...

Страница 407: ...ly one device to the WET54G or WET11B 2 Enable the MAC cloning feature on the WET54G or WET11B to clone the connected device 3 Install the latest drivers and firmware on devices connected to the WET54G or WET11B This guideline is especially important for JetDirect printers because early firmware versions might cause problems with DHCP Note Because these devices are not supported in the Cisco Wirel...

Страница 408: ...y secure the wired side of the WGB With Layer 3 roaming if you plug a wired client into the WGB network after the WGB has roamed to another controller for example to a foreign controller the wired client s IP address displays only on the anchor controller not on the foreign controller If a wired client does not send traffic for an extended period of time the WGB removes the client from its bridge ...

Страница 409: ...g ssid authentication open ap config ssid guest mode ap config ssid exit ap config interface dot11Radio 0 ap config station role workgroup bridge ap config if encry mode wep 40 ap config if encry key 1 size 40 0 1234567890 ap config if WGB_with_static_WEP ap config if end To verify that the WGB is associated to an access point enter this command on the WGB show dot11 association Information simila...

Страница 410: ...ee Figure 7 11 Figure 7 11 Clients Detail Page The Client Type field under Client Properties shows WGB if this client is a workgroup bridge and the Number of Wired Client s field shows the number of wired clients that are connected to this WGB Step 3 To see the details of any wired clients that are connected to a particular WGB follow these steps a Click Back on the Clients Detail page to return t...

Страница 411: ...t hover your cursor over the blue drop down arrow for the desired client and choose Remove or Disable respectively c Click the MAC address of the desired client to see more details for this particular client The Clients Detail page appears see Figure 7 13 Figure 7 13 Clients Detail Page The Client Type field under Client Properties shows WGB Client and the rest of the fields on this page provide a...

Страница 412: ...on similar to the following appears Number of wired client s 1 MAC Address IP Address AP Name Mobility WLAN Auth 00 0d 60 fc d5 0b 10 24 8 75 a1 Local 3 Yes Using the CLI to Debug WGB Issues Use the commands in this section if you experience any problems with the WGB 1 To enable debugging for IAPP messages errors and packets enter these commands debug iapp all enable Enables debugging for IAPP mes...

Страница 413: ...the access point receives a new discovery response from a controller the backup controller list is updated Any controller that fails to respond to two consecutive primary discovery requests is removed from the list If the access point s local controller fails it chooses an available controller from the backup controller list in this order primary secondary tertiary primary backup secondary backup ...

Страница 414: ... in the Local Mode AP Fast Heartbeat Timeout field to configure the fast heartbeat timer for access points in local mode Specifying a small heartbeat interval reduces the amount of time it takes to detect a controller failure The default value is 0 seconds which disables the timer Step 4 From the H REAP Mode AP Fast Heartbeat Timer State drop down box choose Enable to enable the fast heartbeat tim...

Страница 415: ...condary and tertiary backup controllers for a specific point follow these steps a Click Access Points All APs to open the All APs page b Click the name of the access point for which you want to configure primary secondary and tertiary backup controllers c Click the High Availability tab to open the All APs Details for High Availability page see Figure 7 15 Figure 7 15 All APs Details for High Avai...

Страница 416: ...st belong to the same primary secondary or tertiary controller Otherwise the access point cannot join the backup controller Step 2 To configure a secondary controller for a specific access point enter this command config ap secondary base controller_name Cisco_AP controller_ip_address Step 3 To configure a tertiary controller for a specific access point enter this command config ap tertiary base c...

Страница 417: ...mmand config advanced timers auth timeout interval where interval is a value between 10 and 600 seconds inclusive The default value is 10 seconds Step 11 To save your changes enter this command save config Step 12 To view an access point s configuration enter these commands show ap config general Cisco_AP show advanced backup controller show advanced timers Information similar to the following app...

Страница 418: ...ort on a backup controller is determined by where in the association request queue it is after the controller failure In controller software release 5 1 or later you can configure your wireless network so that the backup controller recognizes a join request from a higher priority access point and if necessary disassociates a lower priority access point as a means to provide an available port Note ...

Страница 419: ...cess Points All APs to open the All APs page Step 6 Click the name of the access point for which you want to configure failover priority Step 7 Click the High Availability tab The All APs Details for High Availability page appears see Figure 7 17 Figure 7 17 All APs Details for High Availability Page Step 8 From the AP Failover Priority drop down box choose one of the following options to specify ...

Страница 420: ...ority 1 2 3 4 Cisco_AP where 1 is the lowest priority level and 4 is the highest priority level The default value is 1 Step 3 To save your changes enter this command save config Using the CLI to View Failover Priority Settings Use these commands to view the failover priority configuration settings on your network To confirm whether access point failover priority is enabled on your network enter th...

Страница 421: ...manage access points in various countries from a single controller Note Although the controller supports different access points in different regulatory domains countries it requires all radios in a single access point to be configured for the same regulatory domain For example you should not configure a Cisco 1231 access point s 802 11b g radio for the US A regulatory domain and its 802 11a radio...

Страница 422: ...o disable the 802 11a and 802 11b g networks a Click Wireless 802 11a n Network b Uncheck the 802 11a Network Status check box c Click Apply to commit your changes d Click Wireless 802 11b g n Network e Uncheck the 802 11b g Network Status check box f Click Apply to commit your changes Step 2 Click Wireless Country to open the Country page see Figure 7 18 Figure 7 18 Country Page Step 3 Check the ...

Страница 423: ...cess Points All APs click the link of the desired access point choose Disable from the Status drop down box and click Apply b Click Wireless Access Points All APs to open the All APs page c Click the link for the desired access point d Click the Advanced tab to open the All APs Details for Advanced page see Figure 7 19 Figure 7 19 All APs Details for Advanced Page e The default country for this ac...

Страница 424: ...Ps for valid channel values after this command Are you sure you want to continue y n y Step 4 Enter Y when prompted to confirm your decision Information similar to the following appears Configured Country Multiple Countries US CA MX Auto RF for this country combination is limited to common channels and power KEY Channel is legal in this country and may be configured manually A Channel is the Auto ...

Страница 425: ...nfigured for use by Auto RF Regulatory Domains allowed by this country 802 11BG Channels 1 1 1 1 1 1 2 3 4 5 6 7 8 9 0 1 2 3 4 US AB A A A CA AB A A A MX NA A A A Auto RF C x x x x C x x x x C 802 11A 1 1 1 1 1 1 1 1 1 1 1 1 1 1 1 1 Channels 3 3 3 4 4 4 4 4 5 5 6 6 0 0 0 1 1 2 2 2 3 3 4 4 5 5 6 6 4 6 8 0 2 4 6 8 2 6 0 4 0 4 8 2 6 0 4 8 2 6 0 9 3 7 1 5 US AB A A A A A A A A A A A A CA ABN A A A A A...

Страница 426: ... of the access point s radios Note If you enabled the networks and disabled some access points and then run the config ap country code all command the specified country code is configured on only the disabled access points All other access points are ignored For example if you enter config ap country mx all information similar to the following appears To change country code first disable target AP...

Страница 427: ...f operation For example an access point with part number AIR AP1030 A K9 which is included in the Americas regulatory domain cannot be used in Australia Always be sure to purchase controllers and access points that match your country s regulatory domain The Japanese regulations allow the regulatory domain that is programmed into an access point s radio to be migrated from the J domain to the U dom...

Страница 428: ... domain joined to your controller You cannot migrate your access points from the U regulatory domain back to the J domain The Japanese government has made reverse migration illegal Note You cannot undo an access point migration Once an access point has been migrated you cannot return to software release 4 0 Migrated access points will have non functioning 802 11a radios under software release 4 0 ...

Страница 429: ...ompany name to migrateapj52w52 cisco com This AP is eligible for migration 00 14 1c ed 27 fe AIR AP1242AG J K9ap1240 Begin to migrate Access Points from J J52 to U W52 Are you sure y n Step 6 Enter Y when prompted to confirm your decision to migrate Step 7 Wait for all access points to reboot and rejoin the controller This process may take up to 15 minutes depending on access point The AP1130 AP12...

Страница 430: ...th regulations that require radio devices to use dynamic frequency selection DFS to detect radar signals and avoid interfering with them When a lightweight access point with a 5 GHz radio operates on one of the 15 channels listed in Table 7 2 the controller to which the access point is associated automatically uses DFS to set the operating frequency When you manually select a channel for DFS enabl...

Страница 431: ...onds If there are no radar signals on the new channel the controller accepts client associations It records the channel that showed radar activity as a radar channel and prevents activity on that channel for 30 minutes It generates a trap to alert the network manager Optimizing RFID Tracking on Access Points To optimize the monitoring and location calculation of RFID tags you can enable tracking o...

Страница 432: ... Wireless Access Points Radios 802 11b g n to open the 802 11b g n Radios page Step 8 Hover your cursor over the blue drop down arrow for the desired access point and choose Configure The 802 11b g n Cisco APs Configure page appears see Figure 7 20 Figure 7 20 802 11b g n Cisco APs Configure Page Step 9 To disable the access point radio choose Disable from the Admin Status drop down box and click ...

Страница 433: ... point radio enter this command config 802 11b disable Cisco_AP Step 5 To configure the access point to scan only the DCA channels supported by its country of operation enter this command config ap monitor mode tracking opt Cisco_AP Note To specify the exact channels to be scanned enter this command and the command in Step 6 Note To disable tracking optimization for this access point enter this co...

Страница 434: ...imiting Step 1 To enable or disable the filtering of probe requests forwarded from an access point to the controller enter this command config advanced probe filter enable disable If you enable probe filtering the default filter setting the access point forwards only acknowledged probe requests to the controller If you disable probe filtering the access point forwards both acknowledged and unackno...

Страница 435: ...ness communications The UDI consists of five data elements The orderable product identifier PID The version of the product identifier VID The serial number SN The entity name The product description The UDI is burned into the EEPROM of controllers and lightweight access points at the factory It can be retrieved through either the GUI or the CLI Using the GUI to Retrieve the Unique Device Identifie...

Страница 436: ... types of link test packets are transmitted during a link test request and response Any radio receiving a link test request packet fills in the appropriate fields and echoes the packet back to the sender with the response type set The radio link quality in the client to access point direction can differ from that in the access point to client direction due to the asymmetrical distribution of trans...

Страница 437: ...oller shows this metric regardless of direction Link test request reply round trip time minimum maximum and average The controller software supports CCX versions 1 through 5 CCX support is enabled automatically for every WLAN on the controller and cannot be disabled The controller stores the CCX version of the client in its client database and uses it to limit the features for this client If a cli...

Страница 438: ...pears see Figure 7 24 Note You can also access this page by clicking the MAC address of the desired client and then clicking the Link Test button on the top of the Clients Detail page Figure 7 24 Link Test Page This page shows the results of the CCX link test Note If the client and or controller does not support CCX v4 or later the controller performs a ping link test on the client instead and a m...

Страница 439: ...Test to 00 0d 88 c5 8a d1 Link Test Packets Sent 20 Link Test Packets Received 20 Local Signal Strength 49dBm Local Signal to Noise Ratio 39dB 2 To adjust the link test parameters that are applicable to both the CCX link test and the ping test enter these commands from config mode config linktest frame size size_of_link test_frames config linktest num of frame number_of_link test_request_frames_pe...

Страница 440: ...troller using the CLI Using the GUI to Configure Link Latency Using the controller GUI follow these steps to configure link latency Step 1 Click Wireless Access Points All APs to open the All APs page Step 2 Click the name of the access point for which you want to configure link latency Step 3 Click the Advanced tab to open the All APs Details for Advanced page see Figure 7 25 Figure 7 25 All APs ...

Страница 441: ...ink latency Step 1 To enable or disable link latency for a specific access point or for all access points currently associated to the controller enter this command config ap link latency enable disable Cisco_AP all The default value is disabled Note The config ap link latency enable disable all command enables or disables link latency only for access points that are currently joined to the control...

Страница 442: ...e M0 to M15 data rates are reduced in the 2 4 GHz band Throughput should be minimally impacted because all data rates are still enabled The range is affected because of the lower transmit power All receivers remain enabled 15 4 W Only a single transmitter is enabled Legacy data rates and M0 to M7 rates are minimally affected M8 to M15 rates are disabled because they require both transmitters Throu...

Страница 443: ... of the desired access point Step 2 Click the Advanced tab to open the All APs Details for Advanced page see Figure 7 26 Figure 7 26 All APs Details for Advanced Page Table 7 3 Maximum Transmit Power Settings for 1250 Series Access Points Using PoE Radio Band Data Rates Number of Transmitters Cyclic Shift Diversity CSD Maximum Transmit Power dBm 1 802 3af Mode 15 4 W ePoE Power Optimized Mode 16 8...

Страница 444: ...andard State check box if power is being provided by a power injector or by a switch not on the above list Step 4 Check the Power Injector State check box if the attached switch does not support IPM and a power injector is being used If the attached switch supports IPM you do not need to check this check box Step 5 If you checked the Power Injector State check box in the previous step the Power In...

Страница 445: ...at a power injector is connected to this particular switch port If you relocate the access point you must reissue this command after the presence of a new power injector is verified Note Make sure CDP is enabled before issuing this command Otherwise this command will fail See the Configuring Cisco Discovery Protocol section on page 4 69 for information on enabling CDP To remove the safety checks a...

Страница 446: ...a TELNET SSH CLI session 1 To enable the controller to send commands to the access point from its CLI enter this command debug ap enable Cisco_AP 2 To cause a specific access point to flash its LEDs for a specified number of seconds enter this command debug ap command led flash seconds Cisco_AP You can enter a value between 1 and 3600 seconds for the seconds parameter 3 To disable LED flashing for...

Страница 447: ... 802 11n enabled then the client type shows as 802 11n 2 4 The status of the client connection The authorization status of the client The port number of the access point to which the client is associated An indication of whether the client is a WGB Note Refer to the Cisco Workgroup Bridges section on page 7 34 for more information on the WGB status Note If you want to remove or disable a client ho...

Страница 448: ...omatically AP Name Enter the name of an access point WLAN Profile Enter the name of a WLAN Status Check the Associated Authenticated Excluded Idle and or Probing check boxes Radio Type Choose 802 11a 802 11b 802 11g 802 11n or Mobile WGB Shows WGB clients associated to the controller s access points c Click Apply to commit your changes The Current Filter parameter at the top of the Clients page sh...

Страница 449: ...7 77 Cisco Wireless LAN Controller Configuration Guide OL 17037 01 Chapter 7 Controlling Lightweight Access Points Viewing Clients Figure 7 29 Clients Detail Page ...

Страница 450: ...troller s access points enter this command show client summary Information similar to the following appears Number of Clients 6 MAC Address AP Name Status WLAN Auth Protocol Port Wired 00 13 ce cc 8e b8 Maria 1242 Probing N A No 802 11a 1 No 00 40 96 a9 a0 a9 CJ AP1 Probing N A No 802 11a 1 No 00 40 96 ac 44 13 CJ AP1 Probing N A No 802 11a 1 No 00 40 96 b1 fe 06 CJ AP1 Probing N A No 802 11a 1 No...

Страница 451: ...Wireless LAN Controller Configuration Guide OL 17037 01 Chapter 7 Controlling Lightweight Access Points Viewing Clients Diagnostics Capability Supported S69 Capability Supported Mirroring Disabled QoS Level Silver ...

Страница 452: ...7 80 Cisco Wireless LAN Controller Configuration Guide OL 17037 01 Chapter 7 Controlling Lightweight Access Points Viewing Clients ...

Страница 453: ...8 2 Architecture Overview page 8 6 Adding Mesh Access Points to the Mesh Network page 8 10 Configuring Advanced Features page 8 32 Viewing Mesh Statistics and Reports page 8 39 Converting Indoor Access Points to Mesh Access Points 1130AG 1240AG page 8 48 Changing MAP and RAP Roles for Indoor Mesh Access Points 1130AG 1240AG page 8 49 Converting Indoor Mesh Access Points to Non Mesh Lightweight Acc...

Страница 454: ... indoor 1130 1240 and outdoor mesh access points 1522 1524 unless noted otherwise Mesh access point or MAP is hereafter used to address both indoor and outdoor mesh access points Note Cisco Aironet 1505 and 1510 access points are not supported in this release Note Refer to the Release Notes for Cisco Wireless LAN Controllers and Mesh Access Points for Release 5 2 x for mesh feature summary operati...

Страница 455: ...cess points Access to the wireless LAN mesh for mesh access points is managed by MAC authentication Mesh access points are added to a reference able database to ensure they are allowed access to a given controller and the mesh network Refer to Adding Mesh Access Points to the Mesh Network section on page 8 10 External RADIUS authentication Mesh access points can be externally authorized and using ...

Страница 456: ... support multiple deployment modes including the following Wireless mesh WLAN backhaul Point to multipoint wireless bridging Point to point wireless bridging Cisco Wireless Mesh Network In a Cisco wireless outdoor mesh network multiple mesh access points comprise a network that provides secure scalable outdoor wireless LANs Figure 8 2 shows an example mesh deployment Figure 8 2 Wireless Mesh Deplo...

Страница 457: ...ng Protocol VTP VTP can reconfigure the trunked VLANs across your mesh and possibly cause a loss in connection for your RAP to its primary WLC If improperly configured it can take down your mesh deployment Figure 8 4 Wireless Point to Point Bridge Deployment Point to Multipoint Wireless Bridging Mesh access points support point to multipoint bridging applications Specifically a RAP acting as a roo...

Страница 458: ...colWireless Mesh Routing The Cisco Adaptive Wireless Path Protocol AWPP is designed specifically for wireless mesh networking The path decisions of AWPP are based on link quality and the number of hops Ease of deployment fast convergence and minimal resource consumption are also key components of AWPP The goal of AWPP is to find the best path back to a RAP for each MAP that is part of the RAP s br...

Страница 459: ... Neighbor Access Points Wireless Mesh Constraints When designing and building a wireless mesh network here are a few system characteristics to consider Some of these apply to the backhaul network design and others to the CAPWAP controller design Recommended backhaul is 24 Mbps 24 Mbps is chosen as the optimal backhaul rate because it aligns with the maximum coverage of the WLAN portion of the clie...

Страница 460: ...loyments as the SNR requirements do not make the distances practical Table 8 2 Minimum Required LinkSNR Calculations by Data Rate Number of backhaul hops is limited to eight but three to four is recommended The number of hops is recommended to be limited to three four primarily to maintain sufficient backhaul throughput because each mesh AP uses the same radio for transmission and reception of bac...

Страница 461: ...ocal AP Support non mesh Maximum Possible Mesh AP Support RAPs MAPs1 Total Mesh AP Support 4404 100 150 1 149 150 50 100 150 75 50 125 100 0 100 2106 6 112 1 10 11 2 8 10 3 6 9 4 4 8 5 2 7 6 0 6 2112 12 12 1 113 12 3 9 12 6 6 12 9 3 12 12 0 12 2125 25 25 1 243 25 5 20 25 10 15 25 15 10 25 20 5 25 25 0 25 WiSM 300 375 1 374 375 100 275 375 250 100 350 300 0 300 1 Number of MAPs supported on a mesh ...

Страница 462: ...int Role section on page 8 16 4 Configure a primary secondary and tertiary controller for each MAP Refer to the Verifying that Access Points Join the Controller and Configuring Backup Controllers sections in Chapter 7 5 Configure global mesh parameters Refer to Configuring Global Mesh Parameters section on page 8 16 6 Configure bridging parameters Refer to Configuring Ethernet Bridging and Etherne...

Страница 463: ... Access Points Adding Mesh Access Points to the Mesh Network Note You can also download the list of access point MAC addresses and push them to the controller using the Cisco Wireless Control System WCS Refer to the Cisco Wireless Control System Configuration Guide Release 5 2 for instructions ...

Страница 464: ... Page Step 2 Click New to open the MAC Filters New page see Figure 8 8 Figure 8 8 MAC Filters New Page Step 3 In the MAC Address field enter the MAC address of the mesh access point Note For 1522 and 1524 outdoor mesh access points enter the BVI MAC address of the mesh access point into the controller as a MAC filter For 1130 and 1240 indoor mesh access points enter the Ethernet MAC address If the...

Страница 465: ... add the MAC address of an access point to the controller filter list enter this command config macfilter add ap_mac wlan_id interface description A value of zero 0 for the wlan_id parameter specifies any WLAN and a value of zero 0 for the interface parameter specifies none You can enter up to 32 characters for the optional description parameter Step 2 To save your changes enter this command save ...

Страница 466: ...esh access point For remote authorization and authentication EAP FAST uses the manufacturer s certificate CERT to authenticate the child mesh access point Additionally this manufacturer certificate based identity serves as the username for the mesh access point in user validation For IOS based mesh access points 1130 1240 1522 1524 in addition to adding the MAC address to the user list you need to...

Страница 467: ...of Mesh Access Points To enable external authentication for mesh access points using the CLI enter the following commands config mesh security eap config macfilter mac delimiter colon config mesh security rad mac filter enable config mesh radius server index enable config mesh security force ext auth enable Optional Using the CLI to View Security Statistics To view security statistics for mesh acc...

Страница 468: ... a connection with the controller including Setting the maximum range between RAP and MAP not applicable to 1130 and 1240 indoor mesh access points Enabling a backhaul to carry client traffic Defining whether VLAN tags are forwarded or not Defining the authentication mode EAP or PSK and method local or external for mesh access points including security settings local and external authentication Yo...

Страница 469: ...ing access points in the network Range 150 to 132 000 feet Default 12 000 feet Note After this feature is enabled all mesh access points reboot Backhaul Client Access When this feature is enabled 1520 series 152x mesh access points allow wireless client association over the 802 11a radio Therefore a 152x mesh access point can carry both backhaul traffic and 802 11a client traffic over the same 802...

Страница 470: ... dropped Uncheck the check box to enable the VLAN Tagging feature Note VLAN Transparent is enabled as a default to ensure a smooth software upgrade from 4 1 192 xxM releases to release 5 2 Release 4 1 192 xxM does not support VLAN tagging Note Refer to Configuring Ethernet Bridging and Ethernet VLAN Tagging section on page 8 25 for more details Default Enabled Security Mode Defines the security mo...

Страница 471: ...RADIUS server The mesh access point configured for external authorization and authentication must be added to the user list of the RADIUS server For remote authorization and authentication EAP FAST uses the manufacturer s certificate CERT to authenticate the child mesh access point Additionally this manufacturer certificate based identity serves as the username for the mesh access point in user va...

Страница 472: ...ble disable 802 11a Cisco_AP config ap wlan add delete 802 11a wlan_id Cisco_AP Step 3 To enable or disable VLAN transparent enter this command config mesh ethernet bridging vlan transparent enable disable Step 4 To define a security mode for the mesh access point enter one of the following commands a To provide local authentication of the mesh access point by the controller enter this command con...

Страница 473: ...ttings show mesh client access Shows the status of the client access backhaul as either enabled or disabled When this option is enabled mesh access points are able to associate with 802 11a wireless clients over the 802 11a backhaul This client association is in addition to the existing communication on the 802 11a backhaul between the root and mesh access points controller show mesh client access...

Страница 474: ...h parameters Antenna Gain Refer to the Configuring Antenna Gain section on page 8 22 Workgroup Bridge Groups Refer to the Using the GUI to Configure Antenna Gain section on page 8 22 Configuring Antenna Gain You must configure the antenna gain for the access point to match that of the antenna installed using the controller GUI or controller CLI Note Refer to the External Antennas section of the Ci...

Страница 475: ... and choose Configure The 802 11a n Cisco APs Configure page appears see Figure 8 12 Figure 8 12 802 11a n Cisco APs Configure Page Step 3 Under the Antenna Parameters section enter the antenna gain in 0 5 dBm units in the Antenna Gain field For example 2 5 dBm 5 Note Only external antennas have configurable gain settings The value that you enter must match the value specified by the vendor for th...

Страница 476: ...ety radio on the 1524 Note Refer to the Cisco Workgroup Bridges section in Chapter 7 of this manual for configuration details Supported Workgroup Modes and Capacities The 1130 1240 1310 autonomous access point must be running Cisco IOS release 12 4 3g JA or later on 32 MB access points or Cisco IOS release 12 3 8 JEB or later on 16 MB access points Cisco IOS releases prior to 12 4 3g JA and 12 3 8...

Страница 477: ...ince disassociation Enhanced neighbor list This feature focuses on improving a Cisco CX v4 client s roam experience and network edge performance especially when servicing voice applications The access point provides its associated client information about its neighbors using a neighbor list update unicast message Roam reason report This feature enables Cisco CX v4 clients to report the reason why ...

Страница 478: ...ameras has a wired connection to a MAP The video of all these cameras is then streamed across the wireless backhaul to a central command station on a wired network see Figure 8 14 Figure 8 14 Ethernet VLAN Tagging Ethernet VLAN Tagging Guidelines For security reasons the Ethernet port on a mesh access point RAP and MAP is disabled by default It is enabled by configuring Ethernet Bridging on the me...

Страница 479: ...oE in must be configured to accept tagged packets on its trunk port The RAP forwards all tagged packets received from the mesh network to the wired network No configuration is required to support VLAN tagging on any 802 11a backhaul Ethernet interface within the mesh network This includes the RAP uplink Ethernet port The required configuration happens automatically using a registration mechanism A...

Страница 480: ...port connected to the RAP must be a trunk The trunk port on the switch and the RAP trunk port must match A configured VLAN on a MAP Ethernet port cannot function as a Management VLAN The RAP must always connect to the native VLAN ID 1 on a switch The RAP s primary Ethernet interface is by default the native VLAN of 1 Note You cannot bridge VLAN ID 1 when using VLAN Opaque Ethernet bridging because...

Страница 481: ...a Click gigabitEthernet1 port 1 PoE out b Select access from the mode drop down menu c Enter a VLAN ID The VLAN ID can be any value between 2 and 4095 Note You cannot bridge VLAN ID 1 when using VLAN Opaque Ethernet bridging because VLAN 1 is the internal native VLAN within a mesh network This setting cannot be changed Note A maximum of 16 VLANs are supported across all of a RAP s subordinate MAPs...

Страница 482: ...8 5 Display Parameters for Access Points Parameter Description Bridge type Displays either outdoor 152x access points or indoor 1130 or 1240 access points Backhaul Interface Displays the radio band that this MAP uses to transfer data to other MAPs The only possible value is 802 11a Ethernet Link Status Displays the up or down status of the Ethernet link of the AP152x The Up or Down Dn status of th...

Страница 483: ...esh ethernet bridging vlan transparent disable Step 5 To specify the rate in Mb s at which data is shared between access points on the backhaul interface enter this command config ap bhrate rate Cisco_AP The default value is 24 Mb s for the 802 11a backhaul interface Step 6 To save your settings enter this command save config Using the CLI to Configure Ethernet VLAN Tagging VLAN ID 1 is not reserv...

Страница 484: ... point use bandwidth based CAC Load based CAC is not supported Bandwidth based or static CAC enables the client to specify how much bandwidth or shared medium time is required to accept a new call Each access point determines whether it can accommodate a particular call by looking at the bandwidth available and compares it against the bandwidth required for the call If not enough bandwidth is avai...

Страница 485: ...configured to require no more than two hops for voice On the 802 11a or 802 11b g n Global parameters window Enable dynamic target power control DTPC Disable all data rates less than 11 Mbps On the 802 11a or 802 11b g n Voice parameters window Load based CAC must be disabled Enable admission control ACM for CCXv4 or v5 clients that have WMM enabled Otherwise bandwidth based CAC does not operate p...

Страница 486: ...ails on voice calls on the mesh network Refer to Figure 8 17 when using the CLI commands and viewing their output Figure 8 17 Mesh Network Example Table 8 6 Projected Voice Call Support on a Mesh Network Mesh Access Point Role Radio Minimum Calls Supported1 Maximum Calls Supported2 RAP 802 11a 14 18 802 11b g n 14 18 MAP1 802 11a 6 9 802 11b g n 11 18 MAP2 802 11a 4 7 802 11b g n 5 9 1 Bandwidth o...

Страница 487: ...used voice video Cisco_AP Information similar to the following appears AP Name Slot Radio BW Used Max SB_RAP1 0 11b g 1016 23437 1 11a 3048 23437 SB_MAP1 0 11b g 0 23437 1 11a 3048 23437 SB_MAP2 0 11b g 2032 23437 1 11a 3048 23437 SB_MAP3 0 11b g 0 23437 1 11a 0 23437 Note The bars to the left of the AP Name field indicate the number of hops that the mesh access point is away from its root access ...

Страница 488: ...topology for the network and display the voice calls that are in progress enter this command show mesh cac callpath Cisco_AP Information similar to the following appears AP Name Slot Radio Calls SB_RAP1 0 11b g 0 1 11a 1 SB_MAP1 0 11b g 0 1 11a 1 SB_MAP2 0 11b g 1 1 11a 1 SB_MAP3 0 11b g 0 1 11a 0 Note The calls column for each mesh access point radio in a call path increments by one For example f...

Страница 489: ...004 Platinum 0 4 0 001 Bronze 0 0 0 000 Management 0 0 0 000 Overflows The total number of packets dropped because of queue overflow Peak Length The peak number of packets waiting in the queue during the defined statistics time interval Average Length The average number of packets waiting in the queue during the defined statistics time interval Enabling Mesh Multicast Containment for Video You can...

Страница 490: ... MAPs and their respective Ethernet networks When the in out mode is in operation it is important to properly partition your network to ensure that a multicast sent by one RAP is not received by another RAP on the same Ethernet segment and then sent back into the network Note If 802 11b clients need to receive CAPWAP multicasts then multicast must be enabled globally on the controller as well as o...

Страница 491: ... this feature is enabled all mesh access points reboot Default Disabled Note This parameter is applicable to mesh access points with two radios 1522 1240 and 1130 excluding the 1524 To enable this feature on the controller check the Backhaul Client Access check box on the Wireless Mesh window Refer to Configuring Global Mesh Parameters section on page 8 16 Viewing Mesh Statistics and Reports Viewi...

Страница 492: ...istics The All APs Access Point Name Statistics page for the access point appears see Figure 8 19 Figure 8 19 All APs Access Point Name Statistics Page This page shows the role of the access point in the mesh network the name of the bridge group to which the access point belongs the backhaul interface on which the access point operates and the number of the physical switch port It also displays a ...

Страница 493: ... of responses received from the neighbor mesh access points Tx Neighbor Requests The number of unicast and broadcast requests sent to the neighbor mesh access points Tx Neighbor Responses The number of responses sent to the neighbor mesh access points Parent Changes Count The number of times a mesh access point child moves to another parent Neighbor Timeouts Count The number of neighbor timeouts Q...

Страница 494: ...nt and its parent ReassociationRequest Failures The number of failed reassociation requests between the selected mesh access point and its parent ReassociationRequest Timeouts The number of reassociation request timeouts between the selected mesh access point and its parent Reassociation Requests Successful The number of successful reassociation requests between the selected mesh access point and ...

Страница 495: ...lures 0 Association Timeouts 0 Association Successes 0 Authentication Failures 0 Authentication Timeouts 0 Authentication Successes 0 Re Association Failures 0 Re Association Timeouts 0 Mesh Node Security Stats continued Unknown Reauthentication Requests The number of unknown reauthentication requests received by the parent mesh access point node from its child This state may occur when a child me...

Страница 496: ...time interval Average Length The average number of packets waiting in the queue during the defined statistics time interval Viewing Neighbor Statistics for an Access Point This section explains how to use the controller GUI or CLI to view neighbor statistics for a selected access point It also describes how to run a link test between the selected access point and its parent Using the GUI to View N...

Страница 497: ...the access point It provides each access point s name and radio MAC address Step 3 To perform a link test between the access point and its parent or children follow these steps a Hover your cursor over the blue drop down arrow of the parent or child and choose LinkTest A pop up window appears see Figure 8 22 Figure 8 22 Link Test Window b Click Submit to start the link test The link test results a...

Страница 498: ...ver the blue drop down arrow for the desired access point and choose Details The All APs Access Point Name Link Details Neighbor Name page appears see Figure 8 24 Figure 8 24 All APs Access Point Name Link Details Neighbor Name Page b Click Back to return to the All APs Access Point Name Neighbor Info page Step 5 To view statistics for any of the access points on this page follow these steps a Hov...

Страница 499: ...5 80 ED D0 149 5 6 5 0x1a60 NEED UPDATE BEACON DEFAULT 00 17 94 FE C3 5F 149 7 0 0 0x860 BEACON To view the channel and signal to noise ratio SNR details for a link between an access point and its neighbor enter this command show mesh path Cisco_AP Information similar to the following appears AP Name Radio Mac Channel Snr Up Snr Down Link Snr Flags State mesh 45 rap1 165 15 18 16 0x86b UPDATED NEI...

Страница 500: ...oint MAP or root access point RAP Indoor mesh access points 1130 and 1240 can function as either a RAP or a MAP By default all are configured as MAPs At least one access point within a mesh network must be configured to function as a RAP To convert the access point to a mesh access point using the CLI perform one of the following To convert from a lightweight access point to a mesh access point en...

Страница 501: ...o commit your changes The access point reboots Step 6 Click Save Configuration to save your changes Note Cisco recommends a Fast Ethernet connection between the MAP and controller when changing from a MAP to RAP Note After a RAP to MAP conversion the MAP s connection to the controller is a wireless backhaul rather than a Fast Ethernet connection It is the responsibility of the user to ensure that ...

Страница 502: ...s unable to service its clients until the mesh access point is able to connect to a different root access point in the vicinity Likewise clients might connect to a different mesh access point in the vicinity to maintain connectivity to the network To convert an indoor mesh access point MAP or RAP to a non mesh lightweight access point using the CLI enter the following command config ap mode local ...

Страница 503: ...Channel number assignments on the 1522 or 1524 must match those on the Cisco 3200 radio interfaces Channels 20 4950 GHz through 26 4980 GHz and sub band channels 1 through 19 5 and 10 MHz are used for MAR interoperability This configuration change is made on the controller No changes are made to the access point configuration Channel assignments are made only to the RAP Updates to the MAP are prop...

Страница 504: ...ckhaul Client Access check box to allow wireless client association over the 802 11a radio Step 3 Click Apply to commit your changes Step 4 When prompted to allow a reboot of all the mesh access points on the network click OK Step 5 Click Wireless Access Points Radios 802 11a n to open the 802 11a n Radios page Step 6 Hover your cursor over the blue drop down arrow for the appropriate RAP and choo...

Страница 505: ... enter these commands For the 1522 access point enter these commands config 802 11a disable Cisco_MAP config 802 11a channel ap Cisco_MAP channel_number config 802 11a enable Cisco_MAP For the 1524 enter these commands config 802 11 a49 disable Cisco_MAP config 802 11 a49 channel ap Cisco_MAP channel_number config 802 11 a49 enable Cisco_MAP Note Enter config 802 11 a58 enable Cisco_MAP to enable ...

Страница 506: ...8 54 Cisco Wireless LAN Controller Configuration Guide OL 17037 01 Chapter 8 Controlling Mesh Access Points Configuring Mesh Access Points to Operate with Cisco 3200 Series Mobile Access Routers ...

Страница 507: ...figurations and software versions on the controllers It contains these sections Upgrading Controller Software page 9 2 Transferring Files to and from a Controller page 9 13 Saving Configurations page 9 26 Editing Configuration Files page 9 27 Clearing the Controller Configuration page 9 28 Erasing the Controller Configuration page 9 28 Resetting the Controller page 9 28 ...

Страница 508: ...y the enabled WLANs that belong to its access point group Guidelines for Upgrading Controller Software Follow these guidelines before upgrading your controller to software release 5 2 Make sure you have a TFTP or FTP server available for the software upgrade Keep these guidelines in mind when setting up a TFTP or FTP server Controller software release 5 2 is greater than 32 MB therefore you must m...

Страница 509: ...es that the boot software modifications in all of the previous and current boot software ER aes files are installed Caution If you require a downgrade from one release to another you may lose the configuration from your current release The workaround is to reload the previous controller configuration files saved on the backup server or to reconfigure the controller Guidelines for Upgrading to Cont...

Страница 510: ... c1520 k9w9 mx 124 3g JMA1 c1520 k9w9 mx 124 3g JMA1 Tue Jan 15 00 00 15 2008 SLT HCAB MAP 01 fe bb 6f DEFAULT_ROUTER 11 200 9 20 Tue Jan 15 00 00 15 2008 SLT HCAB MAP 01 fe bb 6f DEVIATION_NUM 0 Tue Jan 15 00 00 15 2008 SLT HCAB MAP 01 fe bb 6f DOT11G_RADIO_MODE 255 Tue Jan 15 00 00 15 2008 SLT HCAB MAP 01 fe bb 6f DOT11_DEVICE_TYPE 4C Tue Jan 15 00 00 15 2008 SLT HCAB MAP 01 fe bb 6f DOT11_ENCRY...

Страница 511: ...series access point prior to a software upgrade Step 1 On the controller CLI enter these commands for each mesh access point debug ap enable Cisco_MAP debug ap command debug lwapp con cli Cisco_MAP debug ap command test mesh enable telnet Cisco_MAP show ap config general Cisco_MAP Note Find the IP address for the access point in the show ap config general ap_name command and continue to Step 2 Ste...

Страница 512: ...2 without any configuration file loss Note If you downgrade to a mesh release you must then reconfigure the controller Cisco recommends that you save the configuration from the mesh release before upgrading to release 5 2 for the first time Then you can reapply the configuration if you need to downgrade You cannot downgrade from controller software release 5 2 to a mesh release 4 1 190 5 4 1 191 2...

Страница 513: ...ecommended Y 4 1 185 0 Y Y2 2 CUSTOMERS WHO REQUIRE DYNAMIC FREQUENCY SELECTION DFS FUNCTIONALITY SHOULD NOT USE THIS RELEASE This release does not provide DFS functionality fixes found in release 4 0 217 204 Additionally this release is not supported in ETSI compliant countries or Singapore 4 1 181 0 Y2 Y2 4 1 171 0 Y2 Y2 4 0 219 0 Y2 Y2 4 0 217 204 Y2 Y2 Y2 Y2 4 0 217 0 Y2 Y2 Y2 Y3 3 Release 4 0...

Страница 514: ... Click a controller series f If necessary click a controller model g If you chose Standalone Controllers in Step d click Wireless LAN Controller Software h If you chose Cisco Catalyst 6500 Series 7600 Series Wireless Services Module WiSM in Step e click Wireless Services Modules WiSM Software i Click a controller software release The software releases are labeled as follows to help you determine w...

Страница 515: ...r FTP Step 10 In the IP Address field enter the IP address of the TFTP or FTP server Step 11 If you are using a TFTP server the default values of 10 retries and 6 seconds for the Maximum Retries and Timeout fields should work correctly without any adjustment However you can change these values To do so enter the maximum number of times that the TFTP server attempts to download the software in the ...

Страница 516: ...ge Version field Note If you do not install the 5 2 157 0 ER aes file the Field Recovery Image Version field shows N A Using the CLI to Upgrade Controller Software Follow these steps to upgrade the controller software using the CLI Note Do not install the 5 2 controller software file and the 5 2 157 0 ER aes boot software file at the same time Install one file and reboot the controller then instal...

Страница 517: ...ANs on the controller using the config wlan disable wlan_id command Step 7 Log into the controller CLI Step 8 Enter ping server ip address to verify that the controller can contact the TFTP or FTP server Step 9 Enter transfer download start and answer n to the prompt to view the current download settings Information similar to the following appears Mode TFTP Data Type Code TFTP Server IP xxx xxx x...

Страница 518: ...y TFTP Code transfer starting TFTP receive complete extracting components Writing new bootloader to flash Making backup copy of RTOS Writing new RTOS to flash Making backup copy of Code Writing new Code to flash TFTP File transfer operation completed successfully Please restart the switch reset system for update to complete Step 12 Enter reset system to save the code update to non volatile NVRAM a...

Страница 519: ...ocal EAP authentication However if you wish to use your own vendor specific device certificate it must be downloaded to the controller Note See the Configuring Local EAP section on page 5 38 for information on configuring local EAP Follow the instructions in this section to download a vendor specific device certificate to the controller through the GUI or CLI However before you begin make sure you...

Страница 520: ...d Timeout fields should work correctly without any adjustment However you can change these values To do so enter the maximum number of times that the TFTP server attempts to download the certificate in the Maximum Retries field and the amount of time in seconds that the TFTP server attempts to download the certificate in the Timeout field Step 8 In the File Path field enter the directory path of t...

Страница 521: ...ut should work correctly without any adjustment However you can change these values To do so enter the maximum number of times that the TFTP server attempts to download the software for the retries parameter and the amount of time in seconds that the TFTP server attempts to download the software for the timeout parameter Step 9 If you are using an FTP server enter these commands transfer download ...

Страница 522: ...icates to the controller through the GUI or CLI However before you begin make sure you have a TFTP or FTP server available for the certificate download Keep these guidelines in mind when setting up a TFTP or FTP server If you are downloading through the service port the TFTP or FTP server must be on the same subnet as the service port because the service port is not routable or you must create sta...

Страница 523: ...ep 7 In the File Path field enter the directory path of the certificate Step 8 In the File Name field enter the name of the certificate Step 9 If you are using an FTP server follow these steps a In the Server Login Username field enter the username to log into the FTP server b In the Server Login Password field enter the password to log into the FTP server c In the Server Port Number field enter t...

Страница 524: ...t the TFTP server attempts to download the software for the timeout parameter Step 8 If you are using an FTP server enter these commands transfer download username username transfer download password password transfer download port port Note The default value for the port parameter is 21 Step 9 Enter transfer download start to view the updated settings then answer y when prompted to confirm the cu...

Страница 525: ...or FTP server must be on the same subnet as the service port because the service port is not routable or you must create static routes on the controller If you are uploading through the distribution system network port the TFTP or FTP server can be on the same or a different subnet because the distribution system port is routable A third party TFTP or FTP server cannot run on the same computer as ...

Страница 526: ...ep 12 Follow the instructions for your wireless client to load the PAC on your client devices Make sure to use the password that you entered above Using the CLI to Upload PACs Follow these steps to upload a PAC from the controller using the controller CLI Step 1 Log into the controller CLI Step 2 Enter transfer upload mode tftp ftp Step 3 Enter transfer upload datatype pac Step 4 Enter transfer up...

Страница 527: ... you cannot download a binary configuration file onto a controller running software release 4 2 or later However when you upgrade a controller from a previous software release to 4 2 or later the configuration file is migrated and converted to XML Note Controller software release 5 2 enables you to read and modify the configuration file See the Editing Configuration Files section on page 9 27 for ...

Страница 528: ... log into the FTP server c In the Server Port Number field enter the port number on the FTP server through which the upload occurs The default value is 21 Step 9 Click Upload to upload the configuration file to the TFTP or FTP server A message appears indicating the status of the upload If the upload fails repeat this procedure and try again Using the CLI to Upload Configuration Files Using the co...

Страница 529: ...nitiate the upload process enter this command transfer upload start Step 9 When prompted to confirm the current settings answer y This example shows the upload command output Mode TFTP TFTP Server IP 10 10 10 4 TFTP Path Config TFTP Filename AS_4402_4_2_55_8_Config xml Data Type Config File Encryption Disabled WARNING Config File Encryption Disabled Are you sure you want to start y N y File transf...

Страница 530: ...hout any adjustment However you can change these values To do so enter the maximum number of times that the TFTP server attempts to download the configuration file in the Maximum Retries field and the amount of time in seconds that the TFTP server attempts to download the configuration file in the Timeout field Step 7 In the File Path field enter the directory path of the configuration file Step 8...

Страница 531: ...pe of file to be downloaded enter this command transfer download datatype config Step 3 If the configuration file is encrypted enter these commands transfer encrypt enable transfer encrypt set key key where key is the encryption key used to decrypt the file Note The key that you enter here should match the one entered during the upload process Step 4 To specify the IP address of the TFTP or FTP se...

Страница 532: ... shows the download command output Mode TFTP TFTP Server IP 10 10 10 4 TFTP Path Config TFTP Filename AS_4402_4_2_55_8_Config xml Data Type Config File Encryption Disabled WARNING Config File Encryption Disabled Are you sure you want to start y N y File transfer operation completed successfully If the download fails repeat this procedure and try again Saving Configurations Controllers contain two ...

Страница 533: ...he configuration file on the server Step 4 To download the configuration file to the controller perform one of the following Download the file using the controller GUI Follow the instructions in the Using the GUI to Download Configuration Files section on page 9 23 Download the file using the controller CLI Follow the instructions in the Using the CLI to Download Configuration Files section on pag...

Страница 534: ...mpt enter n to reboot without saving configuration changes When the controller reboots the configuration wizard starts automatically Step 3 Follow the instructions in the Using the Configuration Wizard section on page 4 2 to complete the initial configuration Erasing the Controller Configuration Follow these steps to reset the controller configuration to default settings Step 1 Enter reset system ...

Страница 535: ...ons Resetting the Controller When the controller reboots the CLI console displays the following reboot information Initializing the system Verifying the hardware configuration Loading microcode into memory Verifying the operating system software load Initializing with its stored configurations Displaying the login prompt ...

Страница 536: ...9 30 Cisco Wireless LAN Controller Configuration Guide OL 17037 01 Chapter 9 Managing Controller Software and Configurations Resetting the Controller ...

Страница 537: ...and manage guest user accounts describes the web authentication process and provides instructions for customizing the web authentication login page It contains these sections Creating Guest User Accounts page 10 2 Web Authentication Process page 10 7 Choosing the Web Authentication Login Page page 10 9 Configuring Wired Guest Access page 10 23 ...

Страница 538: ...on the Security General page This database is shared by local management users including lobby ambassadors net users including guest users MAC filter entries and disabled clients Together these cannot exceed the configured database size Creating a Lobby Ambassador Account You can create a lobby ambassador account on the controller through either the GUI or the CLI Using the GUI to Create a Lobby A...

Страница 539: ...Access Mode drop down box This option enables the lobby ambassador to create guest user accounts Note The ReadOnly option creates an account with read only privileges and the ReadWrite option creates an administrative account with both read and write privileges Step 6 Click Apply to commit your changes The new lobby ambassador account appears in the list of local management users Step 7 Click Save...

Страница 540: ... Log into the controller as the lobby ambassador using the username and password specified in the Creating a Lobby Ambassador Account section above The Lobby Ambassador Guest Management Guest Users List page appears see Figure 10 3 Figure 10 3 Lobby Ambassador Guest Management Guest Users List Page Step 2 Click New to create a guest user account The Lobby Ambassador Guest Management Guest Users Li...

Страница 541: ...upon guest account expiry Similarly if the WLAN session timeout expires before the guest account lifetime the client experiences a recurring session timeout that requires reauthentication Note You can change a guest user account with a non zero lifetime to another lifetime value at any time while the account is active However to make a guest user account permanent using the controller GUI you must...

Страница 542: ...edure to create any additional guest user accounts Viewing Guest User Accounts After a lobby ambassador has created guest user accounts the system administrator can view them from the controller GUI or CLI Using the GUI to View Guest Accounts To view guest user accounts using the controller GUI click Security AAA Local Net Users The Local Net Users page appears see Figure 10 6 Figure 10 6 Local Ne...

Страница 543: ...s LAN their users must enter the username and password when prompted by a login page When web authentication is enabled under Layer 3 Security users might receive a web browser security alert the first time that they attempt to access a URL Figure 10 7 shows a typical security alert Figure 10 7 Typical Web Browser Security Alert After the user clicks Yes to proceed or if the client s browser does ...

Страница 544: ...ows the default web authentication login window Figure 10 8 Default Web Authentication Login Page The default login page contains a Cisco logo and Cisco specific text You can choose to have the web authentication system display one of the following The default login page A modified version of the default login page A customized login page that you configure on an external web server A customized l...

Страница 545: ...tructions in one of these sections to choose the web authentication login page using the controller GUI or CLI Choosing the Default Web Authentication Login Page page 10 10 Creating a Customized Web Authentication Login Page page 10 14 Using a Customized Web Authentication Login Page from an External Web Server page 10 16 Downloading a Customized Web Authentication Login Page page 10 17 Assigning ...

Страница 546: ...hentication login page as is go to Step 8 If you want to modify the default login page go to Step 4 Step 4 If you want to hide the Cisco logo that appears in the top right corner of the default page choose the Cisco Logo Hide option Otherwise click the Show option Step 5 If you want the user to be directed to a particular URL such as the URL for your company after login enter the desired URL such ...

Страница 547: ...r hide the Cisco logo that appears in the top right corner of the default login page enter this command config custom web weblogo enable disable Step 4 If you want the user to be directed to a particular URL such as the URL for your company after login enter this command config custom web redirecturl url You can enter up to 130 characters for the URL To change the redirect back to the default sett...

Страница 548: ...o should be approximately 180 pixels wide and 360 pixels high d To specify the download mode enter transfer download mode tftp e To specify the type of file to be downloaded enter transfer download datatype image f To specify the IP address of the TFTP server enter transfer download serverip tftp server ip address Note Some TFTP servers require only a forward slash as the TFTP server IP address an...

Страница 549: ...ompanyBC Wireless LAN config custom web webmessage Contact the System Administrator for a Username and Password transfer download start Mode TFTP Data Type Login Image TFTP Server IP xxx xxx xxx xxx TFTP Path TFTP Filename Logo gif This may take some time Are you sure you want to start y n y TFTP Image transfer starting Image installed config custom web redirecturl http www AcompanyBC com show cus...

Страница 550: ...rectUrl urlStr if redirectUrl length 255 redirectUrl redirectUrl substring 0 255 document forms 0 redirect_url value redirectUrl document forms 0 buttonClicked value 4 document forms 0 submit function loadAction var url window location href var args new Object var query location search substring 1 var pairs query split for var i 0 i pairs length i var pos pairs i indexOf if pos 1 continue var argn...

Страница 551: ...0 cellpadding 0 tr td nbsp td tr tr align center td colspan 2 font size 10 color 336699 Web Authentication font td tr tr align center td colspan 2 User Name nbsp nbsp nbsp input type TEXT name username SIZE 25 MAXLENGTH 63 VALUE td tr tr align center td colspan 2 Password nbsp nbsp nbsp nbsp nbsp input type Password name password SIZE 25 MAXLENGTH 24 td tr tr align center td colspan 2 input type b...

Страница 552: ...n Example at this URL http www cisco com en US tech tk722 tk809 technologies_configuration_example09186a008067489 f shtml Using a Customized Web Authentication Login Page from an External Web Server If you want to use a customized web authentication login page that you configured on an external web server follow the instructions in the GUI or CLI procedure below When you enable this feature the us...

Страница 553: ...login page on your web server enter this command config custom web ext webauth url url You can enter up to 252 characters for the URL Step 3 To specify the IP address of your web server enter this command config custom web ext webserver add delete server_IP_address Step 4 Enter save config to save your settings Step 5 Follow the instructions in the Using the CLI to Verify the Web Authentication Lo...

Страница 554: ...e Using Templates chapter of the Cisco Wireless Control System Configuration Guide Release 5 2 for instructions If you want to download a customized web authentication login page to the controller follow the instructions in the GUI or CLI procedure below Using the GUI to Download a Customized Web Authentication Login Page Step 1 Make sure that you have a TFTP server available for the file download...

Страница 555: ...ation login page Step 17 If you are satisfied with the content and appearance of the login page click Save Configuration to save your changes Using the CLI to Download a Customized Web Authentication Login Page Step 1 Make sure that you have a TFTP server available for the file download See the guidelines for setting up a TFTP server in Step 8 of the Using the CLI to Choose the Default Web Authent...

Страница 556: ...ication Login Page Settings Enter show custom web to verify your changes to the web authentication login page This example shows the information that appears when the configuration settings are set to default values Cisco Logo Enabled CustomLogo Disabled Custom Title Disabled Custom Message Disabled Custom Redirect URL Disabled Web Authentication Mode Disabled Web Authentication URL Disabled This ...

Страница 557: ...owing options to define the web authentication pages for wireless guest users Internal Displays the default web login page for the controller This is the default value Customized Displays custom web login login failure and logout pages If you choose this option three separate drop down boxes appear for login login failure and logout page selection You do not need to define a customized page for al...

Страница 558: ...ID number of the WLAN to which you want to assign a web login login failure or logout page enter this command show wlan summary Step 2 If you want wireless guest users to log into a customized web login login failure or logout page enter these commands to specify the filename of the web authentication page and the WLAN for which it should display config wlan custom web login page page_name wlan_id...

Страница 559: ...er than a global custom web configuration enter this command config wlan custom web global disable wlan_id Note If you enter the config wlan custom web global enable wlan_id command the custom web authentication configuration at the global level is used Step 7 To save your changes enter this command save config Configuring Wired Guest Access Wired guest access enables guest users to connect to the...

Страница 560: ...or controllers to handle this traffic See Figure 10 16 Figure 10 16 Wired Guest Access Example with Two Controllers 232048 Internet VLAN ID 236 guest LAN 1 egress interface guest ds ingress interface sidkrish intf Controller foreign Controller anchor SSID internal SSID guest Wireless guest client Access switch Conference room Guest office Wired guest access ports Wired guest access ports 232347 In...

Страница 561: ... security for the guest LAN 6 Verify the configuration Configuration Guidelines Follow these guidelines before using wired guest access on your network Wired guest access is supported only on the following controllers 4400 series controllers the Cisco WiSM and the Catalyst 3750G Integrated Wireless LAN Controller Switch Wired guest access interfaces must be tagged Wired guest access ports must be ...

Страница 562: ...ee Figure 10 17 Figure 10 17 Interfaces Edit Page Step 6 In the Port Number field enter a valid port number You can enter a number between 0 and 25 inclusive Step 7 Check the Guest LAN check box Step 8 Enter an IP address for the primary DHCP server Step 9 Click Apply to commit your changes Step 10 To create a wired LAN for guest user access click WLANs Step 11 On the WLANs page choose Create New ...

Страница 563: ...17 Check the Enabled check box for the Status parameter Step 18 Web authentication Web Auth is the default security policy If you want to change this to web passthrough click the Security tab after completing Step 19 and Step 20 Step 19 From the Ingress Interface drop down box choose the VLAN that you created in Step 3 This VLAN provides a path between the wired guest client and the controller by ...

Страница 564: ...is is the default value Customized Displays custom web login login failure and logout pages If you choose this option three separate drop down boxes appear for login login failure and logout page selection You do not need to define a customized page for all three options Choose None from the appropriate drop down box if you do not want to display a customized page for that option Note These option...

Страница 565: ...nd to map a physical port to the interface config interface port interface_name primary_port secondary_port Step 3 To enable or disable the guest LAN VLAN enter this command config interface guest lan interface_name enable disable This VLAN is later associated with the ingress interface created in Step 5 Step 4 To create a wired LAN for wired client traffic and associate it to an interface enter t...

Страница 566: ... logout page Note To use the controller s default logout page enter this command config guest lan custom web logout page none guest_lan_id Step 10 If you want wired guest users to be redirected to an external server before accessing the web login page enter this command to specify the URL of the external server config guest lan custom web ext webauth url ext_web_url guest_lan_id Step 11 If you wan...

Страница 567: ...ings for a specific guest LAN enter this command show custom web all guest lan guest_lan_id Note If internal web authentication is configured the Web Authentication Type displays as internal rather than external controller level or customized WLAN profile level Information similar to the following appears for the show custom web all command Radius Authentication Method PAP Cisco Logo Enabled Custo...

Страница 568: ...b guest lan guest_lan_id command Guest LAN ID 1 Guest LAN Status Disabled Web Security Policy Web Based Authentication Global Status Enabled WebAuth Type Internal Loginfailure page name None Logout page name None Step 16 To display a summary of the local interfaces enter this command show interface summary Information similar to the following appears Interface Name Port Vlan Id IP Address Type Ap ...

Страница 569: ...P Manager No Guest Interface Yes Step 18 To display the configuration of a specific wired guest LAN enter this command show guest lan guest_lan_id Information similar to the following appears Guest LAN Identifier 1 Profile Name guestlan Network Name SSID guestlan Status Enabled AAA Policy Override Disabled Number of Active Clients 1 Exclusionlist Timeout 60 seconds Session Timeout Infinity Interfa...

Страница 570: ... 1 Yes Step 20 To display detailed information for a specific client enter this command show client detail client_mac Information similar to the following appears Client MAC Address 00 40 96 b2 a3 44 Client Username N A AP MAC Address 00 18 74 c7 c0 90 Client State Associated Wireless LAN Id 1 BSSID 00 18 74 c7 c0 9f Channel 56 IP Address 192 168 10 28 Association Id 1 Authentication Algorithm Ope...

Страница 571: ... to configure it on the controllers It contains these sections Overview of Radio Resource Management page 11 2 Overview of RF Groups page 11 5 Configuring an RF Group page 11 6 Viewing RF Group Status page 11 8 Configuring RRM page 11 9 Overriding RRM page 11 25 Enabling Rogue Access Point Detection in RF Groups page 11 34 Configuring CCX Radio Management Features page 11 36 Configuring Pico Cell ...

Страница 572: ...RM automatically detects and configures new controllers and lightweight access points as they are added to the network It then automatically adjusts associated and nearby lightweight access points to optimize coverage and capacity Lightweight access points can simultaneously scan all valid 802 11a b g channels for the country of operation as well as for channels available in other locations The ac...

Страница 573: ...ereby avoiding this problem The controller examines a variety of real time RF characteristics to efficiently handle channel assignments These include Access point received energy The received signal strength measured between each access point and its nearby neighboring access points Channels are optimized for the highest network capacity Noise Noise can limit signal quality at the client and acces...

Страница 574: ... 2 25 times higher than 20 MHz channels In controller software release 5 1 or later you can choose between DCA working at 20 or 40 MHz Note Radios using 40 MHz channels in the 2 4 GHz band are not supported by DCA Coverage Hole Detection and Correction The RRM coverage hole detection algorithm is designed to detect areas of radio coverage in a wireless LAN that are below the level needed for robus...

Страница 575: ... controller Lightweight access points periodically send out neighbor messages over the air Access points using the the same RF group name are able to validate messages from each other When access points on different controllers hear validated neighbor messages at a signal strength of 80 dBm or stronger the controllers dynamically form an RF group Note RF groups and mobility groups are similar in t...

Страница 576: ...e 11 9 for details RF Group Name A controller is configured with an RF group name which is sent to all access points joined to the controller and used by the access points as the shared secret for generating the hashed MIC in the neighbor messages To create an RF group you simply configure all of the controllers to be included in the group with the same RF group name If there is any possibility th...

Страница 577: ...2 Enter a name for the RF group in the RF Network Name field The name can contain up to 19 ASCII characters Step 3 Click Apply to commit your changes Step 4 Click Save Configuration to save your changes Step 5 Repeat this procedure for each controller that you want to include in the RF group Using the CLI to Configure RF Groups Follow these steps to configure an RF group using the CLI Step 1 Enter...

Страница 578: ...these steps to view the status of the RF group using the GUI Step 1 Click Wireless 802 11a n or 802 11b g n RRM RF Grouping to open the 802 11a or 802 11b g RRM RF Grouping page see Figure 11 2 Figure 11 2 802 11a RRM RF Grouping Page This page shows the details of the RF group specifically how often the group information is updated 600 seconds by default the MAC address of the RF group leader whe...

Страница 579: ...e group member are identical this controller is currently the group leader Step 2 Enter show advanced 802 11b group to see which controller is the RF group leader for the 802 11b g RF network Configuring RRM The controller s preconfigured RRM settings are optimized for most deployments However you can modify the controller s RRM configuration parameters at any time through either the GUI or the CL...

Страница 580: ... to optimize RMM parameter settings for the the group If you disable it the controller does not participate in automatic RF grouping instead it optimizes the access points connected directly to it The default value is checked Note Cisco recommends that controllers participate in automatic RF grouping Note that you can override RRM settings without disabling automatic RF group participation See the...

Страница 581: ...o a power level that varies depending on the regulatory domain in which the access points are deployed See Step 7 on page 11 29 for information on available transmit power levels Note For optimal performance Cisco recommends that you use the Automatic setting Refer to the Disabling Dynamic Channel and Power Assignment Globally for a Controller section on page 11 33 for instructions if you ever nee...

Страница 582: ...ful when you know that the clients do not support certain channels because they are legacy devices or they have certain regulatory restrictions Step 1 To disable the 802 11a or 802 11b g network follow these steps a Click Wireless 802 11a n or 802 11b g n Network to open the 802 11a or 802 11b g Global Parameters page b Uncheck the 802 11a or 802 11b g Network Status check box c Click Apply to com...

Страница 583: ...s to start The options are numbers between 0 and 23 inclusive representing the hour of the day from 12 00 a m to 11 00 p m Step 6 Check the Avoid Foreign AP Interference check box to cause the controller s RRM algorithms to consider 802 11 traffic from foreign access points those not included in your wireless network when assigning channels to lightweight access points or uncheck it to disable thi...

Страница 584: ...configure an access point s radio for 20 or 40 MHz mode on the 802 11a n Cisco APs Configure page If you ever then change the static RF channel assignment method to Global on the access point radio the global DCA configuration overrides the channel width configuration that the access point was previously using It can take up to 30 minutes depending on how often DCA is configured to run for the cha...

Страница 585: ...to commit your changes Step 14 To re enable the 802 11a or 802 11b g network follow these steps a Click Wireless 802 11a n or 802 11b g n Network to open the 802 11a or 802 11b g Global Parameters page b Check the 802 11a or 802 11b g Network Status check box c Click Apply to commit your changes Step 15 Click Save Configuration to save your changes Note To see why the DCA algorithm changed channel...

Страница 586: ... potential coverage hole has been detected The valid range is 60 to 90 dBm and the default value is 80 dBm The access point takes data RSSI measurements every 5 seconds and reports them to the controller in 90 second intervals Step 5 In the Voice RSSI field enter the minimum receive signal strength indication RSSI value for voice packets received by the access point The value that you enter is use...

Страница 587: ...P and Coverage Exception Level per AP fields over a 90 second period The controller determines if the coverage hole can be corrected and if appropriate mitigates the coverage hole by increasing the transmit power level for that specific access point Step 8 Click Apply to commit your changes Step 9 To re enable the 802 11a or 802 11b g network follow these steps a Click Wireless 802 11a n or 802 11...

Страница 588: ...oise non 802 11 traffic on a single access point The valid range is 127 to 0 dBm and the default value is 70 dBm d In the Utilization field enter the percentage of RF bandwidth being used by a single access point The valid range is 0 to 100 and the default value is 80 Step 3 From the Channel List drop down box choose one of the following options to specify the set of channels that the access point...

Страница 589: ...ich eventually builds the neighbor list The valid range is 60 to 3600 seconds and the default value is 60 seconds Note In controller software release 4 1 185 0 or later if the access point radio does not receive a neighbor packet from an existing neighbor within 60 minutes the controller deletes that neighbor from the neighbor list In controller software releases prior to 4 1 185 0 the controller ...

Страница 590: ... availability and interference enter this command config 802 11a 802 11b channel global once To disable RRM and set all channels to their default values enter this command config 802 11a 802 11b channel global off To specify the channel set used for DCA enter this command config advanced 802 11a 802 11b channel add delete channel_number You can enter only one channel number per command This comman...

Страница 591: ...an access point s radio for 20 or 40 MHz mode using the config 802 11a chan_width Cisco_AP 20 40 command If you ever then change the static configuration to global on the access point radio the global DCA configuration overrides the channel width configuration that the access point was previously using It can take up to 30 minutes depending on how often DCA is configured to run for the change to t...

Страница 592: ...ent Specifies the percentage of clients on an access point that are experiencing a low signal level but cannot roam to another access point The valid range is 0 to 100 and the default value is 25 config advanced 802 11a 802 11b coverage data voice packet count packets Specifies the minimum failure count threshold for uplink data or voice packets The valid range is 1 to 255 packets and the default ...

Страница 593: ...own Maximum unknown Channel Dwell Times Minimum unknown Average unknown Maximum unknown Auto RF Allowed Channel List 36 40 Auto RF Unused Channel List 44 48 52 56 60 64 100 104 108 112 116 132 136 140 149 153 157 161 165 190 196 DCA Outdoor AP option Disabled coverage Shows the coverage hole detection configuration and statistics Coverage Hole Detection 802 11a Coverage Hole Detection Mode Enabled...

Страница 594: ...Start Preamble Power Threshold 2 RxRestart Signal Jump Status Enabled RxRestart Signal Jump Threshold 10 TxStomp Low RSSI Status Enabled TxStomp Low RSSI Threshold 30 TxStomp Wrong BSSID Status Enabled TxStomp Wrong BSSID Data Only Status Enabled RxAbort Raw Power Drop Status Disabled RxAbort Raw Power Drop Threshold 10 RxAbort Low RSSI Status Disabled RxAbort Low RSSI Threshold 0 RxAbort Wrong BS...

Страница 595: ...the access points instead of relying on the RRM algorithms provided by Cisco Typically this is true in challenging RF environments and non standard deployments but not the more typical carpeted offices Note If you choose to statically assign channels and power levels to your access points and or to disable dynamic channel and power assignment you should still use automatic RF grouping to avoid spu...

Страница 596: ...hin close proximity to each other to the maximum power level Using the GUI to Statically Assign Channel and Transmit Power Settings Follow these steps to statically assign channel and or power settings on a per access point radio basis using the GUI Step 1 Click Wireless Access Points Radios 802 11a n or 802 11b g n to open the 802 11a n or 802 11b g n Radios page see Figure 11 7 Figure 11 7 802 1...

Страница 597: ...os to communicate using two adjacent 20 MHz channels bonded together The radio uses the primary channel that you choose in Step 6 as well as its extension channel for faster throughput Each channel has only one extension channel 36 and 40 are a pair 44 and 48 are a pair and so on For example if you choose a primary channel of 44 the controller would use channel 48 as the extension channel Converse...

Страница 598: ...da for 40 MHz channel bonding Figure 11 9 Channel Bonding in the 5 GHz Band Step 5 Follow these steps to configure the antenna parameters for this radio a From the Antenna Type drop down box choose Internal or External to specify the type of antennas used with the access point radio b Check and uncheck the check boxes in the Antenna field to enable and disable the use of specific antennas for this...

Страница 599: ...nt Channel field shows the current primary channel If you chose 40 MHz for the channel width in Step 4 the extension channel appears in parentheses after the primary channel Note Changing the operating channel causes the access point radio to reset Step 7 To assign a transmit power level to the access point radio choose Custom for the Assignment Method under Tx Power Level Assignment and choose a ...

Страница 600: ... legacy 802 11a radios 20 MHz 802 11n radios or 40 MHz 802 11n radios that you want to operate using only 20 MHz channels This is the default value 40 allows 40 MHz 802 11n radios to communicate using two adjacent 20 MHz channels bonded together The radio uses the primary channel that you choose in Step 5 as well as its extension channel for faster throughput Each channel has only one extension ch...

Страница 601: ... 8 and then round down to enter only the whole number 8 The controller reduces the actual equivalent isotropic radiated power EIRP to make sure that the antenna does not violate your country s regulations Step 5 To specify the channel that a particular access point is to use enter this command config 802 11a 802 11b channel ap Cisco_AP channel Example To configure 802 11a channel 36 as the default...

Страница 602: ...enter this command config 802 11a 802 11b enable network Step 11 To save your settings enter this command save config Step 12 To see the configuration of a particular access point enter this command show ap config 802 11a 802 11b Cisco_AP Information similar to the following appears Cisco AP Identifier 7 Cisco AP Name AP1 Tx Power Num Of Supported Power Levels 8 Tx Power Level 1 20 dBm Tx Power Le...

Страница 603: ...on transmit power levels Step 4 Click Apply to commit your changes Step 5 Click Save Configuration to save your changes Step 6 If you are overriding the default channel and power settings on a per radio basis assign static channel and power settings to each of the access point radios that are joined to the controller Step 7 If desired repeat this procedure for the network type you did not select 8...

Страница 604: ...cessful the frames are authenticated Otherwise the authorized access point reports the neighboring access point as a rogue records its BSSID in a rogue table and sends the table to the controller Using the GUI to Enable Rogue Access Point Detection in RF Groups Using the controller GUI follow these steps to enable rogue access point detection in RF groups Step 1 Make sure that each controller in t...

Страница 605: ...age Step 8 Choose AP Authentication from the Protection Type drop down box to enable rogue access point detection Step 9 Enter a number in the Alarm Trigger Threshold edit box to specify when a rogue access point alarm is generated An alarm occurs when the threshold value which specifies the number of access point frames with an invalid authentication IE is met or exceeded within the detection per...

Страница 606: ... occurs when the threshold value which specifies the number of access point frames with an invalid authentication IE is met or exceeded within the detection period Note The valid threshold range is from1 to 255 and the default threshold value is 1 To avoid false alarms you may want to set the threshold to a higher value Step 7 Enter save config to save your settings Step 8 Repeat Step 5 through St...

Страница 607: ...lmed by radio measurement requests and reports only two clients per access point and up to twenty clients per controller are supported You can view the status of radio measurement requests for a particular access point or client as well as radio measurement reports for a particular client from the controller CLI Controller software release 4 1 or later also improves the ability of the Location App...

Страница 608: ...Step 3 If you checked the Mode check box in the previous step enter a value in the Interval field to specify how often the access points are to issue the broadcast radio measurement requests Range 60 to 32400 seconds Default 60 seconds Step 4 Click Apply to commit your changes Step 5 Click Save Configuration to save your settings Step 6 Follow the instructions in Step 2 of the Using the CLI to Con...

Страница 609: ... 802 11a 802 11b ccx location meas ap Cisco_AP enable interval_seconds The range for the interval_seconds parameter is 60 to 32400 seconds and the default value is 60 seconds This command causes a particular access point in the 802 11a or 802 11b g network to issue broadcast radio measurement requests to clients running CCXv2 or higher Step 3 To enable or disable location calibration for a particu...

Страница 610: ...nt ccx rm client_mac status Information similar to the following appears Client Mac Address 00 40 96 ae 53 b4 Beacon Request Enabled Channel Load Request Disabled Frame Request Disabled Noise Histogram Request Disabled Path Loss Request Disabled Interval 5 Iteration 3 5 To see radio measurement reports for a particular client enter these commands show client ccx rm client_mac report beacon Shows t...

Страница 611: ...rall network performance you can use the controller GUI or CLI to set high density or pico cell mode parameters These parameters enable you to apply the same receiver sensitivity threshold clear channel assessment CCA sensitivity threshold and transmit power values across all access points registered to a given controller When a client that supports high density associates to an access point with ...

Страница 612: ...d controller When you adjust the pico cell mode parameters the following RRM values automatically change The default value of the Fixed option for the Power Level Assignment Method parameter on the 802 11a or 802 11b RRM Tx Power Control TPC page reflects the power setting that you specify for the pico cell Transmit Power parameter The default value of the Power Threshold parameter on the 802 11a ...

Страница 613: ...sco s acquisition of Airespace Cisco recommends that you choose V2 if you want to enable pico cell mode V2 Enables pico cell mode version 2 Choose this option if you want to adjust the pico cell mode parameters to optimize network performance in high density areas where all the clients support high density Step 4 If you chose V2 in Step 3 the 802 11a or 802 11b g Pico Cell page displays three conf...

Страница 614: ... CLI to Configure Pico Cell Mode Note Refer to the Using the GUI to Configure Pico Cell Mode section on page 11 42 for descriptions and default values of the parameters used in the CLI commands Table 11 3 Pico Cell Mode V2 Parameters Parameter Description Rx Sensitivity Threshold Specifies the current minimum and maximum values in dBm for the receiver sensitivity of the 802 11a or 802 11b g radio ...

Страница 615: ...tivity threshold enter this command config advanced 802 11a 802 11b receiver pico cell V2 rx_sense_threshold min max current b To configure the CCA sensitivity threshold enter this command config advanced 802 11a 802 11b receiver pico cell V2 cca_sense_threshold min max current c To configure the transmit power enter this command config advanced 802 11a 802 11b receiver pico cell V2 sta_tx_pwr min...

Страница 616: ...xAbort Wrong BSSID Data Only Status Disabled pico cell V2 parameters in dbm units RxSensitivity Min Max Current RxSense Thres 127 127 65 CCA Threshold Min Max Current Clear Channel 127 127 65 Tx Pwr Min Max Current Transmit Power for A 127 127 10 3 To see the noise and interference information coverage information client signal strengths and signal to noise ratios and nearby access points enter th...

Страница 617: ...e Client Signal To Noise Ratios SNR 0 dB 0 clients SNR 5 dB 0 clients SNR 10 dB 0 clients SNR 15 dB 0 clients SNR 20 dB 0 clients SNR 25 dB 0 clients SNR 30 dB 0 clients SNR 35 dB 0 clients SNR 40 dB 0 clients SNR 45 dB 0 clients Nearby APs Radar Information RF Parameter Recommendations Power Level 0 RTS CTS Threshold 0 Fragmentation Threshold 0 Antenna Pattern 0 ...

Страница 618: ...11 48 Cisco Wireless LAN Controller Configuration Guide OL 17037 01 Chapter 11 Configuring Radio Resource ManagementWireless Device Access Configuring Pico Cell Mode ...

Страница 619: ...ow to configure them on the controllers It contains these sections Overview of Mobility page 12 2 Overview of Mobility Groups page 12 5 Configuring Mobility Groups page 12 9 Viewing Mobility Group Statistics page 12 16 Configuring Auto Anchor Mobility page 12 20 WLAN Mobility Security Values page 12 25 Using Symmetric Mobility Tunneling page 12 26 Running Mobility Ping Tests page 12 28 ...

Страница 620: ...laces an entry for that client in its client database This entry includes the client s MAC and IP addresses security context and associations quality of service QoS contexts the WLAN and the associated access point The controller uses this information to forward frames and manage traffic to and from the wireless client Figure 12 1 illustrates a wireless client roaming from one access point to anot...

Страница 621: ...e IP subnet Figure 12 2 Inter Controller Roaming When the client associates to an access point joined to a new controller the new controller exchanges mobility messages with the original controller and the client database entry is moved to the new controller New security context and associations are established if necessary and the client database entry is updated for the new access point This pro...

Страница 622: ...rk is forwarded directly into the network by the foreign controller Traffic to the client arrives at the anchor controller which forwards the traffic to the foreign controller in an EtherIP tunnel The foreign controller then forwards the data to the client If a wireless client roams to a new foreign controller the client database entry is moved from the original foreign controller to the new forei...

Страница 623: ...t inter controller wireless LAN roaming and controller redundancy Figure 12 4 shows an example of a mobility group Note Controllers do not have to be of the same model to be a member of a mobility group Mobility groups can be comprised of any combination of controller platforms Figure 12 4 A Single Mobility Group As shown above each controller is configured with a list of the other members of the ...

Страница 624: ...5 Two Mobility Groups The controllers in the ABC mobility group recognize and communicate with each other through their access points and through their shared subnets The controllers in the ABC mobility group do not recognize or communicate with the XYZ controllers which are in a different mobility group Likewise the controllers in the XYZ mobility group do not recognize or communicate with the co...

Страница 625: ...nding mobility messages to other member controllers In controller software release 5 0 or later two improvements have been made to mobility messaging each of which is especially useful when sending messages to the full list of mobility members Sending Mobile Announce messages within the same group first and then to other groups in the list The controller sends a Mobile Announce message to members ...

Страница 626: ...roller This is done using the MAC address of the requesting controller When configuring the mobility group in a network where NAT is enabled enter the IP address sent to the controller from the NAT device rather than the controller s management interface IP address Also make sure that the following ports are open on the firewall if you are using a firewall such as PIX UDP 16666 for tunnel control ...

Страница 627: ... a mobility group you must verify that the following requirements have been met for all controllers that are to be included in the group IP connectivity must exist between the management interfaces of all controllers Note You can verify IP connectivity by pinging the controllers All controllers must be configured with the same mobility group name Note The mobility group name is generally set at de...

Страница 628: ... virtual interface IP address by editing the virtual interface name on the Controller Interfaces page See Chapter 3 for more information on the controller s virtual interface Note If all the controllers within a mobility group are not using the same virtual interface inter controller roaming may appear to work but the hand off does not complete and the client loses connectivity for a period of tim...

Страница 629: ...ddress of each controller that is currently a member of the mobility group The first entry is the local controller which cannot be deleted Note If you want to delete any of the remote controllers from the mobility group hover your cursor over the blue drop down arrow for the desired controller and choose Remove Step 2 Perform one of the following to add controllers to a mobility group If you are a...

Страница 630: ...added c In the Group Name field enter the name of the mobility group Note The mobility group name is case sensitive d Click Apply to commit your changes The new controller is added to the list of mobility group members on the Static Mobility Group Members page e Click Save Configuration to save your changes f Repeat Step a through Step e to add all of the controllers in the mobility group g Repeat...

Страница 631: ...sitive c Repeat Step a and Step b for each additional controller that you want to add to the mobility group d Highlight and copy the complete list of entries in the edit box e Click Apply to commit your changes The new controllers are added to the list of mobility group members on the Static Mobility Group Members page f Click Save Configuration to save your changes g Paste the list into the edit ...

Страница 632: ...ck Apply to commit your changes Step 9 If desired you can also configure the multicast group IP address for non local groups within the mobility list To do so click the name of a non local mobility group to open the Mobility Multicast Messaging Edit page see Figure 12 12 and enter the multicast group IP address for the non local mobility group in the Multicast IP Address field Note If you do not c...

Страница 633: ... add mac_address ip_address Note If you are configuring the mobility group in a network where network address translation NAT is enabled enter the IP address sent to the controller from the NAT device rather than the controller s management interface IP address Otherwise mobility will fail among controllers in the mobility group Note Enter config mobility group member delete mac_address if you wan...

Страница 634: ... debugging of multicast usage for mobility messages enter this command debug mobility multicast enable disable Viewing Mobility Group Statistics You can view three types of mobility group statistics from the controller GUI Global statistics Affect all mobility transactions Mobility initiator statistics Generated by the controller initiating a mobility event Mobility responder statistics Generated ...

Страница 635: ...on Group Mobility Statistics Rx Errors Generic protocol packet receive errors such as packet too short or format incorrect Tx Errors Generic protocol packet transmit errors such as packet transmission fail Responses Retransmitted The mobility protocol uses UDP and it resends requests several times if it does not receive a response Because of network or processing delays the responder may receive o...

Страница 636: ... announced to the mobility group Handoff Replies Received The number of handoff replies that have been received in response to the requests sent Handoff as Local Received The number of handoffs in which the entire client session has been transferred Handoff as Foreign Received The number of handoffs in which the client session was anchored elsewhere Handoff Denys Received The number of handoffs th...

Страница 637: ...that client Ping Pong Handoff Requests Dropped The number of handoff requests that were denied because the handoff period was too short 3 seconds Handoff Requests Dropped The number of handoff requests that were dropped due to either an incomplete knowledge of the client or a problem with the packet Handoff Requests Denied The number of handoff requests that were denied Client Handoff as Local The...

Страница 638: ...er of a mobility group that has not been configured as a mobility anchor for a WLAN the client associates to the controller locally a local session is created for the client and the client is announced to the other controllers in the mobility list If the announcement is not answered the controller contacts one of the anchor controllers configured for the WLAN and creates a foreign session for the ...

Страница 639: ...ntroller must be configured with mobility anchors On the anchor controller configure the anchor controller itself as a mobility anchor On the foreign controller configure the anchor as a mobility anchor Auto anchor mobility is not supported for use with DHCP option 82 When using the guest N 1 redundancy and mobility failover features with a firewall make sure that the following ports are open UDP ...

Страница 640: ...he valid range is 3 to 20 and the default value is 3 c In the Keep Alive Interval field enter the amount of time in seconds between each ping request sent to an anchor controller The valid range is 1 to 30 seconds and the default value is 10 seconds d Click Apply to commit your changes Step 2 Click WLANs to open the WLANs page see Figure 12 15 Figure 12 15 WLANs Page Step 3 Click the blue drop dow...

Страница 641: ...a mobility anchor for a WLAN or wired guest LAN hover your cursor over the blue drop down arrow for the anchor and choose Remove Step 6 Click Save Configuration to save your changes Step 7 Repeat Step 4 and Step 6 to set any other controllers as mobility anchors for this WLAN or wired guest LAN Step 8 Configure the same set of mobility anchors on every controller in the mobility group Using the CL...

Страница 642: ...st_lan_id anchor_controller_ip_address config wlan guest lan mobility anchor delete wlan_id guest_lan_id anchor_controller_ip_address Note The wlan_id or guest_lan_id must exist and be disabled Note Deleting the last anchor disables the auto anchor mobility feature and resumes normal mobility for new associations 5 To save your settings enter this command save config 6 To see a list and status of ...

Страница 643: ...IP Address Group Name Status 00 0b 85 32 b1 80 10 10 1 1 local Up 00 0b 85 33 a1 70 10 1 1 2 local Data Path Down 00 0b 85 23 b2 30 10 20 1 2 local Up 8 To troubleshoot mobility issues enter these commands debug mobility handoff enable disable Debugs mobility handoff issues debug mobility keep alive enable disable all Dumps the keepalive packets for all mobility anchors debug mobility keep alive e...

Страница 644: ...symmetric Tunneling or Uni Directional Tunneling Asymmetric tunneling breaks when an upstream router has reverse path filtering RPF enabled In this case the client traffic is dropped at the router because the RPF check ensures that the path back to the source address matches the path from which the packet is coming When symmetric mobility tunneling is enabled all client traffic is sent to the anch...

Страница 645: ...nt traffic could be sent on an incorrect VLAN during mobility events Note Although a 2100 series controller cannot be designated as an anchor for a WLAN when you are using auto anchor mobility it can serve as an anchor in symmetric mobility tunneling to process and forward the upstream client data traffic tunneled from the foreign controller Both the controller GUI and CLI show that symmetric mobi...

Страница 646: ...IP EoIP tunnel Because UDP and EoIP are not reliable transport mechanisms there is no guarantee that a mobility control packet or data packet will be delivered to a mobility peer Mobility packets may be lost in transit due to a firewall filtering the UDP port or EoIP packets or due to routing issues Controller software release 4 0 or later enables you to test the mobility communication environment...

Страница 647: ..._peer_IP_address The mobility_peer_IP_address parameter must be the IP address of a controller that belongs to the mobility list 3 To troubleshoot your controller for mobility ping enter these commands config logging buffered debugging show logging To troubleshoot your controller for mobility ping over UDP enter this command to display the mobility control packet debug mobility handoff enable Note...

Страница 648: ...12 30 Cisco Wireless LAN Controller Configuration Guide OL 17037 01 Chapter 12 Configuring Mobility GroupsWireless Device Access Running Mobility Ping Tests ...

Страница 649: ...iguring Hybrid REAPWireless Device Access This chapter describes hybrid REAP and explains how to configure this feature on controllers and access points It contains these sections Overview of Hybrid REAP page 13 2 Configuring Hybrid REAP page 13 5 Configuring Hybrid REAP Groups page 13 15 ...

Страница 650: ...o deployment restriction on the number of hybrid REAP access points per location However the minimum bandwidth restriction remains 128 kbps with the roundtrip latency no greater than 300 ms and the maximum transmission unit MTU no smaller than 500 bytes Hybrid REAP Authentication Process When a hybrid REAP access point boots up it looks for a controller If it finds one it joins the controller down...

Страница 651: ...er centrally switched depending on the WLAN configuration With respect to client authentication open shared EAP web authentication and NAC and data packets the WLAN can be in any one of the following states depending on the configuration and state of controller connectivity central authentication central switching In this state the controller handles client authentication and all client data is tu...

Страница 652: ...r dependent activities such as network access control NAC and web authentication guest access are disabled and the access point does not send any intrusion detection system IDS reports to the controller Furthermore most radio resource management RRM features such as neighbor discovery noise interference load and coverage measurements use of the neighbor list and rogue containment and detection are...

Страница 653: ... access point Hybrid REAP access points support multiple SSIDs Refer to the Using the CLI to Create WLANs section on page 6 5 for more information NAC out of band integration is supported only on WLANs configured for hybrid REAP central switching It is not supported for use on WLANs configured for hybrid REAP local switching Refer to the Configuring NAC Out of Band Integration section on page 6 55...

Страница 654: ...e settings Note The addresses in this sample configuration are for illustration purposes only The addresses that you use must fit into your upstream network Sample local switch configuration ip dhcp pool NATIVE network 10 10 100 0 255 255 255 0 default router 10 10 100 1 ip dhcp pool LOCAL SWITCH network 10 10 101 0 255 255 255 0 default router 10 10 101 1 interface FastEthernet1 0 1 description U...

Страница 655: ...I Step 1 Follow these steps to create a centrally switched WLAN In our example this is the first WLAN employee a Click WLANs to open the WLANs page b Choose Create New from the drop down box and click Go to open the WLANs New page see Figure 13 2 Figure 13 2 WLANs New Page c From the Type drop down box choose WLAN d Enter a unique profile name for the WLAN in the Profile Name field e Enter a name ...

Страница 656: ...ommit your changes j Click Save Configuration to save your changes Step 2 Follow these steps to create a locally switched WLAN In our example this is the second WLAN employee local a Follow the substeps in Step 1 to create a new WLAN In our example this WLAN is named employee local b When the WLANs Edit page appears modify the configuration parameters for this WLAN In our employee WLAN example you...

Страница 657: ...this is the third WLAN guest central You might want to tunnel guest traffic to the controller so you can exercise your corporate data policies for unprotected guest traffic from a central site Note Chapter 10 provides additional information on creating guest user accounts a Follow the substeps in Step 1 to create a new WLAN In our example this WLAN is named guest central b When the WLANs Edit page...

Страница 658: ...QoS role to a guest user the bandwidth contracts for this user are defined in the QoS profile for the WLAN m If you are adding a new user and you checked the Guest User Role check box choose the QoS role that you want to assign to this guest user from the Role drop down box If you want to create a new QoS role see the Configuring Quality of Service Roles section on page 4 48 for instructions n Fro...

Страница 659: ...LAN for central switching This is the default value Note Go to the Configuring an Access Point for Hybrid REAP section on page 13 11 to configure up to six access points for hybrid REAP Use these commands to obtain hybrid REAP information show ap config general Cisco_AP Shows VLAN configurations show wlan wlan_id Shows whether the WLAN is locally or centrally switched show client detail client_mac...

Страница 660: ...13 6 Figure 13 6 All APs Details for General Page Step 4 Choose H REAP from the AP Mode drop down box to enable hybrid REAP for this access point Note The last parameter on the Inventory tab indicates whether this access point can be configured for hybrid REAP Only the 1130AG 1240AG and 1250 access points support hybrid REAP Step 5 Click Apply to commit your changes and to cause the access point t...

Страница 661: ... be configured per hybrid REAP access point in a VLAN enabled domain Otherwise the access point cannot send and receive packets to and from the controller Step 8 Click Apply to commit your changes The access point temporarily loses its connection to the controller while its Ethernet port is reset Step 9 Click the name of the same access point and then click the H REAP tab Step 10 Click VLAN Mappin...

Страница 662: ...inherit the VLAN assigned at the controller config ap h reap vlan native vlan id Cisco_AP Enables you to configure a native VLAN for this hybrid REAP access point By default no VLAN is set as the native VLAN One native VLAN must be configured per hybrid REAP access point when VLAN tagging is enabled Make sure the switchport to which the access point is connected has a corresponding native VLAN con...

Страница 663: ...onnects the local user can type any http address in the web browser The user is automatically directed to the controller to complete the web authentication process When the web login page appears the user enters his or her username and password To see if a client s data traffic is being locally or centrally switched click Monitor Clients on the controller GUI click the Detail link for the desired ...

Страница 664: ...ture prevents the need to perform a full RADIUS EAP authentication as the client roams from one access point to another The hybrid REAP access points need to obtain the CCKM cache information for all the clients that might associate so they can process it quickly instead of sending it back to the controller If for example you have a controller with 300 access points and 100 clients that might asso...

Страница 665: ...brid REAP backup RADIUS server feature If a hybrid REAP group is configured with both a backup RADIUS server and local authentication the hybrid REAP access point always attempts to authenticate clients using the primary backup RADIUS server first followed by the secondary backup RADIUS server if the primary is not reachable and finally the hybrid REAP access point itself if the primary and second...

Страница 666: ...Step 6 If you want to configure a primary RADIUS server for this group for example the access points are using 802 1X authentication choose the desired server from the Primary RADIUS Server drop down list Otherwise leave the field set to the default value of None Step 7 If you want to configure a secondary RADIUS server for this group choose the server from the Secondary RADIUS Server drop down li...

Страница 667: ...nnected to different controllers all of the controllers must belong to the same mobility group Step 10 Click Add to add the access point to this hybrid REAP group The access point s MAC address name and status appear at the bottom of the page Note If you want to delete an access point hover your cursor over the blue drop down arrow for that access point and choose Remove Step 11 Click Apply to com...

Страница 668: ... passwords each line of the file needs to be in the following format username password and clicking Add to upload the CSV file The clients names appear on the left side of the page under the User Name heading Add clients individually by entering the client s username in the User Name field and a password for the client in the Password and Confirm Password fields and clicking Add to add this client...

Страница 669: ...matically to clients that do not have one during PAC provisioning check the Enable Auto Key Generation check box k In the Authority ID field enter the authority identifier of the EAP FAST server The identifier must be 32 hexadecimal characters l In the Authority Info field enter the authority identifier of the EAP FAST server in text format You can enter up to 32 hexadecimal characters m To specif...

Страница 670: ...o authenticate using LEAP or EAP FAST enter this command config hreap group group_name radius ap user add username password password Note You can add up to 100 clients d To allow a hybrid REAP access point to authenticate clients using LEAP or to disable this behavior enter this command config hreap group group_name radius ap leap enable disable e To allow a hybrid REAP access point to authenticat...

Страница 671: ... Group Summary Count 2 Group Name Aps Group 1 1 Group 2 1 Step 7 To see the details for a specific hybrid REAP group enter this command show hreap group detail group_name Information similar to the following appears Number of Ap s in Group 3 00 1d 45 12 f2 24 AP1240 EW3 f224 Joined 00 1d 45 12 f7 12 AP1240 10 f712 Joined 00 1d a1 ed 9f 84 AP1131 23 9f84 Joined Group Radius Servers Settings Primary...

Страница 672: ...13 24 Cisco Wireless LAN Controller Configuration Guide OL 17037 01 Chapter 13 Configuring Hybrid REAPWireless Device Access Configuring Hybrid REAP Groups ...

Страница 673: ...n products The following safety considerations and safety warnings appear in this appendix Safety Considerations page A 2 Warning Definition page A 2 Class 1 Laser Product Warning page A 5 Ground Conductor Warning page A 7 Chassis Warning for Rack Mounting and Servicing page A 9 Battery Handling Warning for 4400 Series Controllers page A 18 Equipment Installation Warning page A 20 More Than One Po...

Страница 674: ...rce is sufficiently rated to safely run all of the equipment in the rack Verify the integrity of the ground before installing controllers in an equipment rack Lightweight access points are suitable for use in environmental air space in accordance with Section 300 22 C of the National Electrical Code and Sections 2 128 12 010 3 and 12 100 of the Canadian Electrical Code Part 1 C22 1 Warning Definit...

Страница 675: ...eses Warnsymbol bedeutet Gefahr Sie befinden sich in einer Situation die zu Verletzungen führen kann Machen Sie sich vor der Arbeit mit Geräten mit den Gefahren elektrischer Schaltungen und den üblichen Verfahren zur Vorbeugung vor Unfällen vertraut Suchen Sie mit der am Ende jeder Warnung angegebenen Anweisungsnummer nach der jeweiligen Übersetzung in den übersetzten Sicherheitshinweisen die zusa...

Страница 676: ...S IMPORTANTES DE SEGURIDAD Este símbolo de aviso indica peligro Existe riesgo para su integridad física Antes de manipular cualquier equipo considere los riesgos de la corriente eléctrica y familiarícese con los procedimientos estándar de prevención de accidentes Al final de cada advertencia encontrará el número que le ayudará a encontrar el texto traducido en el apartado de traducciones que acomp...

Страница 677: ...FP modules contain Class 1 Lasers Laser Klasse 1 according to EN 60825 1 A1 A2 Warning Class 1 laser product Statement 1008 Waarschuwing Klasse 1 laser produkt Varoitus Luokan 1 lasertuote Attention Produit laser de classe 1 Warnung Laserprodukt der Klasse 1 Avvertenza Prodotto laser di Classe 1 Advarsel Laserprodukt av klasse 1 Aviso Produto laser de classe 1 Advertencia Producto láser Clase I Va...

Страница 678: ...ireless LAN Controller Configuration Guide OL 17037 01 Appendix A Safety Considerations and Translated Safety Warnings Class 1 Laser Product Warning Aviso Produto a laser de classe 1 Advarsel Klasse 1 laserprodukt ...

Страница 679: ...nooit bediend worden zonder dat er een op de juiste wijze geïnstalleerde aardingsleiding aanwezig is Neem contact op met de bevoegde instantie voor elektrische inspecties of met een elektricien als u er niet zeker van bent dat er voor passende aarding gezorgd is Varoitus Laitteiden on oltava maadoitettuja Älä koskaan ohita maajohdinta tai käytä laitteita ilman oikein asennettua maajohdinta Ota yht...

Страница 680: ...ri jordingslederen og bruk aldri utstyret uten riktig montert jordingsleder Ta kontakt med fagfolk innen elektrisk inspeksjon eller med en elektriker hvis du er usikker på om det finnes velegnet jordning Aviso Este equipamento deve ser aterrado Nunca anule o fio terra nem opere o equipamento sem um aterramento adequadamente instalado Em caso de dúvida com relação ao sistema de aterramento disponív...

Страница 681: ... the rack If the rack is provided with stabilizing devices install the stabilizers before mounting or servicing the unit in the rack Statement 1006 Waarschuwing Om lichamelijk letsel te voorkomen wanneer u dit toestel in een rek monteert of het daar een servicebeurt geeft moet u speciale voorzorgsmaatregelen nemen om ervoor te zorgen dat het toestel stabiel blijft De onderstaande richtlijnen worde...

Страница 682: ...ien sollen zur Gewährleistung Ihrer Sicherheit dienen Wenn diese Einheit die einzige im Gestell ist sollte sie unten im Gestell angebracht werden Bei Anbringung dieser Einheit in einem zum Teil gefüllten Gestell ist das Gestell von unten nach oben zu laden wobei das schwerste Bauteil unten im Gestell anzubringen ist Wird das Gestell mit Stabilisierungszubehör geliefert sind zuerst die Stabilisator...

Страница 683: ...ema quede bien estable Para garantizar su seguridad proceda según las siguientes instrucciones Colocar el equipo en la parte inferior del bastidor cuando sea la única unidad en el mismo Cuando este equipo se vaya a instalar en un bastidor parcialmente ocupado comenzar la instalación desde la parte inferior hacia la superior colocando el equipo más pesado en la parte inferior Si el bastidor dispone...

Страница 684: ...almente preenchido carregue o de baixo para cima com o componente mais pesado em sua parte inferior Se o rack contiver dispositivos estabilizadores instale os antes de montar ou dar manutenção à unidade existente Advarsel For at forhindre legemesbeskadigelse ved montering eller service af denne enhed i et rack skal du sikre at systemet står stabilt Følgende retningslinjer er også for din sikkerhed...

Страница 685: ...A 13 Cisco Wireless LAN Controller Configuration Guide OL 17037 01 Appendix A Safety Considerations and Translated Safety Warnings Chassis Warning for Rack Mounting and Servicing ...

Страница 686: ...A 14 Cisco Wireless LAN Controller Configuration Guide OL 17037 01 Appendix A Safety Considerations and Translated Safety Warnings Chassis Warning for Rack Mounting and Servicing ...

Страница 687: ...A 15 Cisco Wireless LAN Controller Configuration Guide OL 17037 01 Appendix A Safety Considerations and Translated Safety Warnings Chassis Warning for Rack Mounting and Servicing ...

Страница 688: ...A 16 Cisco Wireless LAN Controller Configuration Guide OL 17037 01 Appendix A Safety Considerations and Translated Safety Warnings Chassis Warning for Rack Mounting and Servicing ...

Страница 689: ...A 17 Cisco Wireless LAN Controller Configuration Guide OL 17037 01 Appendix A Safety Considerations and Translated Safety Warnings Chassis Warning for Rack Mounting and Servicing ...

Страница 690: ...atement 1015 Waarschuwing Er is ontploffingsgevaar als de batterij verkeerd vervangen wordt Vervang de batterij slechts met hetzelfde of een equivalent type dat door de fabrikant aanbevolen is Gebruikte batterijen dienen overeenkomstig fabrieksvoorschriften weggeworpen te worden Varoitus Räjähdyksen vaara jos akku on vaihdettu väärään akkuun Käytä vaihtamiseen ainoastaan saman tai vastaavantyyppis...

Страница 691: ...jon hvis batteriet skiftes på feil måte Skift kun med samme eller tilsvarende type som er anbefalt av produsenten Kasser brukte batterier i henhold til produsentens instruksjoner Aviso Existe perigo de explosão se a bateria for substituída incorrectamente Substitua a bateria por uma bateria igual ou de um tipo equivalente recomendado pelo fabricante Destrua as baterias usadas conforme as instruçõe...

Страница 692: ...oastaan koulutettu ja laitteen tunteva henkilökunta Attention Il est vivement recommandé de confier l installation le remplacement et la maintenance de ces équipements à des personnels qualifiés et expérimentés Warnung Das Installieren Ersetzen oder Bedienen dieser Ausrüstung sollte nur geschultem qualifiziertem Personal gestattet werden Avvertenza Questo apparato può essere installato sostituito ...

Страница 693: ...ificado debe instalar reemplazar o utilizar este equipo Varning Endast utbildad och kvalificerad personal bör få tillåtelse att installera byta ut eller reparera denna utrustning Aviso Somente uma equipe treinada e qualificada tem permissão para instalar substituir ou dar manutenção a este equipamento Advarsel Kun uddannede personer må installere udskifte komponenter i eller servicere dette udstyr...

Страница 694: ...A 22 Cisco Wireless LAN Controller Configuration Guide OL 17037 01 Appendix A Safety Considerations and Translated Safety Warnings Equipment Installation Warning ...

Страница 695: ...e tension et tout courant électrique de l unité toutes les connexions d alimentation doivent être débranchées Warnung Dieses Gerät kann mehr als eine Stromzufuhr haben Um sicherzustellen dass der Einheit kein Strom zugeführt wird müssen alle Verbindungen entfernt werden Avvertenza Questa unità può avere più di una connessione all alimentazione elettrica Tutte le connessioni devono essere staccate ...

Страница 696: ...ne Power Supply Warning for 4400 Series Controllers Aviso Esta unidade pode ter mais de uma conexão de fonte de alimentação Todas as conexões devem ser removidas para interromper a alimentação da unidade Advarsel Denne enhed har muligvis mere end en strømforsyningstilslutning Alle tilslutninger skal fjernes for at aflade strømmen fra enheden ...

Страница 697: ...A 25 Cisco Wireless LAN Controller Configuration Guide OL 17037 01 Appendix A Safety Considerations and Translated Safety Warnings More Than One Power Supply Warning for 4400 Series Controllers ...

Страница 698: ...A 26 Cisco Wireless LAN Controller Configuration Guide OL 17037 01 Appendix A Safety Considerations and Translated Safety Warnings More Than One Power Supply Warning for 4400 Series Controllers ...

Страница 699: ...endix provides declarations of conformity and regulatory information for the products in the Cisco UWN Solution This appendix contains these sections Regulatory Information for Lightweight Access Points page B 2 FCC Statement for Cisco 2100 Series Wireless LAN Controllers page B 10 FCC Statement for 4400 Series Wireless LAN Controllers page B 10 ...

Страница 700: ...tion Commission Declaration of Conformity Statement Model AIR AP1010 A K9 AIR AP1020 A K9 AIR AP1030 A K9 FCC Certification number LDK102057 Manufacturer Cisco Systems Inc 170 West Tasman Drive San Jose CA 95134 1706 USA This device complies with Part 15 rules Operation is subject to the following two conditions 1 This device may not cause harmful interference and 2 This device must accept any int...

Страница 701: ...operations to reduce any potential for harmful interference to co channel Mobile Satellite System MSS operations Department of Communications Canada Model AIR AP1010 A K9 AIR AP1020 A K9 AIR AP1030 A K9 Certification number 2461B 102057 Canadian Compliance Statement This Class B Digital apparatus meets all the requirements of the Canadian Interference Causing Equipment Regulations Cet appareil num...

Страница 702: ...s requisitos esenciales asi como con otras disposiciones de la Directive 1999 5 EC Έλληνας Αυτός ο εξοπλισμός συμμορφώνεται με τις ουσιώδεις απαιτήσεις και τις λοιπές διατάξεις της Οδηγίας 1999 5 EΚ Français Cet appareil est conforme aux exigencies essentialles et aux autres dispositions pertinantes de la Directive 1999 5 EC Íslenska Þessi búnaður samrýmist lögboðnum kröfum og öðrum ákvæðum tilski...

Страница 703: ... be compliant to the requirements set forth in CFR 47 Sections 2 1091 and 15 247 b 4 addressing RF Exposure from radio frequency devices as defined in Evaluating Compliance with FCC Guidelines for Human Exposure to Radio Frequency Electromagnetic Fields The equipment should be installed more than 20 cm 7 9 in from your body or nearby persons The access point must be installed to maintain a minimum...

Страница 704: ... Class B Warning for 2100 Series Controllers in Japan Warning This is a Class A product based on the standard of the Voluntary Control Council for Interference by Information Technology Equipment VCCI If this equipment is used in a domestic environment radio disturbance may arise When such trouble occurs the user may be required to take corrective actions Warning This is a Class B product based on...

Страница 705: ...se guidelines are provided in both Japanese and English Japanese Translation Warning When installing the product please use the provided or designated connection cables power cables AC adaptors Using any other cables adaptors could cause a malfunction or a fire Electrical Appliance and Material Safety Law prohibits the use of UL certified cables that have the UL shown on the code for any other ele...

Страница 706: ... low power radio stations of RF ID are used in the vicinity 2 If this equipment causes RF interference to a premises radio station of RF ID promptly change the frequency or stop using the device contact the number below and ask for recommendations on avoiding radio interference such as setting partitions 3 If this equipment causes RF interference to a specified low power radio station of RF ID con...

Страница 707: ...functions Article 14 The operation of the low power radio frequency devices is subject to the conditions that no harmful interference is caused to aviation safety and authorized radio station and if interference is caused the user must stop operating the device immediately and can t re operate it until the harmful interference is clear The authorized radio station means a radio communication servi...

Страница 708: ...ision reception which can be determined by turning the equipment off and on the user is encouraged to try to correct the interference by one or more of the following measures Reorient or relocate the receiving antenna Increase the separation between the equipment and receiver Connect the equipment into an outlet on a circuit different from that to which the receiver is connected Consult the dealer...

Страница 709: ...t apply to the Cisco UWN Solution products Cisco 2100 Series Wireless LAN Controllers Cisco 4400 Series Wireless LAN Controllers Cisco Wireless Services Modules This appendix contains these sections End User License Agreement page C 2 Limited Warranty page C 4 General Terms Applicable to the Limited Warranty Statement and End User License Agreement page C 6 Notices page C 6 ...

Страница 710: ...isco grants to Customer a nonexclusive and nontransferable license to use for Customer s internal business purposes the Software and the Documentation for which Customer has paid the required license fees Documentation means written information whether contained in user or technical manuals training materials specifications or otherwise specifically pertaining to the Software and made available by...

Страница 711: ...ny upgrades updates bug fixes or modified versions thereto collectively Upgrades or backup copies of the Software licensed or provided to Customer by Cisco or an authorized Cisco reseller NOTWITHSTANDING ANY OTHER PROVISION OF THIS AGREEMENT 1 CUSTOMER HAS NO LICENSE OR RIGHT TO USE ANY ADDITIONAL COPIES OR UPGRADES UNLESS CUSTOMER AT THE TIME OF ACQUIRING SUCH COPY OR UPGRADE ALREADY HOLDS A VALI...

Страница 712: ...U S Government End User Purchasers The Software and Documentation qualify as commercial items as that term is defined at Federal Acquisition Regulation FAR 48 C F R 2 101 consisting of commercial computer software and commercial computer software documentation as such terms are used in FAR 12 212 Consistent with FAR 12 212 and DoD FAR Supp 227 7202 1 through 227 7202 4 and notwithstanding any othe...

Страница 713: ...In addition due to the continual development of new techniques for intruding upon and attacking networks Cisco does not warrant that the Software or any equipment system or network on which the Software is used will be free of vulnerability to intrusion or attack Restrictions This warranty does not apply if the Software Product or any other equipment upon which the Software is authorized to be use...

Страница 714: ...mer acknowledges and agrees that Cisco has set its prices and entered into this Agreement in reliance upon the disclaimers of warranty and the limitations of liability set forth herein that the same reflect an allocation of risk between the parties including the risk that a contract remedy may fail of its essential purpose and cause consequential loss and that the same form an essential basis of t...

Страница 715: ...hout prior written permission For written permission please contact openssl core openssl org 5 Products derived from this software may not be called OpenSSL nor may OpenSSL appear in their names without prior written permission of the OpenSSL Project 6 Redistributions of any form whatsoever must retain the following acknowledgment This product includes software developed by the OpenSSL Project for...

Страница 716: ...th the distribution 3 All advertising materials mentioning features or use of this software must display the following acknowledgement This product includes cryptographic software written by Eric Young eay cryptsoft com The word cryptographic can be left out if the routines from the library being used are not cryptography related 4 If you include any Windows specific code or a derivative thereof f...

Страница 717: ...ese sections Interpreting LEDs page D 2 System Messages page D 2 Using the CLI to Troubleshoot Problems page D 5 Configuring System and Message Logging page D 6 Viewing Access Point Event Logs page D 13 Uploading Logs and Crash Files page D 14 Uploading Core Dumps from the Controller page D 17 Monitoring Memory Leaks page D 17 Troubleshooting CCXv5 Client Devices page D 19 Using the Debug Facility...

Страница 718: ...xx xx xx xx xx A client is sending an association request on a security enabled WLAN with the protected bit set to 0 in the Capability field of the association request As designed the controller rejects the association request and the client sees an association failure dtl_arp c 480 Got an idle timeout message from an unknown client xx xx xx xx xx xx The controller s network processing unit NPU se...

Страница 719: ...ference has exceeded threshold on channel check channel assignments LRADIF_COVERAGE_PROFILE_FAILED Possible coverage hole detected Check the lightweight access point history to see if it is a common problem and add lightweight access points if necessary LRADIF_LOAD_PROFILE_PASSED Load is now within threshold limits LRADIF_NOISE_PROFILE_PASSED Detected noise is now less than threshold LRADIF_INTERF...

Страница 720: ...ILURE Check for IPSec configuration mismatch between WLAN and client IPSEC_IKE_NEG_FAILURE Check for IPSec IKE configuration mismatch between WLAN and client IPSEC_SUITE_NEG_FAILURE Check for IPSec IKE configuration mismatch between WLAN and client IPSEC_INVALID_COOKIE Informational message RADIOS_EXCEEDED Maximum number of supported Cisco radios exceeded Check for controller failure in the same L...

Страница 721: ...tion call and 2 the priority of the task divided by a range of system priorities The CPU Use field shows the CPU usage of a particular task The Reaper field shows three values 1 the amount of time for which the task is scheduled in user mode operation 2 the amount of time for which the task is scheduled in system mode operation and 3 whether the task is being watched by the reaper task monitor ind...

Страница 722: ...indicated by a T If the task is being watched by the reaper task monitor this field also shows the timeout value in seconds before which the task needs to alert the task monitor 3 show tech support Shows an array of information related to the state of the system including the current configuration last crash file CPU utilization and memory utilization 4 show run config Shows the complete configura...

Страница 723: ... to the controller appears below this field Note If you ever want to remove a syslog server from the controller click Remove to the right of the desired server Step 3 To set the severity level for filtering syslog messages to the syslog servers choose one of the following options from the Syslog Level drop down box Emergencies Severity level 0 Alerts Severity level 1 default value Critical Severit...

Страница 724: ...vel 16 Local Use 1 Facility level 17 Local Use 2 Facility level 18 Local Use 3 Facility level 19 Local Use 4 Facility level 20 Local Use 5 Facility level 21 Local Use 6 Facility level 22 Local Use 7 Facility level 23 Step 5 Click Apply to commit your changes Step 6 To set the severity level for logging messages to the controller buffer and console choose one of the following options from both the ...

Страница 725: ...nclude process information The default value is disabled Step 9 Check the Trace Info check box if you want the message logs to include traceback information The default value is disabled Step 10 Click Apply to commit your changes Step 11 Click Save Configuration to save your changes Using the GUI to View Message Logs To view message logs using the controller GUI click Management Logs Message Logs ...

Страница 726: ...erts Severity level 1 critical Severity level 2 errors Severity level 3 warnings Severity level 4 notifications Severity level 5 informational Severity level 6 debugging Severity level 7 Note As an alternative you can enter a number from 0 through 7 for the severity_level parameter Note If you set a syslog level only those messages whose severity is equal to or less than that level are sent to the...

Страница 727: ...cess Facility level 1 uucp Unix to Unix copy system Facility level 8 Step 4 To set the severity level for logging messages to the controller buffer and console enter these commands config logging buffered severity_level config logging console severity_level where severity_level is one of the following emergencies Severity level 0 alerts Severity level 1 critical Severity level 2 errors Severity le...

Страница 728: ...able disable The default value is disabled Step 8 To cause the controller to include traceback information in the message logs or to prevent the controller from displaying this information enter this command config logging traceinfo enable disable The default value is disabled Step 9 To enable or disable timestamps in log messages and debug messages enter these commands config service timestamps l...

Страница 729: ...rce member unknown Mar 26 09 23 13 574 MM 3 INVALID_PKT_RECVD mm_listen c 5508 Received an invalid packet from 1 100 163 144 Source member 0 0 0 0 source member unknown Previous message occurred 2 times Mar 26 09 22 44 925 MM 3 INVALID_PKT_RECVD mm_listen c 5508 Received an invalid packet from 1 100 163 144 Source member 0 0 0 0 source member unknown Viewing Access Point Event Logs Access points l...

Страница 730: ...PWAP changed state to JOIN Mar 1 00 01 48 122 LINK 5 CHANGED Interface Dot11Radio0 changed state to administratively down Mar 1 00 01 48 122 LINK 5 CHANGED Interface Dot11Radio1 changed state to administratively down To delete the existing event log and create an empty event log file for a specific access point or for all access points joined to the controller enter this command clear ap eventlog ...

Страница 731: ... enter the name of the log or crash file Step 7 If you chose FTP as the Transfer Mode follow these steps a In the Server Login Username field enter the FTP server login name b In the Server Login Password field enter the FTP server login password c In the Server Port Number field enter the port number of the FTP server The default value for the server port is 21 Step 8 Click Upload to upload the l...

Страница 732: ...ted reboot of the controller following a crash The software watchdog module periodically checks the integrity of the internal software and makes sure that the system does not stay in an inconsistent or non operational state for a long period of time Step 3 To specify the path to the file enter these commands transfer upload serverip server_ip_address transfer upload path server_path_to_file transf...

Страница 733: ...rver to which the core dump file is uploaded enter this command config coredump ftp server_ip_address filename where server_ip_address is the IP address of the FTP server to which the controller sends its core dump file and Note The controller must be able to reach the FTP server filename is the name that the controller uses to label the core dump file Step 3 To specify the username and password f...

Страница 734: ...nd save config Step 4 To view a summary of any discovered memory issues enter this command show memory monitor Information similar to the following appears Memory Leak Monitor Status low_threshold 10000 high_threshold 30000 current status disabled Memory Error Monitor Status Crash on error flag currently set to disabled No memory error detected Step 5 To view the details of any memory leaks or cor...

Страница 735: ...o troubleshoot problems regarding client communication with a WLAN The client and access points can be put through a defined set of tests in an attempt to identify the cause of communication difficulties the client is experiencing and then allow corrective measures to be taken to make the client operational on the network You can use the controller GUI or CLI to enable the diagnostic channel and y...

Страница 736: ...al view of the authentication events for a given client The client maintains a minimum of five previous authentication attempts including failed attempts and successful ones Syslog This log provides internal system information from the client For example it may indicate problems with 802 11 operation system operation and so on The statistics report provides 802 1X and security information for the ...

Страница 737: ...shooting on a particular WLAN enter this command config wlan diag channel enable disable wlan_id Step 2 To verify that your change has been made enter this command show wlan wlan_id Information similar to the following appears WLAN Identifier 1 Profile Name employee1 Network Name SSID employee Status Disabled MAC Filtering Disabled Broadcast SSID Enabled AAA Policy Override Disabled Number of Acti...

Страница 738: ...and config client ccx test association client_mac_address ssid bssid 802 11a 802 11b 802 11g channel Step 8 To send a request to the client to perform the 802 1X test enter this command config client ccx test dot1x client_mac_address profile_id bssid 802 11a 802 11b 802 11g channel Step 9 To send a request to the client to perform the profile redirect test enter this command config client ccx test...

Страница 739: ...rieving client reports 12 Retrieving client logs 13 Retrieval complete 14 Beginning association test 15 Beginning DHCP test 16 Beginning network connectivity test 17 Beginning DNS ping test 18 Beginning name resolution test 19 Beginning 802 1X authentication test 20 Redirecting client to a specific profile 21 Test complete 22 Test passed 23 Test failed 24 Cancel diagnostic channel operation or sel...

Страница 740: ...r to the following appears for the 802 1X authentication test dot1x Complete Success EAP Method 1 Host OS Login Credentials dot1x Status 255 Step 15 To see the relevant data frames captured by the client during the previous test enter this command show client ccx frame data client_mac_address Information similar to the following appears LOG Frames Frame Number 1 Last Frame Number 1120 Direction 1 ...

Страница 741: ...Direction 1 Timestamp 0d 00h 50m 39s 881513us Frame Length 189 Frame Data 00000000 80 00 00 00 ff ff ff ff ff ff 00 12 44 bd 80 30 D 0 00000010 00 12 44 bd 80 30 60 f7 46 c0 8b 4b d1 05 00 00 D 0 F K 00000020 64 00 11 08 00 01 00 01 08 8c 12 98 24 b0 48 60 d H 00000030 6c 05 04 00 02 00 00 85 1e 00 00 89 00 0f 00 ff l 00000040 03 19 00 41 50 34 30 2d 31 37 00 00 00 00 00 00 AP40 17 00000050 00 00 ...

Страница 742: ...ndix D Troubleshooting Troubleshooting CCXv5 Client Devices Figure D 5 Clients Detail Page Step 3 To send a report request to the client click the CCXv5 Req button Step 4 To view the parameters from the client click Display The Client Reporting page appears see Figure D 6 ...

Страница 743: ...ent Devices Figure D 6 Client Reporting Page This page lists the client profiles and indicates if they are currently in use It also provides information on the client s operating parameters manufacturer and capabilities Step 5 Click the link for the desired client profile The Profile Details page appears see Figure D 7 ...

Страница 744: ...profiles enter this command config client ccx get profiles client_mac_address Step 2 To send a request to the client to send its current operating parameters enter this command config client ccx get operating parameters client_mac_address Step 3 To send a request to the client to send the manufacturer s information enter this command config client ccx get manufacturer info client_mac_address Step ...

Страница 745: ...ment Threshold 2342 Radio Channels 1 2 3 4 5 6 7 8 9 10 11 Tx Power Mode Automatic Rate List MB 1 0 2 0 Radio Type HRDSSS 802 11b Preamble Type Long preamble CCA Method Energy Detect Carrier Detect Correlation Data Retries 6 Fragment Threshold 2342 Radio Channels 1 2 3 4 5 6 7 8 9 10 11 Tx Power Mode Automatic Rate List MB 5 5 11 0 Radio Type ERP 802 11g Preamble Type Long preamble CCA Method Ener...

Страница 746: ...Address Available IP Address 70 0 4 66 Subnet Mask 255 0 0 0 Default Gateway 70 1 0 1 IPv6 Address Not Available IPv6 Address 0 0 0 0 0 0 0 0 0 0 0 0 0 0 0 0 IPv6 Subnet Mask 0 0 0 0 0 0 0 0 0 0 0 0 0 0 0 0 DNS Servers 103 0 48 0 WINS Servers System Name URAVAL3777 Firmware Version 4 0 0 187 Driver Version 4 0 0 187 Step 8 To see the client manufacturer information enter this command show client c...

Страница 747: ... Type DSSS Radio Channels 1 2 3 4 5 6 7 8 9 10 11 Tx Power Mode Automatic Rate List MB 1 0 2 0 Radio Type HRDSSS 802 11b Radio Channels 1 2 3 4 5 6 7 8 9 10 11 Tx Power Mode Automatic Rate List MB 5 5 11 0 Radio Type ERP 802 11g Radio Channels 1 2 3 4 5 6 7 8 9 10 11 Tx Power Mode Automatic Rate List MB 6 0 9 0 12 0 18 0 24 0 36 0 48 0 54 0 Radio Type OFDM 802 11a Radio Channels 36 40 44 48 52 56 ...

Страница 748: ...e Jun 26 18 28 48 2007 Roaming Response LogID 133 Status Successful Event Timestamp 0d 00h 00m 08s 815477us Source BSSID 00 0b 85 81 06 c2 Target BSSID 00 0b 85 81 06 d2 Transition Time 3281 ms Transition Reason First association to WLAN Transition Result Success Event Timestamp 0d 00h 00m 26s 637084us Source BSSID 00 0b 85 81 06 d2 Target BSSID 00 0b 85 81 06 c2 Transition Time 3313 ms Informatio...

Страница 749: ...t SysLog 11 Jun 19 11 49 56 uraval3777 Mandatory elements missing in the OID response Tue Jun 26 18 07 48 2007 SysLog Response LogID 131 Status Successful Event Timestamp 0d 00h 19m 42s 279000us Client SysLog 11 Jun 19 11 50 00 uraval3777 Mandatory elements missing in the OID response Event Timestamp 0d 00h 19m 42s 279003us Client SysLog 11 Jun 19 11 50 03 uraval3777 Mandatory elements missing in ...

Страница 750: ...ts before they are displayed Packets not passing the ACLs are discarded without being displayed Each ACL includes an action permit deny or disable and one or more fields that can be used to match the packet The debug facility provides ACLs that operate at the following levels and on the following values Driver ACL NPU encapsulation type Port Ethernet header ACL Destination address Source address E...

Страница 751: ...l displays both transmitted and received packets packet_count is the maximum number of packets to log You can enter a value between 1 and 65535 packets and the default value is 25 packets display_size is the number of bytes to display when printing a packet By default the entire packet is displayed Note To disable the debug facility enter this command debug packet logging disable Step 2 Use these ...

Страница 752: ...op 3 sunrpc auth sftp uucp path nntp ntp netbios ns netbios dgm netbios ssn imap2 snmp snmp trap cmip man cmip agent xdmcp nextstep bgp prospero irc smux at rtmp at nbp at echo at zis qmtp z3950 ipx imap3 ulistserv https snpp saft npmp local npmp gui and hmmp ind dst_port is the UDP TCP two byte destination port for example telnet 23 or any The controller accepts a numeric or any string recognized...

Страница 753: ...ample Text2pcap Output Step 4 To determine why packets might not be displayed enter this command debug packet error enable disable Step 5 To display the status of packet debugging enter this command show debug packet Information similar to the following appears Status disabled Number of packets to display 25 Bytes packet to display 0 Packet display format text2pcap ...

Страница 754: ...isabled 4 disabled 5 disabled 6 disabled IP ACL 1 disabled 2 disabled 3 disabled 4 disabled 5 disabled 6 disabled EoIP Ethernet ACL 1 disabled 2 disabled 3 disabled 4 disabled 5 disabled 6 disabled EoIP IP ACL 1 disabled 2 disabled 3 disabled 4 disabled 5 disabled 6 disabled LWAPP Dot11 ACL 1 disabled 2 disabled 3 disabled 4 disabled 5 disabled 6 disabled LWAPP IP ACL 1 disabled 2 disabled 3 disab...

Страница 755: ...ing coverage use an access point that is not part of your existing wireless network A remote monitoring device A computer capable of running the analyzer software Windows XP or Linux operating system The controller supports sniffing on both Windows XP and Linux machines Software and supporting files plug ins or adapters Your analyzer software may require specialized files before you can successful...

Страница 756: ... commit your changes Step 5 Click OK when warned that the access point will be rebooted Step 6 Click Wireless Access Points Radios 802 11a n or 802 11b g n to open the 802 11a n or 802 11b g n Radios page Step 7 Hover your cursor over the blue drop down arrow for the desired access point and choose Configure The 802 11a n or 802 11b g n Cisco APs Configure page appears see Figure D 11 Figure D 11 ...

Страница 757: ...to configure sniffing on an access point Step 1 To configure the access point as a sniffer enter this command config ap mode sniffer Cisco_AP where Cisco_AP is the access point configured as the sniffer Step 2 When warned that the access point will be rebooted and asked if you want to continue enter Y The access point reboots in sniffer mode Step 3 To enable sniffing on the access point enter this...

Страница 758: ...k lwapp mkdir radius release reload rename renew rmdir save set test upgrade Commands available during a Telnet or SSH session include debug disable enable help led login logout more no debug show systat undebug where Using the controller CLI follow these steps to enable Telnet or SSH access on lightweight access points Step 1 To enable Telnet or SSH connectivity on an access point enter this comm...

Страница 759: ...to get the status of all access points currently known to the controller When any change is made in the status of an access point a notification is sent to the MSE Using the CLI to Debug Access Point Monitor Service Issues If you experience any problems with the access point monitor service enter this command debug service ap monitor all error event nmsp packet enable disable where all configures ...

Страница 760: ...D 44 Cisco Wireless LAN Controller Configuration Guide OL 17037 01 Appendix D Troubleshooting Debugging the Access Point Monitor Service ...

Страница 761: ...uter page E 3 Catalyst 3750G Integrated Wireless LAN Controller Switch page E 4 This section provides logical connectivity diagrams for the controllers integrated into other Cisco products specifically the Catalyst 3750G Integrated Wireless LAN Controller Switch the Cisco WiSM and the Cisco 28 37 38xx Series Integrated Services Router These diagrams show the internal connections between the switch...

Страница 762: ...ial at 9600 baud Supervisor 720 4404 Controller A 4404 Controller B Hidden Port 1 Port 2 Port 3 Port 4 Hidden Port 5 Port 6 Port 7 Port 8 Hidden Port 9 Hidden Port 10 2 SFP Ports Console Console RS 232 Serial at 9600 baud Console RS 232 Serial at 9600 baud Memory Boot Flash Memory Boot Flash Flash File System Flash File System on CF Card Disk 0 Disk 1 Flash File System on CF Card Do not remove Fla...

Страница 763: ...ommunication between the router and Fast Ethernet versions of the controller network module interface wlan controller slot unit and support for subinterfaces with dot1q encap show interfaces wlan controller slot unit show controllers wlan controller slot unit test service module wlan controller slot unit test HW module wlan controller slot unit reset enable disable service module wlan controller s...

Страница 764: ...t 3750G Integrated Wireless LAN Controller Switch Figure E 3 Logical Connectivity Diagram for the Catalyst 3750G Integrated Wireless LAN Controller Switch These commands are used for communication between the Catalyst 3750G switch and the 4402 controller Login Command This command is used to initiate a telnet session from the switch to the controller session switch_number processor 1 3750G Switch ...

Страница 765: ...WCP is an internal keep alive protocol that runs between the switch and the controller It enables the switch to monitor the health of the controller and to report any problems It uses UDP and runs over the two internal Gigabit ports but it creates an internal VLAN 4095 to separate control traffic from data traffic Every 20 seconds the switch sends a keep alive message to the controller If the cont...

Страница 766: ...ors packets WCP packets sm State machine wcp WCP protocol Reset Commands These two commands in this order are used to reset the controller from the switch They are not yet available but will be supported in a future release test wireless controller stop switch_number test wireless controller start switch_number Note A direct console connection to the controller does not operate when hardware flow ...

Страница 767: ...11b g n Radios page 4 60 11 26 802 11a Pico Cell page 11 42 802 11a Pico Cell page with pico cell mode V2 parameters 11 43 802 11a RRM Coverage page 11 16 802 11a RRM DCA page 11 12 802 11a RRM Dynamic Channel Assignment DCA page 11 12 802 11a RRM General page 11 18 802 11a RRM Tx Power Control TPC page 11 10 802 11b g n Cisco APs Configure page 7 60 D 40 802 11 bands configuring using the CLI 4 1...

Страница 768: ...ontrol Lists Rules New page 5 56 Access Control Lists page 5 55 Access Mode parameter 4 26 4 28 access point core dumps uploading using the CLI 7 32 using the GUI 7 31 access point event logs viewing D 13 access point groups assigning access points to using the CLI 6 48 using the GUI 6 46 to 6 47 creating using the CLI 6 47 to 6 48 using the GUI 6 44 to 6 47 default group 6 44 described 6 42 illus...

Страница 769: ... Unit A MSDU 4 20 aggregation method specifying 4 20 AirMagnet Enterprise Analyzer D 39 Aironet IE parameter 6 25 6 40 Aironet IEs configuring using the CLI 6 42 configuring using the GUI 6 40 Airopeek D 39 Alarm Trigger Threshold parameter 11 35 All APs Access Point Name Link Details Neighbor Name page 8 46 All APs Access Point Name Mesh Neighbor Stats page 8 46 All APs Access Point Name Neighbor...

Страница 770: ...4 28 Auth Key Mgmt parameter 6 23 Authority ID Information parameter 5 44 13 21 13 22 Authority ID parameter 5 44 13 21 Authorize LSC APs against auth list parameter 7 22 Authorize MIC APs against auth list or AAA parameter 7 22 authorizing access points using the CLI 7 23 using the GUI 7 22 auto anchor mobility configuring using the CLI 12 23 to 12 24 using the GUI 12 21 to 12 23 guidelines 12 21...

Страница 771: ...eter 7 19 Catalyst 3750G Integrated Wireless LAN Controller Switch described 1 11 logical connectivity diagram and associated software commands E 4 to E 6 ports 3 3 3 5 cautions xxv CCA Sensitivity Threshold parameter 11 44 CCKM configuring 6 23 described 6 22 hybrid REAP groups 13 16 with mobility 12 7 CCX configuring Aironet IEs using the CLI 6 42 using the GUI 6 40 described 6 39 link test 7 64...

Страница 772: ... Sensors List page 5 103 CIDS Shun List page 5 106 ciphers configuring 6 23 6 24 described 6 23 Cisco 2100 Series Wireless LAN Controllers AutoInstall interfaces 4 7 described 1 8 FCC statement B 10 features not supported 1 8 network connections 1 17 ports 3 2 3 3 3 4 Cisco 28 37 38xx Integrated Services Router described 1 11 logical connectivity diagram and associated software commands E 3 ports ...

Страница 773: ... 2 9 logging into 2 7 to 2 8 logging out 2 9 navigating 2 9 troubleshooting commands D 5 to D 6 using 2 7 to 2 9 Client Certificate Required parameter 5 43 client location using WCS 1 7 client MFP 5 66 Client Protection parameter 5 70 client reporting configuring using the CLI D 28 to D 31 configuring using the GUI D 25 to D 28 described D 19 Client Reporting page D 27 client roaming configuring 4...

Страница 774: ...ltiple controller deployment 1 4 overview 1 6 to 1 7 platforms 1 7 to 1 12 resetting factory default settings using the CLI 4 3 using the GUI 4 3 single controller deployment 1 3 to 1 4 synchronizing with location appliance 4 86 types of memory 1 15 upgrading software guidelines 9 2 to 9 3 using the CLI 9 10 to 9 12 using the GUI 9 8 to 9 10 uploading core dump files from D 17 Controller Spanning ...

Страница 775: ... 31 8 13 13 10 Designated Root parameter 3 27 DES IPSec data encryption 5 9 Destination parameter 5 57 Destination Port parameter 5 57 Detect and Report Ad Hoc Networks parameter 5 85 device certificates downloading using the CLI 9 15 to 9 16 using the GUI 9 13 to 9 14 overview 9 13 using with local EAP 5 40 5 45 DHCP configuring using the CLI 6 10 configuring using the GUI 6 9 debugging 6 11 DHCP...

Страница 776: ...upport parameter 4 15 dynamic channel assignment DCA 20 MHz channelization 11 4 11 14 40 MHz channelization 11 4 11 14 configuring using the CLI 11 20 to 11 21 using the GUI 11 12 to 11 15 described 11 3 sensitivity thresholds 11 14 dynamic frequency selection 7 58 to 7 59 dynamic interface configuring using the CLI 3 18 using the GUI 3 16 to 3 17 described 3 8 dynamic transmit power control confi...

Страница 777: ...e AP and Rogue Client Entries parameter 5 85 Extensible Authentication Protocol EAP configuring 6 21 setting local timers 5 46 timeout and failure counters per access point 5 49 per client 5 49 extension channel 11 29 F factory default settings resetting using the CLI 4 3 resetting using the GUI 4 3 failover priority for access points configuring using the CLI 7 48 using the GUI 7 46 to 7 48 descr...

Страница 778: ...GUI 7 6 to 7 7 described 7 5 overriding using the CLI 7 8 using the GUI 7 7 Group Mode parameter 11 8 12 17 Group Name parameter 12 12 13 17 Group Setup page on CiscoSecure ACS 5 22 Guest LAN parameter 10 26 guest N 1 redundancy 12 20 guest user accounts creating 10 2 to 10 7 creating as a lobby ambassador 10 4 to 10 6 viewing using the CLI 10 7 using the GUI 10 6 Guest User parameter 5 31 13 10 G...

Страница 779: ... Request Timeout parameter 5 41 IDS 5 103 IDS sensors configuring using the CLI 5 105 to 5 106 using the GUI 5 103 to 5 105 described 5 103 IDS signature events viewing using the CLI 5 117 to 5 118 viewing using the GUI 5 114 to 5 115 IDS signatures configuring using the CLI 5 115 to 5 117 using the GUI 5 109 to 5 114 described 5 107 frequency 5 113 MAC frequency 5 113 5 116 measurement interval 5...

Страница 780: ... 3 to 12 4 Interval parameter 11 13 11 38 intra controller roaming described 4 40 illustrated 12 2 Inventory page 7 63 Invoke Channel Update Now button 11 13 Invoke Power Update Now button 11 11 IP address to MAC address binding configuring 4 44 to 4 45 described 4 44 IP Mask parameter 4 26 IPSec parameter 5 9 IPv6 bridging configuring using the CLI 6 39 using the GUI 6 38 to 6 39 described 6 36 g...

Страница 781: ...AP parameter 5 42 Learn Client IP Address parameter 13 9 Lease Time parameter 6 12 LEDs configuring 7 74 interpreting D 2 license agreement C 2 to C 4 Lifetime parameter 5 31 10 5 13 10 Lightweight Access Point Protocol LWAPP 1 6 7 2 lightweight mode reverting to autonomous mode 7 17 limited warranty C 4 to C 6 link aggregation LAG configuring neighboring devices 3 34 described 3 29 to 3 30 enabli...

Страница 782: ...nificant Certificates LSC page 7 19 local user database capacity 10 2 location calibration 11 37 viewing settings using the CLI 4 86 to 4 89 location appliance installing certificate 4 84 to 4 85 synchronizing with controller 4 86 location based services 11 37 location presence 4 87 logical connectivity diagram Catalyst 3750G Integrated Wireless LAN Controller Switch E 4 Cisco 28 37 38xx Integrate...

Страница 783: ...ng the CLI 5 122 configuring using the GUI 5 122 Maximum Local Database Entries parameter 5 30 5 122 Maximum RF Usage Per AP parameter 4 46 Max Login Ignore Identity Response parameter 5 41 Max RF Bandwidth parameter 4 55 4 56 MCS data rates 4 18 Member MAC Address parameter 12 12 memory types 1 15 memory leaks monitoring D 17 to D 19 mesh network example 8 34 parameters configuring using the CLI ...

Страница 784: ...AT devices 12 9 determining when to include controllers 12 7 difference from RF groups 11 5 examples 12 7 illustrated 12 5 messaging among 12 7 number of access points supported 12 5 12 6 number of controllers supported 12 5 prerequisites 12 9 to 12 10 using with NAT devices 12 8 to 12 9 mobility group statistics types 12 16 viewing using the CLI 12 19 using the GUI 12 16 to 12 19 mobility list de...

Страница 785: ...e GUI 8 44 to 8 47 Netbios Name Servers parameter 6 12 Netmask parameter 6 12 network analyzer supported software AirMagnet D 39 Airopeek D 39 Omnipeek D 39 Wireshark D 39 Network Mobility Services Protocol NMSP 4 80 active connections 4 88 modifying the notification interval for clients RFID tags and rogues 4 85 viewing counters 4 88 Network parameter 6 12 notes xxv NTP server configuring to obta...

Страница 786: ...llers 3 2 3 3 3 4 on Catalyst 3750G Integrated Wireless LAN Controller Switch 3 3 3 5 on Cisco 28 37 38xx Series Integrated Services Router 3 3 to 3 4 4 91 7 25 on Cisco WiSM 3 3 3 4 overview 3 2 to 3 5 Ports page 3 19 Power Assignment Leader parameter 11 11 power cable warning for Japan B 7 Power Injector Selection parameter 7 72 Power Injector State parameter 7 72 Power Neighbor Count parameter ...

Страница 787: ...oS roles assigning for use with hybrid REAP 13 10 configuring using the CLI 4 50 to 4 51 using the GUI 4 48 to 4 50 QoS Roles for Guest Users page 4 49 Quality of Service QoS parameter 6 31 quarantined VLAN configuring 3 11 3 17 using 13 8 with hybrid REAP 13 4 with NAC out of band integration 6 58 Quarantine parameter for dynamic interface 3 17 for management interface 3 11 NAC out of band integr...

Страница 788: ...ing attributes 5 17 to 5 18 Range RootAP to MeshAP parameter 8 17 Redirect URL After Login parameter 10 10 Refresh time Interval parameter 4 72 regulatory information for 2100 series controllers B 10 for 4400 series controllers B 10 for lightweight access points B 2 to B 10 related publications xxvii Remote Authentication Dial In User Service See RADIUS Request Max Retries parameter 5 41 Request T...

Страница 789: ...4 Rogue AP Detail page 5 94 Rogue AP Ignore List page 5 97 rogue classification rules configuring using the CLI 5 90 to 5 93 configuring using the GUI 5 87 to 5 90 Rogue Client Detail page 5 95 Rogue Location Discovery Protocol RLDP configuring using the CLI 5 85 to 5 87 using the GUI 5 84 to 5 85 defined 5 81 Rogue Location Discovery Protocol parameter 5 84 Rogue on Wire parameter 5 85 Rogue Poli...

Страница 790: ...o Factory Default button 11 19 Severity Level Filtering parameter D 7 Shared Secret Format parameter 5 8 5 24 Shared Secret parameter 5 8 5 24 Short Preamble Enabled parameter 5 50 short preambles 5 50 Show Wired Clients option 7 38 shunned clients described 5 106 viewing using the CLI 5 107 using the GUI 5 106 Signature Events Detail page 5 114 Signature Events Summary page 5 114 Signature Events...

Страница 791: ...6 for WLANs 6 5 STP Mode parameter 3 25 STP Port Designated Bridge parameter 3 25 STP Port Designated Cost parameter 3 25 STP Port Designated Port parameter 3 25 STP Port Designated Root parameter 3 24 STP Port Forward Transitions Count parameter 3 25 STP Port ID parameter 3 24 STP Port Path Cost Mode parameter 3 25 STP Port Path Cost parameter 3 26 STP Port Priority parameter 3 25 STP State param...

Страница 792: ...0 time length values TLVs supported for CDP 4 69 to 4 71 timeout configuring for disabled clients 6 15 Time Since Topology Changed parameter 3 27 timestamps enabling or disabling in log and debug messages D 12 Time to Live for the PAC parameter 5 44 13 21 time zone configuring using the CLI 4 12 configuring using the GUI 4 11 TKIP configuring 6 23 6 24 described 6 22 parameter 6 23 Topology Change...

Страница 793: ...e parameter 5 31 13 10 Username parameter 7 7 7 10 7 11 User Object Type parameter 5 34 User parameter 9 19 User Profile Name parameter 4 28 Using Our SSID parameter 5 85 V Validate Rogue Clients Against AAA parameter 5 85 Valid Client on Rogue AP parameter 5 85 Validity parameter 9 19 VCCI warnings for controllers B 7 VCI strings 7 24 Verify Certificate CN Identity parameter 5 43 video informatio...

Страница 794: ...lt using the CLI 10 11 to 10 12 using the GUI 10 10 to 10 11 customized example 10 20 customizing from an external web server using the CLI 10 17 using the GUI 10 16 to 10 17 default 10 8 downloading a customized login page guidelines 10 17 using the CLI 10 19 using the GUI 10 18 to 10 19 modified default example 10 13 previewing 10 11 10 19 verifying settings using the CLI 10 20 Web Authenticatio...

Страница 795: ...lying an ACL to a WLAN 5 62 configuring AAA override 5 80 configuring infrastructure MFP for a WLAN 5 69 configuring IPv6 bridging 6 39 configuring NAC out of band integration 6 59 configuring the diagnostic channel D 20 WLANs Edit QoS page 6 35 WLANs Edit Security AAA Servers page assigning LDAP servers to a WLAN 5 36 choosing RADIUS or LDAP servers for external authentication 10 21 disabling acc...

Страница 796: ...ide OL 17037 01 sample configuration 7 37 viewing status using the CLI 7 40 using the GUI 7 37 to 7 39 world mode 4 15 4 16 WPA1 WPA2 configuring using the CLI 6 24 using the GUI 6 23 to 6 24 described 6 22 WPA2 Policy parameter 6 23 WPA Policy parameter 6 23 ...

Отзывы: