5-85
Cisco Wireless LAN Controller Configuration Guide
OL-17037-01
Chapter 5 Configuring Security Solutions
Managing Rogue Devices
Step 3
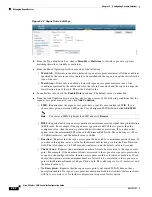
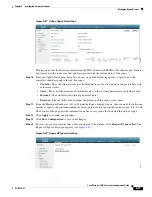
In the Expiration Timeout for Rogue AP and Rogue Client Entries field, enter the number of seconds
after which the rogue access point and client entries expire and are removed from the list. The valid range
is 240 to 3600 seconds, and the default value is 1200 seconds.
Note
If a rogue access point or client entry times out, it is removed from the controller only if its rogue
state is Alert or Threat for any classification type.
Step 4
If desired, check the
Validate Rogue Clients Against AAA
check box to use the AAA server or local
database to validate if rogue clients are valid clients. The default value is unchecked.
Step 5
If desired, check the
Detect and Report Ad-Hoc Networks
check box to enable ad-hoc rogue detection
and reporting. The default value is checked.
Step 6
If you want the controller to automatically contain certain rogue devices, check the following check
boxes. Otherwise, leave the check boxes unchecked, which is the default value.
Caution
When you enable any of these parameters, the following warning appears: “Using this feature may have
legal consequences. Do you want to continue?” The 2.4- and 5-GHz frequencies in the Industrial,
Scientific, and Medical (ISM) band are open to the public and can be used without a license. As such,
containing devices on another party’s network could have legal consequences.
•
Rogue on Wire
—Automatically contains rogues that are detected on the wired network.
•
Using Our SSID
—Automatically contains rogues that are advertising your network’s SSID. If you
leave this parameter unchecked, the controller only generates an alarm when such a rogue is
detected.
•
Valid Client on Rogue AP
—Automatically contains a rogue access point to which trusted clients
are associated. If you leave this parameter unchecked, the controller only generates an alarm when
such a rogue is detected.
•
AdHoc Rogue AP
—Automatically contains adhoc networks detected by the controller. If you leave
this parameter unchecked, the controller only generates an alarm when such a network is detected.
Step 7
Click
Apply
to commit your changes.
Step 8
Click
Save Configuration
to save your changes.
Using the CLI to Configure RLDP
Using the controller CLI, follow these steps to configure RLDP.
Step 1
To enable, disable, or initiate RLDP, enter these commands:
•
config rogue ap rldp
enable
alarm-only
—Enables RLDP on all access points.
•
config rogue ap rldp
enable
alarm-only
monitor_ap_only
—Enables RLDP only on access points
in monitor mode.
•
config rogue ap rldp
initiate
rogue_mac_address
—Initiates RLDP on a specific rogue access
point.
•
config rogue ap rldp
disable
—Disables RLDP on all access points.

