


10-10
Cisco Wireless LAN Controller Configuration Guide
OL-17037-01
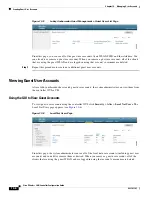
Chapter 10 Managing User Accounts
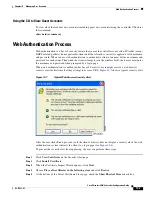
Choosing the Web Authentication Login Page
Choosing the Default Web Authentication Login Page
If you want to use the default web authentication login page as is (see
) or with a few
modifications, follow the instructions in the GUI or CLI procedure below.
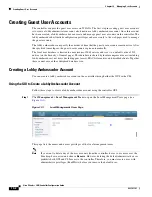
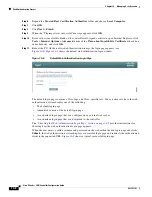
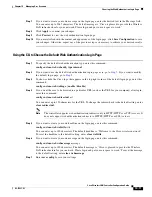
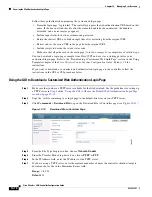
Using the GUI to Choose the Default Web Authentication Login Page
Step 1
Click
Security
>
Web Auth
>
Web Login Page
to open the Web Login page (see
).
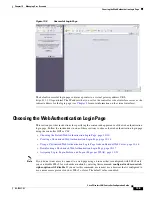
Figure 10-10
Web Login Page
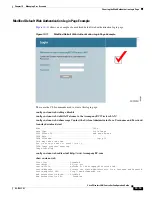
Step 2
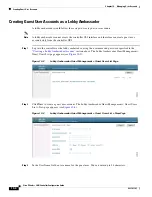
From the Web Authentication Type drop-down box, choose
Internal (Default)
.
Step 3
If you want to use the default web authentication login page as is, go to
. If you want to modify
the default login page, go to
Step 4
If you want to hide the Cisco logo that appears in the top right corner of the default page, choose the
Cisco Logo
Hide
option. Otherwise, click the
Show
option.
Step 5
If you want the user to be directed to a particular URL (such as the URL for your company) after login,
enter the desired URL (such as www.AcompanyBC.com) in the Redirect URL After Login field. You
can enter up to 254 characters.
Note
The controller supports web authentication redirects only to HTTP (HTTP over TCP) servers. It
does not support web authentication redirects to HTTPS (HTTP over SSL) servers.
Step 6
If you want to create your own headline on the login page, enter the desired text in the Headline field.
You can enter up to 127 characters. The default headline is “Welcome to the Cisco wireless network.”


