


4
When you are finished, click Finish Wall.
Revit Architecture returns you to the last active view.
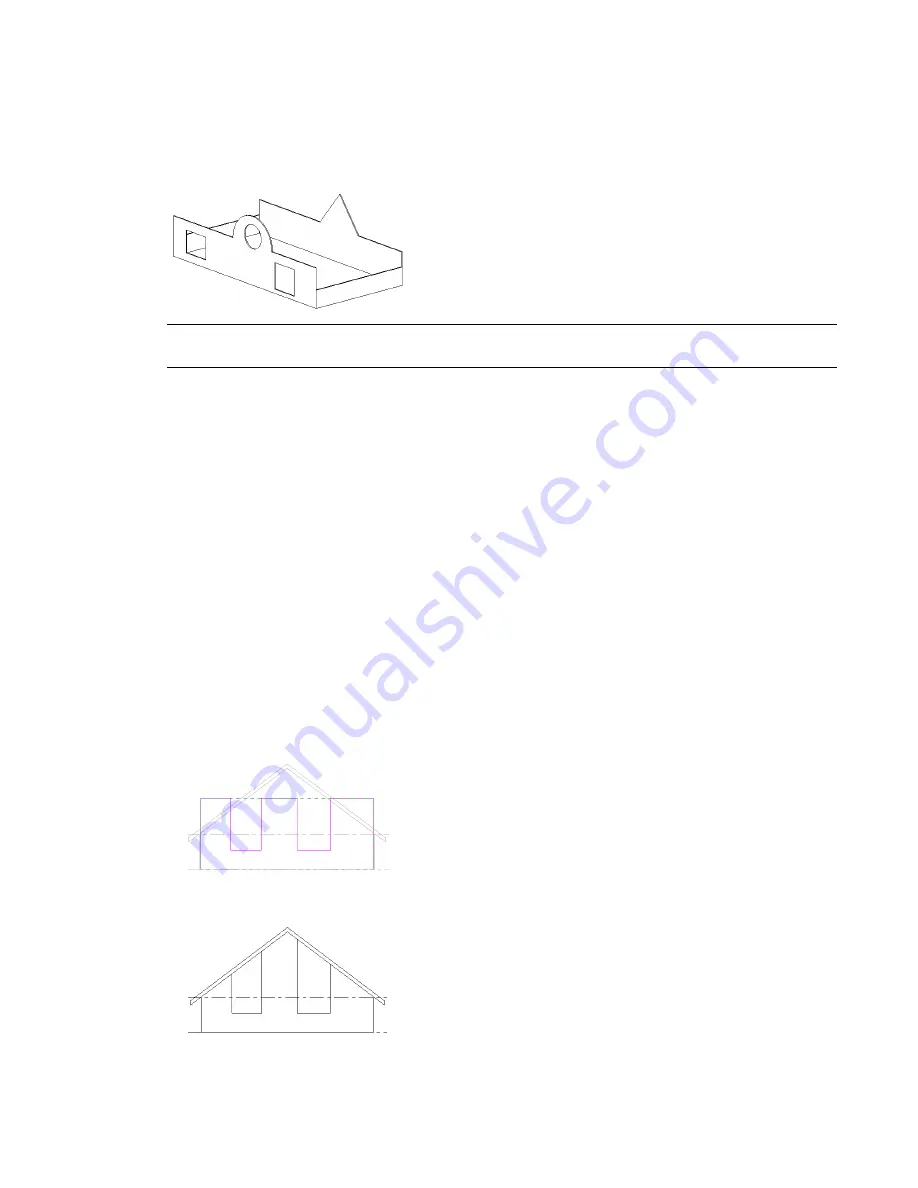
After modifying walls shapes, your design might look something like this:
Design with non-rectangular walls and cut openings
NOTE
If you want to revert an edited wall to its original shape, select the wall in a view and click Modify Walls
tab
➤
Modify Wall panel
➤
Reset Profile.
Guidelines for Defining Wall Shapes or Openings
When defining wall shapes and openings, consider the following guidelines:
■
If you are defining a shape on a wall that is not horizontal or vertical in a plan view, you should draw a
section parallel to the wall before going into the elevation sketch mode. When you go into sketch mode,
the Go To View dialog appears. Revit Architecture suggests the section view as the optimal view for
editing the sketch. Click Open View to open that view.
■
You cannot edit the elevation profile of an arc wall.
■
While you edit the elevation profile of a wall attached to another element, the wall temporarily reverts
to its shape and height prior to attaching it. For example, if you edit the profile of a wall attached to a
roof, the wall assumes its unconnected height prior to attaching to the roof. As a result, you may find
the wall is not at the right height to complete the elevation profile edits. To change the height, while in
sketch mode, click Modify Walls > Edit Profile tab
➤
Element panel
➤
Wall Properties. Change the
Unconnected Height of the wall.
As you edit the elevation profile, keep in mind that after you finish the sketch, the wall top or bottom
attaches only where horizontal lines are coincident with the reference planes in the sketch.
Sample edited profile in sketch mode (note top sketch lines that are coincident with
reference planes)
Finished wall attached to roof (non-coincidental horizontal lines from sketch did not
attach)
Sketching Wall Shapes | 663
Содержание 256B1-05A761-1301 - AutoCAD Revit Structure Suite 2010
Страница 1: ...Revit Architecture 2010 User s Guide March 2009 ...
Страница 4: ......
Страница 42: ...xlii ...
Страница 84: ...42 ...
Страница 126: ...84 ...
Страница 166: ...124 ...
Страница 229: ...Schedule Field Formatting Calculating Totals Specifying Schedule Properties 187 ...
Страница 230: ...Schedule with Grid Lines Schedule with Grid Lines and an Outline 188 Chapter 5 Project Views ...
Страница 304: ...262 ...
Страница 427: ...Defining the first scale vector Defining the second scale vector Resizing Graphically 385 ...
Страница 454: ...Before painting applying material to stairs 412 Chapter 8 Editing Elements ...
Страница 456: ...414 ...
Страница 486: ...444 ...
Страница 674: ...632 ...
Страница 802: ... Attachment Style Cut Column Attachment Justification Intersect Column Midline 760 Chapter 13 Architectural Design ...
Страница 809: ...Curtain wall Curtain Grid Curtain Walls Curtain Grids and Mullions 767 ...
Страница 994: ...952 ...
Страница 1016: ...974 ...
Страница 1204: ...1162 ...
Страница 1290: ...1248 ...
Страница 1318: ...1276 ...
Страница 1372: ...1330 ...
Страница 1382: ...1340 ...
Страница 1462: ...1420 ...
Страница 1492: ...1450 ...


