USO
RESTRITO
Macro Attachment Assigning
519
Ch
a
p
te
r 16
M
a
c
ro
s
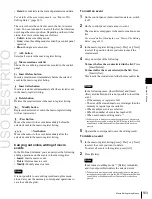
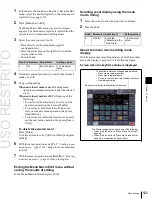
The cross-point button you pressed flashes green, and
the register you recalled in step
1
is assigned to the
button. The [MCRO ONLY SET] button goes off.
Without switching to macro only mode in step
2
, if
you hold down the [PRE MCRO] and [POST MCRO]
buttons together and press the desired button, it is
possible to set a macro attachment in macro only mode
for that button.
To check macro attachment settings
Hold down the [PRE MCRO] button or [POST MCRO]
button. While it is held down, buttons for which macro
attachments are set flash as follows.
While the [PRE MCRO] button is held down:
•
Buttons set in pre macro mode: flash amber
•
Buttons set in macro only mode: flash green
While the [POST MCRO] button is held down:
•
Buttons set in post macro mode: flash amber
•
Buttons set in macro only mode: flash green
Setting a macro attachment to a fader lever
You can set a macro attachment to any particular position
of a fader lever in the transition control block.
Notes
•
In macro only mode it is not possible to set a macro
attachment.
•
It is not possible to set a macro attachment to a fader
lever in the keyframe control block or downstream key
control block.
•
For a split fader, you can set a macro attachment to the
main split fader.
1
Recall the macro register (1 to 250) that you want to
assign to the fader lever
2
Move the fader lever to the position where you want to
set the macro attachment.
3
Hold down the [PRE MCRO] or [POST MCRO]
button
1)
in the cross-point control block, and press the
[LIMIT SET] or [PRIOR SET] button in the control
block containing the fader lever operated in step
2
.
1)
Only when setting a macro attachment to the start point or end point
of fader lever operation, use [PRE MCRO] and [POST MCRO] in
distinction, as follows.
To set the operation start point (0%):
hold down [PRE MCRO] for
the operation.
To set the operation end point (100%):
hold down [POST MCRO]
for the operation.
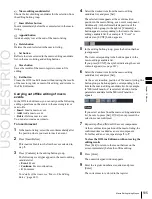
This assigns the register recalled in step
1
to the fader
lever position selected in step
2
.
To check a macro attachment setting
Hold down the [PRE MCRO] or [POST MCRO] button in
the cross-point control block. While it is held down, the
fader lever position where the macro attachment is set
appears in the following places.
•
Transition indicator in the transition execution
section:
The indicator lights at the position where the
macro attachment is set.
•
Transition rate indication in the transition execution
section:
This shows the fader lever position where the
macro attachment is set, as a percentage value (fader
lever start position as 0%, end position 100%).
Removing macro attachment settings
To cancel a macro attachment to a button
Hold down the [PRE MCRO] button or [POST MCRO]
button, and press a button that is flashing in the
background A row. The button for which the macro
attachment is set stops flashing and goes off, and this
removes the setting.
To cancel a macro attachment to a fader lever
Hold down the [PRE MCRO] or [POST MCRO] button in
the cross-point control block, and press the [LIMIT SET]
or [PRIOR SET] button in the control block containing the
fader lever having the macro attachment set.
To delete individual macro attachment settings
You can delete individual settings of a macro attachment
assigned to a button.
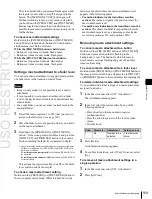
1
In the Macro menu, select VF2 ‘Attachment.’
The Attachment menu appears.
2
In the list, select the relevant data by any of the
following methods.
•
Press directly on the menu macro register
configuration list.
•
Press the arrow keys to scroll the reverse video
cursor.
•
Turn the knob.
Knob
Parameter
Adjustment
Setting values
1
No
Number to be
selected
1 to maximum
value
3
Press [Delete].
A confirmation message appears.
4
To confirm the deletion, select [Yes]. To cancel, select
[No].
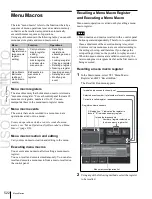
To remove all macro attachment settings in a
single operation
1
In the Macro menu, select VF2 ‘Attachment.’
2
Press [All Clear].
Summary of Contents for MVS-8000X SystemMVS-7000X System
Page 358: ...USO RESTRITO 358 Wipe Pattern List Appendix Volume 1 Enhanced Wipes Rotary Wipes ...
Page 360: ...USO RESTRITO Random Diamond DustWipes 360 1 w pe PaternLO ...
Page 362: ...USO RESTRITO 362 DME Wipe Pattern List Appendix Volume 1 Door 2D trans 3D trans ...
Page 364: ...USO RESTRITO 364 DME Wipe Pattern List Appendix Volume 1 Page turn Page roll ...
Page 377: ...USO RESTRITO Menu Tree 377 Appendix Volume 1 AUX Menu AUX button CCR Menu CCR button ...
Page 379: ...USO RESTRITO Menu Tree 379 Appendix Volume 1 DME Menu DME button ...
Page 381: ...USO RESTRITO Menu Tree 381 Appendix Volume 1 Macro Menu MCRO button ...
Page 382: ...USO RESTRITO 382 Menu Tree Appendix Volume 1 Key Frame Menu KEY FRAME button ...
Page 383: ...USO RESTRITO Menu Tree 383 Appendix Volume 1 Effect Menu EFF button ...
Page 384: ...USO RESTRITO 384 Menu Tree Appendix Volume 1 Snapshot Menu SNAPSHOT button ...
Page 385: ...USO RESTRITO Menu Tree 385 Appendix Volume 1 Shotbox Menu SHOTBOX button ...
Page 386: ...USO RESTRITO 386 Menu Tree Appendix Volume 1 File Menu FILE button ...
Page 391: ...USO RESTRITO Menu Tree 391 Appendix Volume 1 ENG SETUP button to previous pages ...
Page 413: ...USO RESTRITO MVS 8000X System MVS 7000X System SY 4 470 637 01 1 Sony Corporation 2013 ...
Page 706: ...USO RESTRITO MVS 8000X System MVS 7000X System SY 4 470 637 01 1 Sony Corporation 2013 ...


