USO
RESTRITO
220
Clip Transition Operations
Ch
a
p
te
r 7
F
ra
m
e
M
e
m
o
ry
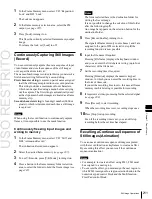
Background transition display area
Clip transition display area
Position of frame 0
Reference axis
Clip display area
3
Press [Clip].
The status area shows a list of clips.
4
Select the clip to use in the clip transition.
5
Return to the Clip Transition menu, and in the <BKGD
Transition Type> group, select the background
transition type.
Notes
For details of the background transition selected here,
see the various adjustments in the M/E-1 >Misc
>Transition menu.
6
In the <Select> group, press [BKGD Transition].
7
Use either of the following methods to set the
background transition start point independently of the
clip playback timing.
•
Move the fader lever to the desired position, and in
the <BKGD Transition Set Timing> group press
[Start].
•
Turn knob 1 to set the number of frames. The left
end of the reference axis
(see following figure)
is the
position of frame 0.
8
Using either of the following methods, set the end
point of the background transition.
•
Move the fader lever to the desired position, and in
the <BKGD Transition Set Timing> group press
[Stop].
•
Turn knob 2 to set the number of frames.
9
If Wipe or DME Wipe is selected in the <BKGD
Transition Type> group, in the <BKGD Transition
Direction> group, select the background transition
direction.
10
In the <Select> group, press [FM1&2 Clip].
11
Using either of the following methods, set the start
point of the clip.
•
Move the fader lever to the desired start point, and in
the <Clip Transition Set Timing> group press
[Start].
•
Turn knob 1 to set the number of frames. The left
end of the reference axis
(see previous figure)
is the
position of frame 0.
Notes
It is not possible to set the end point.
12
In the <Clip Transition Direction> group, select the
playback direction of the clip.
To reset the start point and end point
Press [Timing Reset].
The background transition start point and end point, and
the clip start point are all reset.
Summary of Contents for MVS-8000X SystemMVS-7000X System
Page 358: ...USO RESTRITO 358 Wipe Pattern List Appendix Volume 1 Enhanced Wipes Rotary Wipes ...
Page 360: ...USO RESTRITO Random Diamond DustWipes 360 1 w pe PaternLO ...
Page 362: ...USO RESTRITO 362 DME Wipe Pattern List Appendix Volume 1 Door 2D trans 3D trans ...
Page 364: ...USO RESTRITO 364 DME Wipe Pattern List Appendix Volume 1 Page turn Page roll ...
Page 377: ...USO RESTRITO Menu Tree 377 Appendix Volume 1 AUX Menu AUX button CCR Menu CCR button ...
Page 379: ...USO RESTRITO Menu Tree 379 Appendix Volume 1 DME Menu DME button ...
Page 381: ...USO RESTRITO Menu Tree 381 Appendix Volume 1 Macro Menu MCRO button ...
Page 382: ...USO RESTRITO 382 Menu Tree Appendix Volume 1 Key Frame Menu KEY FRAME button ...
Page 383: ...USO RESTRITO Menu Tree 383 Appendix Volume 1 Effect Menu EFF button ...
Page 384: ...USO RESTRITO 384 Menu Tree Appendix Volume 1 Snapshot Menu SNAPSHOT button ...
Page 385: ...USO RESTRITO Menu Tree 385 Appendix Volume 1 Shotbox Menu SHOTBOX button ...
Page 386: ...USO RESTRITO 386 Menu Tree Appendix Volume 1 File Menu FILE button ...
Page 391: ...USO RESTRITO Menu Tree 391 Appendix Volume 1 ENG SETUP button to previous pages ...
Page 413: ...USO RESTRITO MVS 8000X System MVS 7000X System SY 4 470 637 01 1 Sony Corporation 2013 ...
Page 706: ...USO RESTRITO MVS 8000X System MVS 7000X System SY 4 470 637 01 1 Sony Corporation 2013 ...


