USO
RESTRITO
Applying Special Effects (Effects on the Overall Video Signal)
307
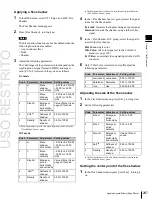
Knob
Parameter
Adjustment
Setting values
1
Y Clip
Luminance
clip level
+109.59 to
–7.31
2
Y Gain
Luminance
contrast
gradient
–100.00 to +100.00
3
Y Offset
Luminance
offset level
increment
–100.00 to +100.00
4
C Gain
Chroma
contrast
gradient
–100.00 to +100.00
Ch
a
p
te
r 11
DM
E
O
p
e
ra
ti
o
n
s
Masking the Posterization or Solarization
effect with a selected pattern
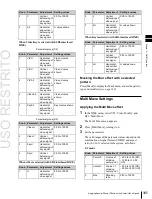
Press [Mask] to display the Mask menu, and set the pattern
type and modifiers
Video output level
Video output level
Nega Settings
Applying the Nega effect
Video input level
Clip, Gain, Offset
Video input level
1
In the DME menu, select VF2 ‘Video Modify’ and
HF3 ‘Color Modify.’
The Color Modify menu appears.
2
Press [Nega Y] or [Nega C], turning it on, or press both
buttons, turning them on.
Nega Y:
Reverse the luminance.
Nega C:
Reverse the chroma.
Masking the Nega effect with a selected
pattern
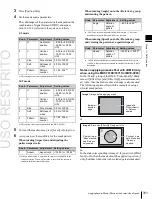
Press [Mask] to display the Mask menu, and set the pattern
type and modifiers
Contrast Settings
Applying the Contrast effect
1
In the DME menu, select VF2 ‘Video Modify’ and
HF3 ‘Color Modify.’
The Color Modify menu appears.
2
Press [Contrast], turning it on.
3
Set the parameters.
Masking the Contrast effect with a
selected pattern
Press [Mask] to display the Mask menu, and set the pattern
type and modifiers
Mosaic Settings
Applying the Mosaic effect
1
In the DME menu, select VF2 ‘Video Modify’ and
HF4 ‘Mosaic.’
The Mosaic menu appears.
2
Press [Mosaic], turning it on.
3
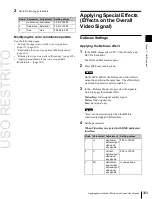
Set the following parameters.
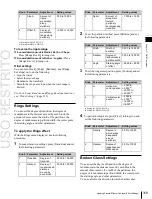
Knob
Parameter
Adjustment
Setting values
1
Size
Size of tiles
0.00 to 100.00
2
Aspect
Aspect ratio
of tiles
–100.00 to
+100.00
a)
a)
Specify minus values to stretch the tiles in the vertical direction, and
plus values to stretch the tiles in the horizontal direction.
Masking the Mosaic effect with a selected
pattern
Press [Mask] to display the Mask menu, and set the pattern
type and modifiers
Sketch Settings
Applying the Sketch effect
1
In the DME menu, select VF7 ‘Enhanced Video
Modify’ and HF1 ‘Sketch.’
The Sketch menu appears.
2
Press [Sketch], turning it on.
Summary of Contents for MVS-8000X SystemMVS-7000X System
Page 358: ...USO RESTRITO 358 Wipe Pattern List Appendix Volume 1 Enhanced Wipes Rotary Wipes ...
Page 360: ...USO RESTRITO Random Diamond DustWipes 360 1 w pe PaternLO ...
Page 362: ...USO RESTRITO 362 DME Wipe Pattern List Appendix Volume 1 Door 2D trans 3D trans ...
Page 364: ...USO RESTRITO 364 DME Wipe Pattern List Appendix Volume 1 Page turn Page roll ...
Page 377: ...USO RESTRITO Menu Tree 377 Appendix Volume 1 AUX Menu AUX button CCR Menu CCR button ...
Page 379: ...USO RESTRITO Menu Tree 379 Appendix Volume 1 DME Menu DME button ...
Page 381: ...USO RESTRITO Menu Tree 381 Appendix Volume 1 Macro Menu MCRO button ...
Page 382: ...USO RESTRITO 382 Menu Tree Appendix Volume 1 Key Frame Menu KEY FRAME button ...
Page 383: ...USO RESTRITO Menu Tree 383 Appendix Volume 1 Effect Menu EFF button ...
Page 384: ...USO RESTRITO 384 Menu Tree Appendix Volume 1 Snapshot Menu SNAPSHOT button ...
Page 385: ...USO RESTRITO Menu Tree 385 Appendix Volume 1 Shotbox Menu SHOTBOX button ...
Page 386: ...USO RESTRITO 386 Menu Tree Appendix Volume 1 File Menu FILE button ...
Page 391: ...USO RESTRITO Menu Tree 391 Appendix Volume 1 ENG SETUP button to previous pages ...
Page 413: ...USO RESTRITO MVS 8000X System MVS 7000X System SY 4 470 637 01 1 Sony Corporation 2013 ...
Page 706: ...USO RESTRITO MVS 8000X System MVS 7000X System SY 4 470 637 01 1 Sony Corporation 2013 ...


