


304
Adding Optional Hardware
19
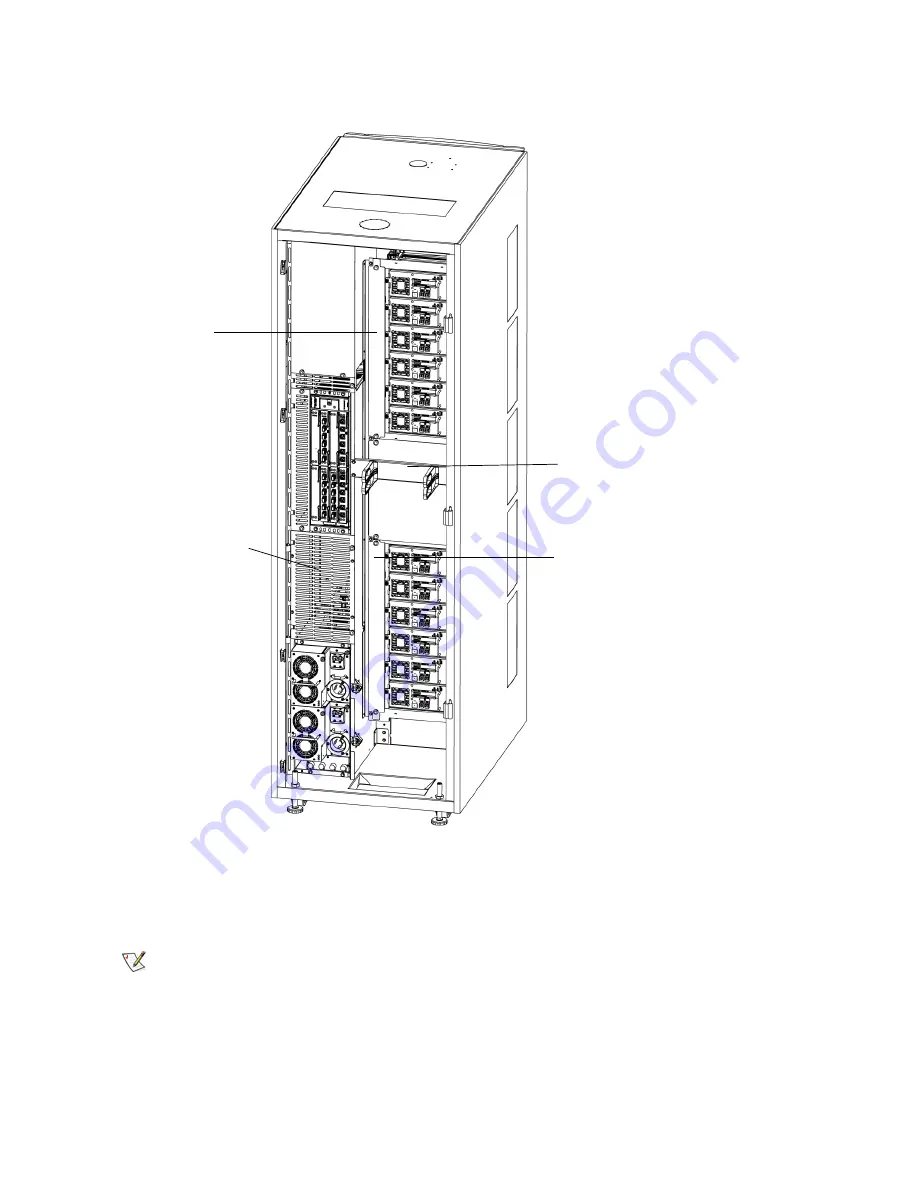
Use a #2 Phillips screwdriver to replace the top drive cluster cover plate, the mid-module cover plate,
the bottom drive cluster cover plate, and the LBX/IEX cover plate.
20
Close the service and access doors.
21
Press the
Power
switch on the operator panel.
22
After the Robotics Enabled Indicator turns solid green, log in to the library.
23
Make sure that you are viewing the physical library. From the
View
menu, select the name of the
physical library.
24
From the LMC, select
Setup > Aisle Light Settings
.
Note
To avoid interference with the scanner, the aisle lights are automatically turned
off whenever the Teach or Inventory functions are used.
mid-module cover plate
bottom drive cluster
cover plate
LBX/IEX cover plate
top drive cluster
cover plate
Summary of Contents for Scalar i6000
Page 20: ...8 About This Guide and Your Product...
Page 38: ...26 Installing a Stand Alone Control Module...
Page 104: ...92 Installing a Multi Module Library...
Page 156: ...144 Installing Cartridges...
Page 164: ...152 Setting up Your Library for Access...
Page 242: ...230 Configuring the Library...
Page 304: ...292 Adding Optional Hardware eight 2 5 mm screws...
Page 318: ...306 Adding Optional Hardware...
Page 336: ...324 Installation Testing and Verification Figure 35 Example Test Log Output...
Page 356: ...344 Testing and Calibrating the Digital Level...
Page 362: ...350 LBX Board and Terminator...
Page 380: ...368 Glossary...
Page 384: ...372 Index...


