3-8 System Preparation
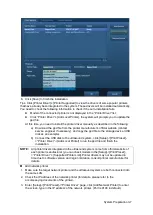
4. Click [Verify Net Printer], the IP address, name and port information of the network
printer will be displayed under the “Port” box. Change the port to match the verified
printer information if necessary.
5. Click [OK] to enter the ppd installing screen:
Select PPD file from media: select the path from the external media and install.
Select PPD file from database: select the ppd. file integrated in the ultrasound system.
6. After the ppd. file is installed completely, enter the printer name to finish the installation.
After installation
succeeds, the system returns to the “Printer Driver” page and displays
the added network printer.iStorage UltraAssist Print
The system supports printing by iStorage function. Before using this function, please make sure
that the iStorage server has configured a defaulted printer, and the ultrasound system has
configured an iStorage server. For details, please refer to “”.
1. Enter [Setup]->[Print Preset]-
>”Printer Driver” and check iStorage printer status, which
should be AssistPrinter@IP a
ddress with “Ready” status.
2.
Click “Print Service” to enter the screen, and select AssistPrinter@IP address to be the
printer for the Report Print service.
3. Click [Save] .
Print Service
You can use a graph/ text printer to print report or images.
To set the default report printer and its attribute:
In "[Setup]-
> [Print Preset]" screen, select the "Print Service", select “Report Print”
column in the service list, set the items in the "Property" box.
Report print:
Click [Print] in the report dialog box to print a report; or, use the user-defined key to
print, see "11.1.5 Key Config" for details.Please refer to the accompanying manuals
of the printers for more details.
3.8
Digital Video Printer
Install a local printer
1. Put the printer in a proper place.
2. Connect the printer (VIDEO IN port) and the ultrasound system (USB port) with the data
cable.
3. Load a paper roll, and turn on the system and printer.
4. Install the printer driver (step
s are the same as of graph/text printer, please refer to “3.7
” for details). And you need not install the driver of the printer listed in
section “2.5.4 Peripherals Supported”.
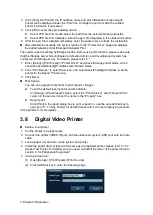
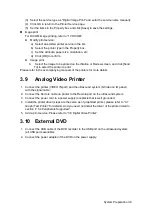
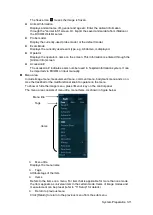
5. Add a print service:
(1) Open [Setup]-> [Print Preset]->[Print Service].
(2) Click [Add Service] to enter the following page.
Summary of Contents for DP-50 Exp Vet
Page 2: ......
Page 34: ...2 6 System Overview 2 6 Introduction of Each Unit Right View Left View...
Page 42: ......
Page 68: ......
Page 128: ......
Page 148: ......
Page 166: ...10 18 DICOM For details on tast manager see 9 6 Animal Task Manager...
Page 180: ......
Page 220: ......
Page 224: ......
Page 236: ......
Page 242: ......
Page 248: ......
Page 342: ...D 2 Printer Adapter Type Model SONY X898MD...
Page 343: ...P N 046 017713 02 1 0...


