JANOME Embroidery Software Instruction Book
Chapter 21 Creating Embroidery Lettering
165
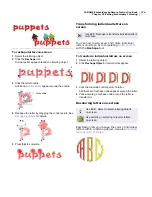
Creating vertical orientations
Vertical orientation does not have a fixed
or pre-determined length – the
baseline
extends as long as you keep adding
letters. Line spacing is calculated
horizontally while letter spacing is
calculated vertically. Letters, by default,
are centered along vertical lines. New
lines are placed by default from right to
left to suit Asian languages. Vertical
orientation is effective for embroidering
on sleeves, as a decorative effect, and for
Asian text.
Try this! Vertical lettering best suited to
uppercase for Western languages because
descenders in lowercase letters are not
accommodated in the letter spacing. See
Adjusting
individual letter spacing on-screen
for details.
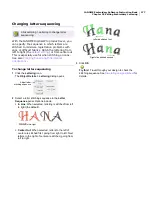
To create a vertical orientation
1
In the
Object Details > Lettering
dialog, click the
Vertical
orientation icon.
2
Enter your text in the text entry box.
3
Click
OK
.
4
Mark the start point of the baseline on-screen.
Try this!
You can adjust orientation settings at any
stage. See
Adjusting orientations
for details.
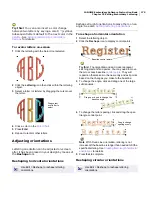
Creating circular orientations
Use the Circle CCW
or Circle CW orientation to
place letters around a full circle.
For a circle you need to mark two reference points,
while for an oval you need to mark three. The
position of the second reference point determines
the justification point of the text. The text is
centered around this point.
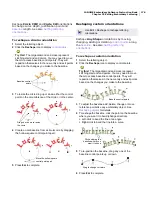
To create a circular orientation
1
In the
Object Details > Lettering
dialog, click the
Circle CCW
or
Circle CW
orientation icon.
2
Enter your text in the text entry box.
3
Click
OK
.
4
Mark the center of the circle on-screen.
5
Mark a point on the circumference to define the radius.
6
Press
Enter
for a perfect circle, or click again to form an
oval.
As soon as the last point is marked, the letters of your
text are positioned around the circle.
Select
vertical
orientation
Circle Below
Circle Above
Select circular orientation
Click to place
center of circle
Click to set radius
of circle
1
2
Click to place
center of circle
Click to set
radius of circle
1
2
3
Click to set radius
of oval
Summary of Contents for Digitizer MB
Page 236: ...234 Part IX Software Feature Table...


