


JANOME Embroidery Software Instruction Book
Chapter 16 Arranging and Transforming Objects
124
Creating layouts
Create large embroidery layouts using Easy
Layout together with selected design/s and/or
object/s. Designs are automatically copied, rotated
and placed in the work area according to the
chosen transformation method. Designs are
always placed equidistant around the center of the
work area based on the reference design/s or
object/s – i.e. the design/s or object/s selected to
perform the operation.
Try this! When used in conjunction with the
Combine toolbar, you can place multiple hoops
around a single design. See
Hooping large designs
for details.
To create a rectangular layout
1
Insert a design and/or select a design/s or object/s
already on-screen.
2
Click the
Display Layout Work Area
icon to toggle
display of the defined work area. See also
Defining
work areas
.
3
Move to the desired position in the work area.
Warning
If you want the selected objects to sew out in
separate hoopings, make sure they are grouped before
proceeding. Otherwise, they will be color-optimized for
a single stitchout – i.e. color block by color block. See
also
Hooping large designs
.
4
Select the
Copy And Mirror To Corners
method.
Four wireframe copies are displayed and placed
equidistant around the center of the work area. Each
copy is mirrored about the vertical or horizontal plane
depending on the location of the reference design.
5
Click the
Apply
button or press
Enter
to confirm.
6
Insert or create additional designs as required.
Use Easy Layout > Copy And Mirror To Corners
to automatically create copies of any selected
object/s in each corner of the layout work area.
Use Easy Layout > Copy To Circle to
automatically create copies (specified by
the number of repeats) of selected object/s
around the center of the work area.
Use Easy Layout > Move To Center to
automatically move selected object/s to the center
of the work area.
Use Easy Layout > Apply to generate the object/s
and stitches of copies created by Easy Layout
operations. Pressing the Enter key has the same
effect.
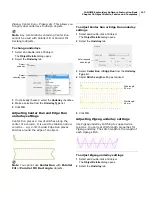
Objects
grouped for
separate
stitchout
Summary of Contents for Digitizer MB
Page 236: ...234 Part IX Software Feature Table...