JANOME Embroidery Software Instruction Book
Chapter 16 Arranging and Transforming Objects
123
You can also print out the layout with Cloth Setter
marks to enable them to use the JANOME Cloth
Setter to physically layout the designs on the item
or fabric you wish to embroider. You can also print
the template which can be used to position each of
the hooped portions of the design. See
Printing
Designs
for details.
Try this! When used in conjunction with the
Combine toolbar, you can place multiple hoops
around a single design. See
Hooping large designs
for details.
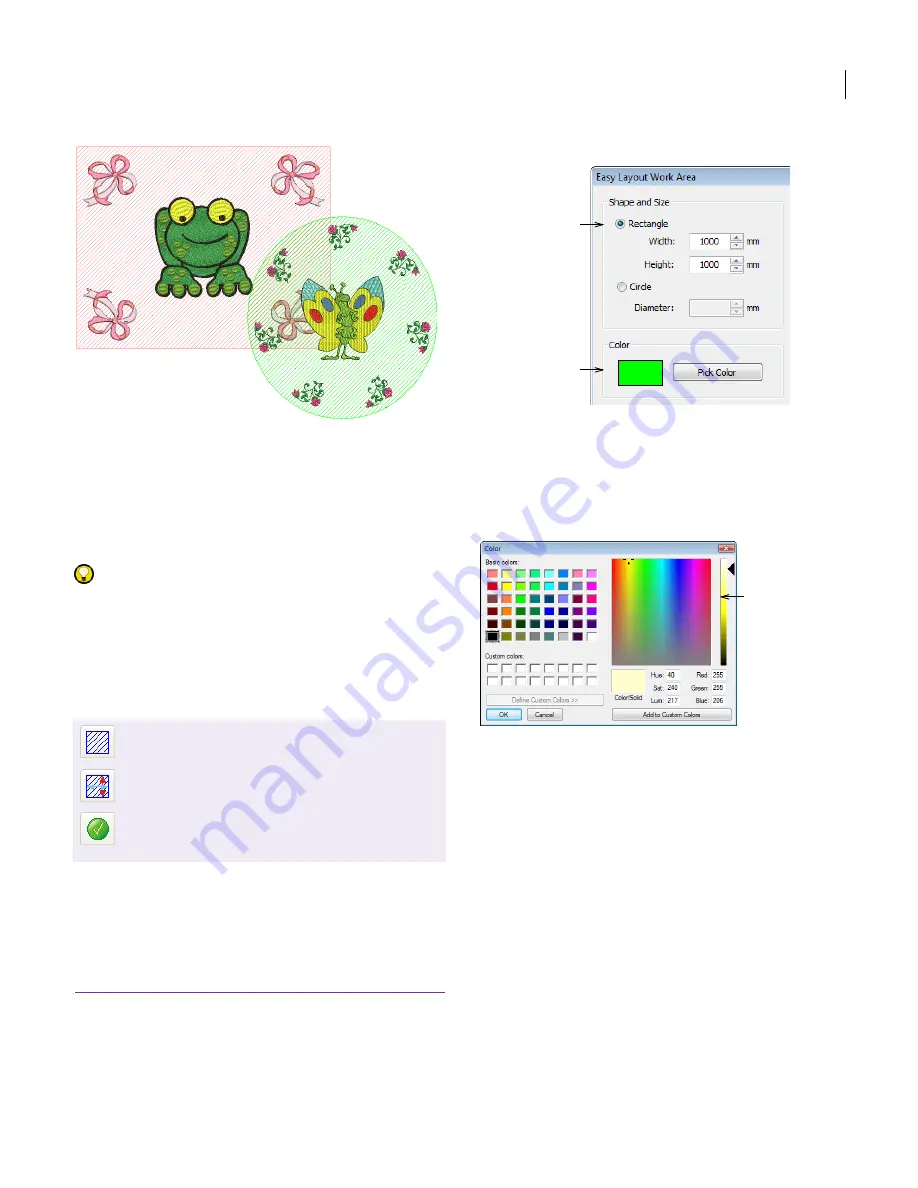
Defining work areas
Before you can create a design layout, you first
need to define a work area according to the
characteristics of the item or fabric you intend to
sew to. Work areas may be defined as rectangular
or circular spaces. EasyDesign allows you to define
a work area of up to 3m x 3m.
To define a work area
1
Click the
Define Layout Work Area
button to create a
new work area.
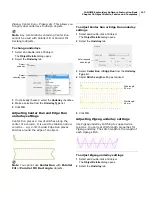
The
Easy Layout Work Area
dialog is displayed.
2
Select either a rectangular or round work area and
enter the required size.
3
Optionally click the
Pick Color
button to change the
display color.
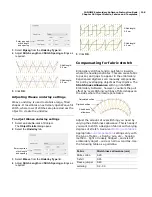
The
Color
dialog where you can select another color or
create a new color of your choice.
4
Click
OK
to confirm selections.
5
Click the
Display Layout Work Area
button to display
the layout.
Use Easy Layout > Display Layout Work Area to
toggle display of the defined work area.
Use Easy Layout > Define Layout Work Area to
access the Easy Layout Work Area dialog.
Use Apply to generate the object/s and stitches of
copies created by Easy Layout operations.
Pressing the Enter key has the same effect.
Define rectangular or
circular work area
Define work
area color
Pick or define
color of your
choice
Summary of Contents for Digitizer MB
Page 236: ...234 Part IX Software Feature Table...


