Configuration
66
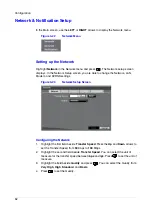
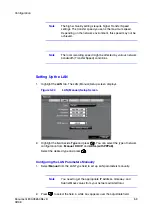
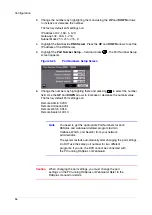
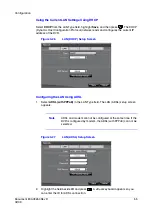
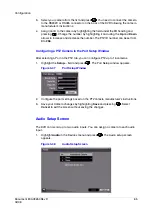
2.
Highlight the field beside the input and press
. A list of cameras appears, and
you can select which camera you want associated with that audio input.
3.
Highlight Enable Audio-Out and press
to toggle between enabling and
disabling the audio out feature.
Note
The DVR does NOT record audio when the recording speed is
set to less than 1 ips.
4.
Save your Audio changes by highlighting Save and pressing
. Select Cancel
to exit the screen without saving the changes.
Alarm-Out Screen
The Alarm-Out screen allows you to change the settings and to establish a schedule for
each alarm output from the back of the DVR.
Highlight Alarm-Out in the Devices menu and press
. The Alarm-Out screen
appears.
Figure 3-39
Alarm-Out Settings Screen
Summary of Contents for HRSD16
Page 12: ...Tables 12 ...
Page 18: ...18 ...
Page 22: ...Introduction 22 ...
Page 138: ...Operation 138 ...
Page 140: ...USB Hard Disk Drive Preparation 140 ...
Page 158: ...Time Overlap 158 ...
Page 160: ...Troubleshooting 160 ...
Page 162: ...Connector Pinouts 162 ...
Page 163: ...Map of Screens Document 800 03650 Rev D 163 02 09 H Map of Screens ...
Page 164: ...Map of Screens 164 ...
Page 166: ...System Log Notices 166 ...
Page 175: ......

