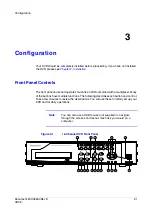
Configuration
32
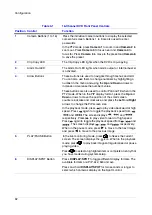
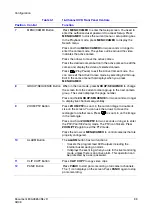
Table 3-1
16-Channel DVR Front Panel Controls
Position Control
Function
1
Camera Buttons (1 to 16)
Press the individual camera buttons to display the selected
camera full screen. Buttons 1 to 9 are also used to enter
passwords.
In the PTZ mode, press Camera 1 to zoom in and Camera 2 to
zoom out. Press Camera 3 to focus near and Camera 4 to
focus far. Press Camera 5 to move to the preset and Camera 6
to save the preset.
2
Clip Copy LED
The Clip Copy LED lights when the DVR is clip-copying.
3
Alarm Out LED
The Alarm Out LED lights when alarm output or internal buzzer
is activated.
4
Arrow Buttons
These buttons are used to navigate through menus and GUI.
You can also use them to change numbers by highlighting a
number in the menu and using the Up and Down arrows to
increase or decrease the number's value.
These buttons are also used to control Pan and Tilt when in the
PTZ mode. When in the PIP display format, press the Up and
Down arrows to move the position of the small screen
counter-clockwise and clockwise, and press the Left and Right
arrows to change the PIP screen size.
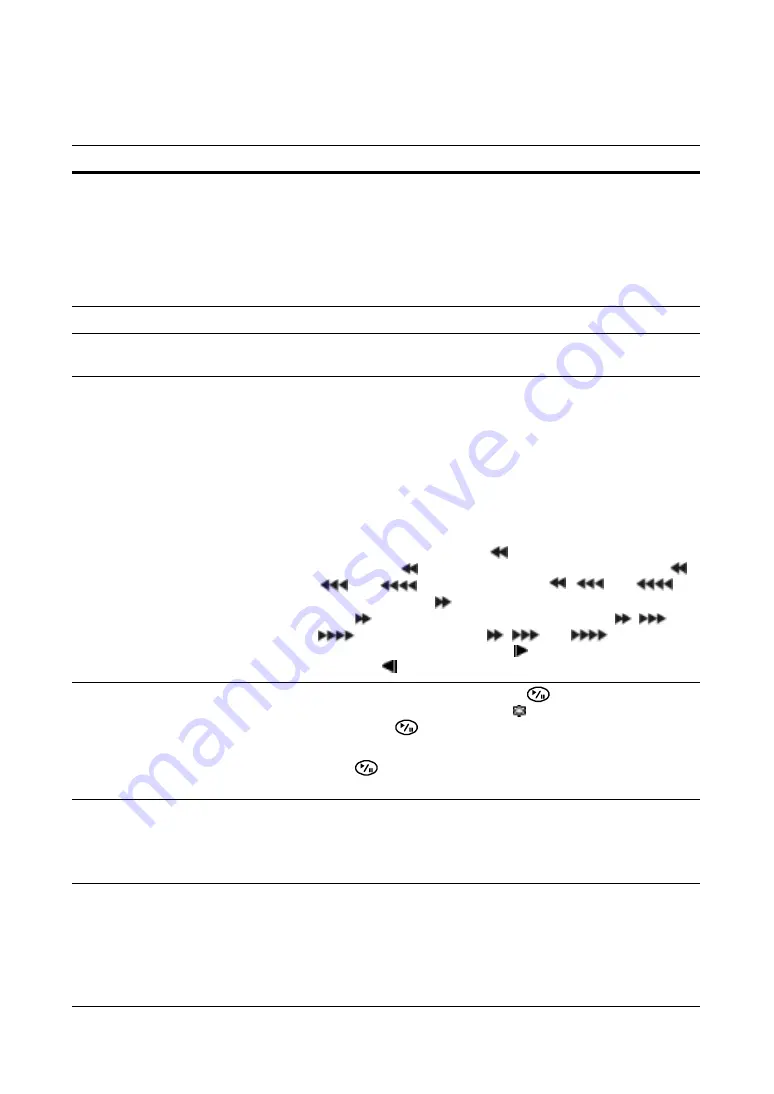
In the playback mode, press
to play video backward at high
speed. Press
again to toggle the playback speed from
,
and
. The screen displays
,
and
respectively. Press
to play video forward at high speed.
Press
again to toggle the playback speed from
,
and
. The screen displays
,
and
respectively.
When in the pause mode, press
to move to the next image
and press
to move to the previous image.
5
PLAY/PAUSE Button
In the live monitoring mode, press
to freeze the current
screen. The screen displays the
icon. When in the playback
mode, press
to play back images at regular speed or pause
playing video.
Press
to select a highlighted item or complete an entry that
you have made during system setup.
6
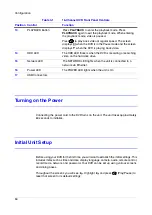
DISPLAY/SPOT Button
Press DISPLAY/SPOT to toggle different display formats. The
available formats are: PIP, 2x2, 3x3 and 4x4.
Press and hold DISPLAY/SPOT for two seconds or longer to
select which cameras display on the Spot monitor.
Summary of Contents for HRSD16
Page 12: ...Tables 12 ...
Page 18: ...18 ...
Page 22: ...Introduction 22 ...
Page 138: ...Operation 138 ...
Page 140: ...USB Hard Disk Drive Preparation 140 ...
Page 158: ...Time Overlap 158 ...
Page 160: ...Troubleshooting 160 ...
Page 162: ...Connector Pinouts 162 ...
Page 163: ...Map of Screens Document 800 03650 Rev D 163 02 09 H Map of Screens ...
Page 164: ...Map of Screens 164 ...
Page 166: ...System Log Notices 166 ...
Page 175: ......


