Configuration
Document 800-03650
Rev D
65
02/09
3.
Select your camera from the list and press
. You need to connect the camera
to the RS232C or RS485 connector on the back of the DVR following the camera
manufacturer's instructions.
4.
Assign an ID to the camera by highlighting the field under the ID heading and
pressing
. Change the number by highlighting it and using the Up and Down
arrows to increase and decrease the number. The PTZ ID number can be set from
0 to 256.
Configuring a PTZ Camera in the Port Setup Window
After selecting a Port in the PTZ tab, you can configure PTZ up to 16 cameras.
1.
Highlight the Setup… field and press
. The Port Setup window appears.
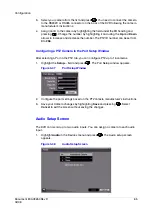
Figure 3-37
Port Setup Window
2.
Configure the port settings based on the PTZ camera manufacturer's instructions.
3.
Save your Camera changes by highlighting Save and pressing
. Select
Cancel to exit the screen without saving the changes.
Audio Setup Screen
The DVR can record up to two audio inputs. You can assign a camera to each audio
input.
1.
Highlight Audio in the Devices menu and press
. The Audio setup screen
appears.
Figure 3-38
Audio Setup Screen
Summary of Contents for HRSD16
Page 12: ...Tables 12 ...
Page 18: ...18 ...
Page 22: ...Introduction 22 ...
Page 138: ...Operation 138 ...
Page 140: ...USB Hard Disk Drive Preparation 140 ...
Page 158: ...Time Overlap 158 ...
Page 160: ...Troubleshooting 160 ...
Page 162: ...Connector Pinouts 162 ...
Page 163: ...Map of Screens Document 800 03650 Rev D 163 02 09 H Map of Screens ...
Page 164: ...Map of Screens 164 ...
Page 166: ...System Log Notices 166 ...
Page 175: ......

