Advanced Functions and Settings: AUTO REG. MARK - Auto Registration Mark Sensor
100
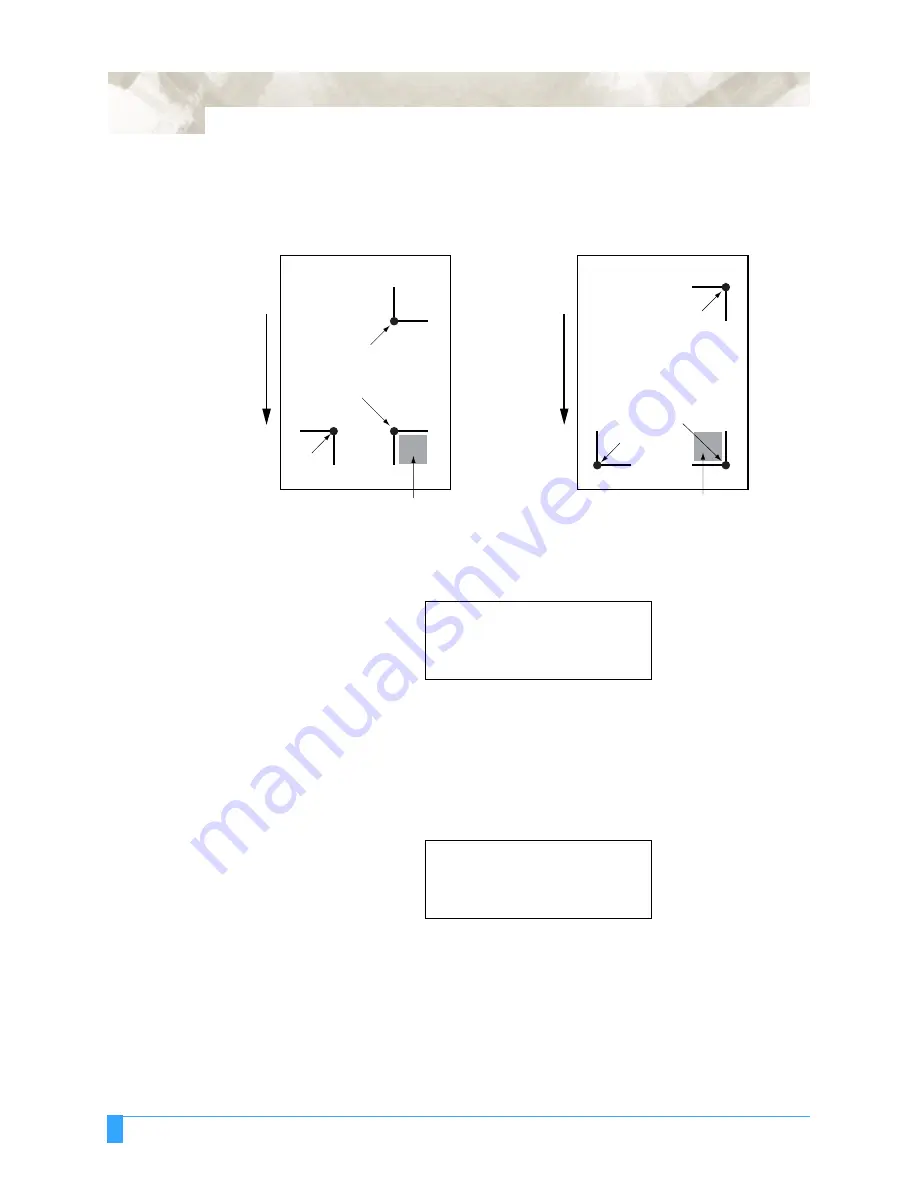
• If you press the F3 key (AUTO), sensing begins from the current pen position.
Use the POSITION key to move the pen tip to the shaded area in the following
diagrams, and then press the F3 key.
• If you press the F4 key (MANUAL), the following message is displayed. Use the
POSITION key to move the pen tip to MARK 1, and then press the ENTER key.
When the ENTER key is pressed, the plotter will start scanning for the registra-
tion mark.
• When the three points have been scanned, the display changes to the following
(only displayed if OFF has been selected for DISTANCE ADJUST). The mea-
sured value for the distance between points 1 and 2 is shown on the 3rd row.
Set the actual distance on the 4th row.
Press the RIGHT or LEFT ARROW key to move the cursor. Press the UP or
DOWN arrow key to increase or decrease the number for the distance value.
• Press the ENTER key to store the setting. The display changes to the following
(only displayed if OFF has been selected for DISTANCE ADJUST). The mea-
Point
3
Point
3
Pattern
1
Media
feed
direction
Pattern
2
Point
1
(the
desired
Origin
Point)
Move
the
pen
tip
within
this
area
Move
the
pen
tip
within
this
area
Point
2
Point
2
Point
1
(the
desired
Origin
Point)
MOVE TO MARK 1
*
USE THE POSITION KEY
*
TO MOVE THE PEN AND
*
THEN PRESS ENTER.
*
DISTANCE
POINT 1-2
00099.8 mm
.
OK?
..........
00100.0 mm
.
Summary of Contents for FC5100A-100
Page 1: ...A 75 100 130 150 user manual MANUAL NO FC5100 UM 154...
Page 3: ......
Page 11: ......
Page 27: ...Out of the Box Connecting the Plotter 27...
Page 33: ...Cutters and Holders Blade Length 33...
Page 133: ...Advanced Functions and Settings RS 232C Serial Interface 133...
Page 149: ...Background Settings Background Settings for HP GL 149...


