background image

GS Screen Actions

Graphical Status Screens/Floor Plans • 87

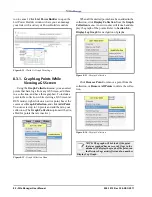
Run: After a GS Screen has been created and you 

arrive at a saved GS Screen, you are automatically in 
Run mode. When in Run mode, right-click to bring up 
the Actions menu. After creating a GS Screen, toggle 
the button to Run mode to see the GS Screen operate. 
If you wish to edit a saved GS Screen, toggle this but-
ton to Edit mode so that you can make changes.

9.2.3. Widgets and Images

The building blocks of GS Screens are the widgets 

used to create the GS Screens. When you click Add 
GS Screen
 from the Navigation Tree menu, you will 
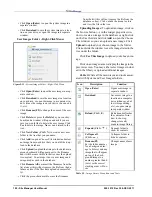
be on a clear GS Screen with a widget menu. Different 
types of widgets can be added from this menu and 
then edited by right-clicking for the widget’s Proper-
ties
 menu for more editing options. The Image Li-
brary is available from this menu for downloading 
and saving images for your GS Screen. See Section 
9.4.1., Adding GS Screens
 for more information 
about building your GS Screen, and Section 9.4.3., 
Widget Editor
 topic for more information about 
working with widgets.

9.2.4. Setting a GS Screen as Your 

Home Page

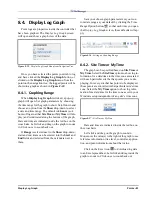
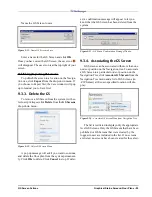
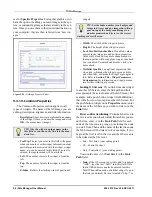
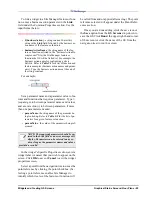
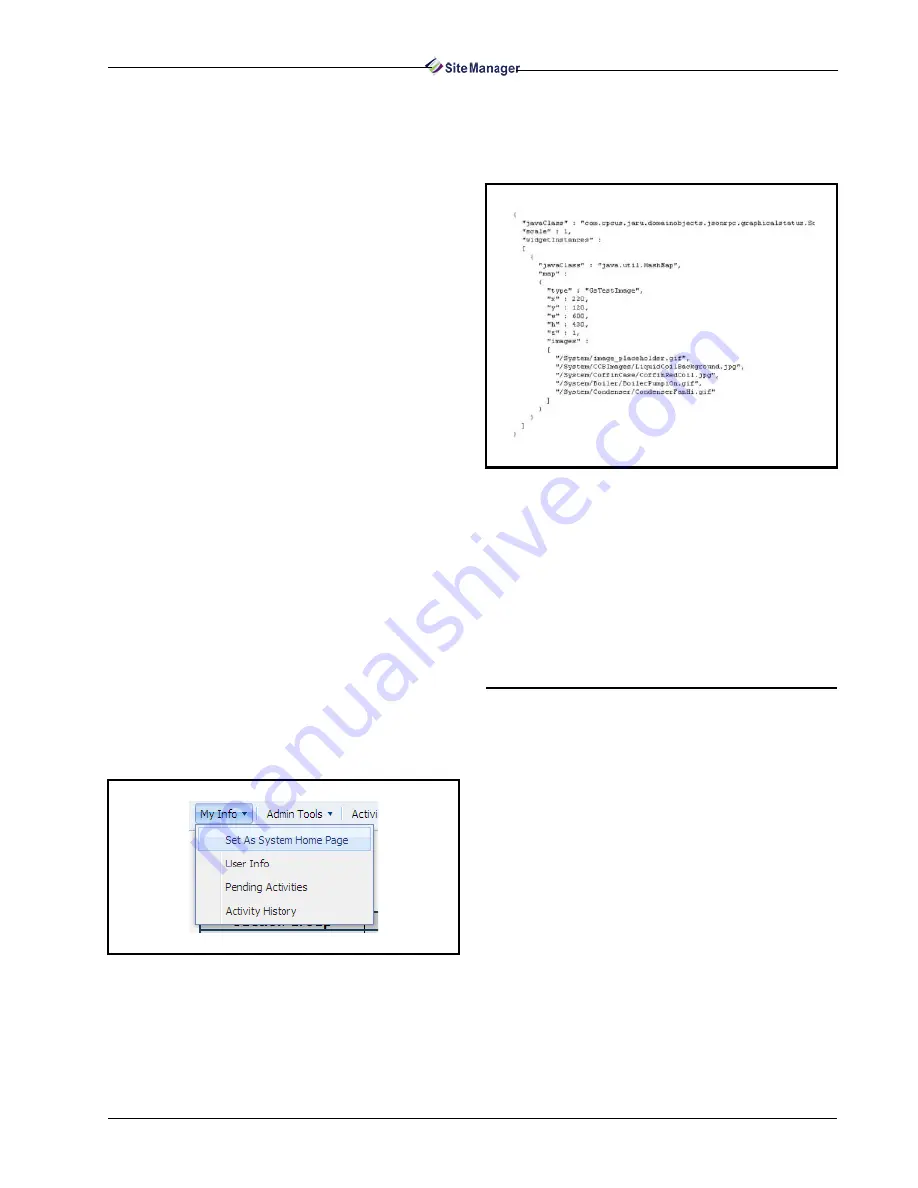
Once on a GS Screen, click Set As System Home 

Page located off the My Info drop-down menu to set 
a GS Screen as your home page and overwrite any 
previously set GS Screen system home page. A con-
firmation window appears: click OK to set the GS 
Screen as your new system home page (no undo) or 
close this window. After a GS Screen has been set as 
a system home page, it may be disabled by uncheck-
ing the Enable System Home Page checkbox in the 
My Info drop-down menu under User Info.

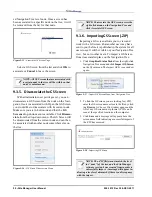
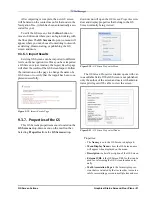
9.2.5. JSON Source Code

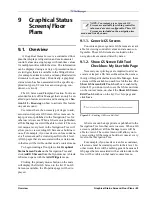
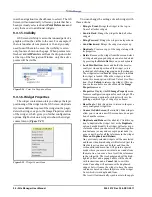
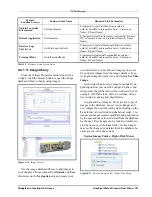
Figure 9-5 shows an example of a view-only 

JSON Source graphical status screen:

9.2.6. Working With Widget 

Parameters

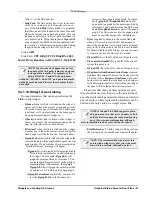
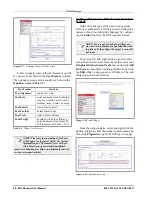
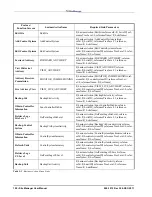
Text-based widgets can use replaceable parame-

ters that are used to help generate the actual contents 
of the label when displayed within the widget. For 
more information on widget parameters, refer to Sec-
tion 9.4.4., Widget Parameters - Customization
.

9.3. GS Screen Actions

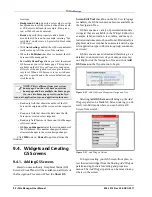
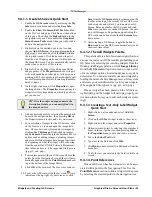
9.3.1. Exporting the GS .ZIP

Exporting a GS screen sends the floor plan to an-

other user for viewing without publishing it for all 
logged-in users to see. All GS Screens that are export-
ed will be saved in .ZIP format. The .ZIP file will 
know which level of the tree it was created from auto-
matically. Each GS screen will contain: the Site Man-
ager version, GS screen schema, and the level in the 
tree the screen was created in. The .ZIP version has to 
be less than or equal to the Site Manager version and 
GS schema installed on the customer server in order 
for the screen to be imported.

1.  Open a GS screen and click the GS Screens drop-

down menu.

Figure 9-4 - Setting a GS Screen as Your Home Page

Figure 9-5 - JSON Source Code Example

Summary of Contents for Site Manager

Page 1: ...026 1012 Rev 3 06 DEC 2011 Site Manager User Manual ...

Page 2: ......

Page 3: ...Retail Solutions 3240 Town Point Drive NW Suite 100 Kennesaw GA 30144 Phone 770 425 2724 Fax 770 425 9319 ...

Page 4: ......

Page 5: ... 4 Maintenance Upgrades Tech Support Licensing 11 2 1 4 1 About Maintenance Upgrades Tech Support Licensing and Keys 11 2 1 4 2 About Feature Licensing and Keys 12 2 2 DATABASE BACKUP 12 2 3 IMPORTING XML DATAFILE 12 2 3 1 Default Time Zone During Import 13 2 4 TROUBLESHOOTING 13 2 4 1 Page Troubleshooting 13 2 4 1 1 Online Help Navigation Pop up Window Scrolling in Online Help 13 2 4 2 Error Repo...

Page 6: ...3 2 Delete Site 40 4 3 3 Edit Configure Site 41 4 3 4 Site Properties 41 4 4 CONTROL SYSTEM 41 4 4 1 Control System Properties 42 4 4 2 Delete Control System 42 4 4 3 Edit Configure Control System 42 4 4 3 1 Advisory Receiver Commission 43 4 5 UNIT 43 4 5 1 Unit Properties 43 4 5 2 Add Application Instance 44 4 5 3 Delete Application Instance 44 4 5 4 Edit Application Instance 45 4 5 5 Application...

Page 7: ...2 2 Purge Inbound Connections 71 6 2 3 Advisory Forwarding 72 6 2 4 Advisory Receiver Commissioning 72 7 CONFIGURATION 74 7 1 CONFIGURING ACTIVITIES 74 7 1 1 Configure Advisory Purge 74 7 1 2 Advisory Snooze Configuration 74 7 1 3 Configure Backup 75 7 1 4 Configure Log Purge 75 7 2 CONFIGURATION TOOLS 77 7 2 1 List Power Builder 77 7 2 1 1 Bulk Site Name Report 78 8 POINTS 79 8 1 OVERVIEW 79 8 2 ...

Page 8: ...e Property Editor 95 9 4 1 9 Common Properties 96 9 4 1 10 Widget Screen Linking 97 9 4 1 11 Image Library 101 9 4 2 Running GS Screens 103 9 4 2 1 Widget GS Right Click Menu Options 103 9 4 2 2 My System Home Page 103 9 4 2 3 Setting a GS Screen as Your System Home Page 103 9 4 2 4 Setting a GS Screen as Your Site Home Page 104 9 4 2 5 Edit and Run Modes and Supported Browsers 104 9 4 2 6 Print I...

Page 9: ...igation tree which comprises four levels or nodes Directory Site Control System and Unit and use the Search option see Section 1 2 1 Search Criteria for locat ing items in Site Manager Site Manager features include Site Creation Basic Site Management navigation tree view grouping of sites site visibility Backup Restore backup all sites daily schedules backup TCP IP Connectivity Only Historical and...

Page 10: ...eria You can generally search for the entity type by just typing it in For example if you search for site 120 a list of sites with 120 in its name will be returned Searching for Store 120 will also return similar re sults In addition to this feature you may narrow down the search more specifically by using narrowed criteria You may prefix a word with a scope to narrow it down The prefix must be fo...

Page 11: ...gin using Site Manager by creating a directory structure setting up users optional 1 4 Login Logout 1 4 1 Login The login page is the first page that appears on your web browser Figure 1 1 Enter your Login ID and password into their respective fields the Pass word field is case sensitive and press the Login but ton or press Return on your keyboard Once your login has been validated you will be tak...

Page 12: ...ur E mail Address and have your Site Manager Login ID sent to the e mail address associated with your login ID 1 Enter your valid e mail address and click Send 2 Your login ID s will be sent to the e mail you en tered If you are unable to log in check the following Incorrect ID Password combination was entered Login ID has expired Case sensitivity was not observed when entering password 1 4 2 Logo...

Page 13: ...e Filter Points Allows you to display different point views in the navigation window Select from the drop down list for the appropriate point view Active Points is the default each time the user starts up the browser and will show all config ured points in the controller Active with Logs shows active points that have a controller log available Points with Logs shows points that have a con troller ...

Page 14: ...he Historical Advisory View page and see the advisory history Search Find directories sites control systems us ers contractors and more by entering your search criteria in the field For more information on per forming searches in Site Manager refer to Section 1 2 Basic Concepts Logout Logs you out of Site Manager 1 5 1 Navigation Tree The navigation tree is located on the left hand side of the scr...

Page 15: ... only be accessed by admin level users To access advisory menus and setpoint broadcast click on Activities for the drop down menu To access the online help system click Help for the drop down menu 1 5 4 Main Window The main window of the Site Manager is located to the right of the Navigation frame and takes up most of the space on the screen Mouse over the name of the menu you would like to select...

Page 16: ...t will allow software li cense keys to be added edited The Site Manager Feature Licensing window dis plays what type of feature is licensed the license key number and license status 2 1 1 Registration 1 Click the Help drop down menu from the top menu bar and click Feature Activation 2 Click the Registration button to proceed in obtain ing a license 3 Click OK to open the Product Activation License...

Page 17: ...ally be sent to Emerson Retail Solutions If successful a confirma tion window Figure 2 6 will open to notify you that your registration information has been sent 6 Click OK and you will return to the Feature Licens ing page 7 For systems that are not SMTP enabled after filling out your information follow the instructions in the Product Activation and Licensing window Figure 2 5 Product Activation ...

Page 18: ...Licens ing emerson com 8 Click OK and this will return you to the Feature Li censing page 2 1 2 Activation Once you receive the e mail containing the file that will activate your trial license save the file to a location on your drive 1 Go back to the Feature Licensing page and click Activation 2 Click OK on the confirmation window to proceed The Product Activation License Import window will open ...

Page 19: ...features you wish to acti vate Click the Add Feature button on the Feature Li censing page and enter the key into the boxes provid ed Figure 2 13 Click Save The key entered will know what feature it is asso ciated with and will populate the appropriate field s on the screen To override an existing key a new key will need to be added and replace the existing key Click Cancel to stop and exit 2 1 4 ...

Page 20: ...rocedure for your particular database 2 Back up the applicable Web server areas webserverhome webapps emerson WEB INF classes com cpcus jaru ui jsonrpc GsFile system Screens User If applicable webserverhome webapps emerson WEB INF classes com cpcus jaru ui jsonrpc GsFile system Widgets User webserverhome webapps emerson WEB INF classes com cpcus jaru ui jsonrpc GsFile system Images Log retrieval s...

Page 21: ...ormation of when date and time and where the error occurred The Details button will show a set of program codes of the error when clicked Click Hide Details to hide Description enter a description of the error in the field provided what you were doing before the error took place etc Company enter the name of your company Telephone enter your contact numbers Email Address pre filled by default the ...

Page 22: ...lick Navigation Tree menu Click the Save button at the bottom of this page and refresh the Navigation Tree for changes to take effect If the Enable System Home Page checkbox is en abled it will set the GS screen you choose as your system home page as indicated by Current Home Page on start up If the Hide Nav Frame checkbox is enabled the navigation tree will be hidden each time you log in The sele...

Page 23: ...o child activities a message appears No activities to display For ex ample if logs are retrieved from the Unit level the plus sign when selected will expand and the user can view each application type that had logs re trieved and the status Therefore if an activity failed or is partially complete users can select the plus sign to see where the failure occurred Activity which activity was performed...

Page 24: ... specified Export options are available at the bottom of the page This allows you to export current page informa tion into different output formats such as Excel Spreadsheet HTML and PDF Select the format from the Export drop down and select whether to ex port All activities displayed or only those Not Com pleted Failed and Partially Completed activities You can also choose to export all details o...

Page 25: ...2 1 1 User Manager The User Manager lists all users in the database From the User Manager page you can select a user to edit delete a user or jump to the User Configuration page to add a user User names and group names that are currently added in the database will display in this page If more users are in the database than can display on a single page the list of user names will appear on multiple...

Page 26: ...GS Screen Edit Tool checkbox is en abled the GS menus will become visible on the right click Navigation Tree menu Click the Save button at the bottom of this page and refresh the Navigation Tree for changes to take effect If the Enable System Home Page checkbox is en abled it will set the GS screen you choose as your system home page as indicated by Current Home Page on start up If the Hide Nav Fr...

Page 27: ...display in the page If more groups are in the database than can display on a single page the list of group names will appear on multiple pages as indicated at the bottom of the window Page 1 of 1 Click the Group Name header for a quick sort or click the drop down arrow to open the sort menu To export group data select from the available ex port formats from the drop down below the table Ex cel Spr...

Page 28: ...Supervisor no restrictions on user privileges ad ministrator level Advanced has all access except administrator level rights Limited user has the basic level of user privileges Can edit and add basic parameters View only user has no ability to edit or add infor mation None no privileges have been assigned to user Bypassing controller security The Bypass Con troller Security option can allow a user...

Page 29: ...ore directories are in the database than can dis play on a single page the list of directory names will appear on multiple pages as indicated at the bottom of the window Page 1 of 1 Click the Directory header for a quick sort or click the drop down arrow to open the sort menu Adding a Directory To add a new directory click the Add New button from the Directory Manager page Figure 3 20 and enter th...

Page 30: ...irectory Click OK to delete No to stop 3 2 1 4 Site Manager The Site Manager lists all sites in the database From the Site Manager page you can select a site to edit delete a site view its properties or jump to the Site Configuration page to add a site If more sites are in the database than can display on a single page the list of site names will appear on multiple pages as indicated at the bottom...

Page 31: ...d New This will take you to the Contractor Configuration page where all information about the contractor can be en tered Erase contractor information from the database by selecting a contractor from the list and clicking De lete Edit contractor information by selecting a contrac tor name and clicking Edit This will take you to the Contractor Configuration page where contractor in formation can be ...

Page 32: ...being performed Requested to Start Site Time The default time is displayed depending on the page that the user is viewing User The user to which the pending activity is as signed Target Reference to exactly where the activity is taking place Status The status including items currently in progress and waiting to start Each item s Status will be a link to the expanded information page or status page...

Page 33: ...p down menu to view by Result type Exceptions Report Click the Exceptions Report icon from this column to open a window that dis plays details of the activity that was either failed or partially completed Sort Ascending Sort Descending arranges the ac tivities alphabetically from A Z or Z A Activity ID internal use internal key to the activ ity the user is currently on Activity Parent ID internal ...

Page 34: ...s ers System schedules are automatically set up and are not able to be edited by users A table with all the scheduled activities will be displayed By default the columns are sorted according to the next run time which will be in ascending order The columns are sorted by clicking on the column header Name A unique descriptive name given to a sched ule by the user or Site Manager in case of a system...

Page 35: ...not de lete it in the list but will only suspend it until the time you or another user set it back to Enable mode Run Now If you would like to run an existing schedule immediately click on the Run Now but ton Once selected the progress page opens Reset Filters Applied filters will reset to default Adding a new or modifying an existing schedule Double clicking on a schedule will allow users to edit...

Page 36: ...ours change or special events occur scheduling a Setpoint Broadcast can send data to mul tiple groups sites and or multiple controllers at one site and provides the ability to send setpoint and pa rameter information across a single enterprise To schedule Setpoint Broadcast refer to Section 3 3 2 Setpoint Broadcast Scheduling Retrieve Logs Retrieving logs shows a historical view of inputs and outp...

Page 37: ...ether refreshing the point list should be run now or on a schedule Select the type of Schedule one time only at intervals or calendar based Scheduling Backup A Backup saves information from a controller to the server and can be done at the directory site con trol system or unit level For scheduling a Backup enter a name and choose whether the backup should be run now or on a sched ule Select the t...

Page 38: ...tep to updating firmware is to apply the firmware to the controller Firmware Apply can be configured for deployment at the Control System lev el only from the Schedule Manager The Firmware Apply activity is designed to only Run Now without the option for scheduling future time or date no Run on Schedule option After setting the configuration Click Go to run For more information on Firmware Update ...

Page 39: ...ed to the database will display in this list If an email address was not provided during user setup a NO EMAIL SET UP will display below the user name 3 If your recipient is not in the list or the user email address is not set up enter the recipient s email ad dress in the Additional Email Addresses field Separate email addresses with a comma 4 Type your message in the Body field and provide a Sub...

Page 40: ... al ready exists in the database and prompted to rename the broadcast before you can save This field cannot be left blank Choose how often the broadcast will be run one time only at intervals or based on calendar informa tion Run Once For one time only broadcasts enter the start date and time the broadcast will be run The broadcast will only be run at that date and time On ly the options for Run O...

Page 41: ...an one e mail is en tered Emails will be validated and the system will prompt you if the syntax of an email address is not correct Configuration Test Send checkbox When Setpoint Broadcast is set as the type of Schedule When this box is checked a Test Send will perform all steps of an actual setpoint broadcast except it will not actually execute the send The message in red as shown in Figure 3 50 n...

Page 42: ...wn to the application instance lev el click the radio button of the application instance and then click the Save button The Application Set point Group screen of the selected application in stance will open where you can select data points to use for setpoint broadcast see Schedules Setup on page 35 for details on setting up Application Set point Groups If there are no valid applications selected ...

Page 43: ...When a field is changed by adding data the selec tion image changes to the lightning bolt Character Deletion When the lightning bolt im age is displayed and data is deleted from the field by using the standard method of character deletion backspace key delete key control x mouse select cut the image will not change The image must be clicked to change the state to the Dot image if field data was no...

Page 44: ... point s you wish to send dur ing broadcast Note that when the Dot image is clicked it will be replaced with a Lightning Bolt im age to indicate that the point or points have been se lected Switch through tabs to view and select more points for broadcast You can also change point val ues and configure log and alarms from this screen by entering your changes in the point value fields Click the Save...

Page 45: ... Tree has an icon to illustrate the tree level it be longs to Each node icon precedes every node description Application types application instances and points are also are represented by icons Plus and minus signs placed before the tree level icons function to expand or collapse tree elements Click on to expand a tree element Click on to collapse a tree element All menus and submenus in the navig...

Page 46: ... is select ed the State Province Region drop down menu will be changed to a blank text field to allow a name to be entered in the field 4 2 2 Add Directory To add a directory right click the Site Manager root menu at the top of the tree and click Add Direc tory or use the Directory menu from the navigation tree and click Add Directory on the More Directory Tasks flyout menu Advisory Receiver Commi...

Page 47: ...ow will open and ask if you want to delete the directory Click OK to delete Cancel to exit 4 2 5 Edit Configure Directory To make changes to a directory click the Edit Di rectory menu from the desired directory s mouse over right click menu in the navigation tree The Di rectory Configuration page opens If United States is selected as the country a drop down menu with all the states will be shown I...

Page 48: ...dress field If the Vali date IP Address checkbox is enabled default only a valid IP address will be accepted If an invalid address is entered a message will appear to notify you that an invalid address has been entered Enter the Port number of the device to which you are connecting in the Port field The Advisory Commissioning Port is the port used for receiving advisories after commissioning is co...

Page 49: ...nd exit the page 4 3 4 Site Properties If Site Properties is clicked from the navigation tree under the More Site Tasks flyout menu the Site Properties page opens displaying the active con trol systems all Activities associated with that prop erty configurables and details about the site 4 4 Control System A control system is a set of controllers with one point of connection in one localized physi...

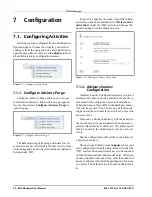
Page 50: ... have been set up for this control system Activities Lists any activities that may be per formed on the control system Activity Configuration Activities that can be con figured at the control system level can also be ac cessed from this page System Configuration Opens the Activity History Results page for the chosen control system and its entities Firmware can be managed from this section see Sect...

Page 51: ... level Click the Save button to save or the Cancel button to clear and exit the page 4 4 3 1 Advisory Receiver Commission Clicking on Advisory Receiver Commission menu opens the Advisory Receiver Commission page where various advisory configurations can be set This menu is unique at the Control System level For detailed discussion on this topic see Section 6 2 4 Advisory Receiver Commissioning 4 5...

Page 52: ...ith one add command Application Name Assign a name for the applica tion you wish to add max of 15 characters If the name assigned to the application is already in use a number will append at the end of the name to differ entiate one from the other e g TEST TEST001 TEST002 etc If more than one application is add ed with one command the same naming rule will apply Click the Add button to send the in...

Page 53: ...figuration in an online controller To open the Edit Application page right click the desired application instance from the navigation tree and select Edit Application Instance The Edit Application page allows you to perform online remote editing of applications and shows the editable and non editable point values or protocol component of an application instance which are di vided into groups set b...

Page 54: ...ons toggle button Al lows you to select the display mode for points When Full Options is displayed the Reduced Op tions mode is in use and vice versa Full Options al lows you to view more points than in the Reduced Options By default the page is set to Full Options click the toggle button to shift modes Advanced Access and Normal Access toggle but ton Click this button to display Level 5 propertie...

Page 55: ...s and have the average as the output value The output is connected to the input of anoth er application to control off of the average temperature Click OK to save the settings pointer information will display in the Value field of the Edit Application page Click Cancel to exit Each output point that has the ability to be a point er can point to multiple other input points within a controller To co...

Page 56: ... can range from air handlers Figure 4 29 analog and digital combiners zones power monitor ing global data sensor control time schedules and more All application types contain application points that appear underneath the application type once ex panded An example of how an application type appears on the navigation menu An example of how the application type appears inside the main window To jump ...

Page 57: ... performed Duration Elapsed time of the action Start Method On Demand Requested to Start The date and time the activity was requested to start by the user User The user who initiated the activity Status The status of the activity which may be In Progress Waiting to Start etc 4 6 2 Initializing Terminal Mode The Terminal Mode feature is accessed from the mouse over or right click menu from the Unit...

Page 58: ...anges while a GS Screen is being viewed the system will not pick up configuration changes between the time the application data inven tory is being received Key Function for RX Function for BX Function for CX Suction Group AHU AHU Condensers Zones Lighting Standard and Case Circuits Lighting Circuits Sensor Con trol and Power Mon itoring Sensors Sensors Setup Setup Setup Help key Opens the online ...

Page 59: ...be evident automatically on the navigation tree under the selected unit or click on the Refresh button in the navigation frame 4 6 5 Refresh Point List Refresh point list is an activity that may be per formed only at the Application Type and Applica tion Instance levels on the navigation tree When a refresh point list is performed information is pulled from the controller and is posted to the data...

Page 60: ...igation tree under the selected Control System or click on the refresh button in the navigation frame 4 6 7 Restore A Restore pulls the backed up setpoints from the database and restores or loads the data back into the controller and is deployed at the Unit level Click the backup from the list that you wish to re store to the unit and a message window will ask if you are sure you want to execute t...

Page 61: ...o upload to the E2 controller If the description file is to be uploaded at a later date select Run On Schedule and configure it from the Schedule Manager page Note that this Ac tivity can be scheduled but not recurring Running the Upload Description File activity now from the Activity Startup page Select the file that will be sent to the controller from the Description File To Upload list If the f...

Page 62: ...at directory or site need to be cho sen Select the specific unit controller if you click the right click menu Upload Description File on the unit level All unit controllers under the current level should be selected if you click the right click menu Upload Description File on directory or site level 4 6 9 1 Description File Upload to the E2 Controller When the schedule runs either using the Run On...

Page 63: ... down field will be disabled The data of the chosen application instance will be used to populate information for this field Click Save to save the new application setpoint group The new application setpoint group will add to the list of current application setpoint groups under the Application Setpoint Group section Select where to send the setpoints by selecting a target controller group or by c...

Page 64: ... window Figure 5 4 and selecting the desired file from the File Up load window Figure 5 5 Firmware files must be obtained from the emersonclimate com site and then uploaded to the server For example the files for E2 can be found here http www emersonclimate com en US products electronics Pages e2_facility_management_system aspx Site Manager is not shipped with any firmware packages pre loaded in t...

Page 65: ...and will return to the Add Delete Firmware Files window Figure 5 7 with the uploaded file displayed in the table of firmware files stored on the Site Manager server file system The package file will display in the table under Firmware Version If the package file is not valid you will be directed to the page with the firmware file error displayed identifying the reason for the error Figure 5 8 Clic...

Page 66: ... delete confirmation win dow Delete Firmware Files will be displayed Figure 5 11 To proceed with the deletion of the selected firm ware package files click Delete on the Delete Firm ware Files window Figure 5 11 Otherwise click the Cancel button If there were errors in the deletion process the De lete Firmware Files errors window Figure 5 12 will open and display only those files that could not be...

Page 67: ...duled Firmware Update Transfers may be scheduled but will be on a non recurring one time schedule only so they will need to be configured in Schedule Manager each time when run on a schedule A Firmware Update Transfer configuration can be selected from the main navigation tree Figure 5 14 from a properties page Figure 5 15 or from the Schedule Manager Figure 5 16 At the start of the Firmware Updat...

Page 68: ... To run the Firmware Update Transfer Schedule now Figure 5 17 1 Select the Run Now option on the Schedule Manag er page 2 Make the appropriate configuration option selec tions Directory Site and Control System 3 Select the appropriate firmware package under the Firmware Selection drop down 4 Select whether a downgrade will be allowed If the firmware selection is a downgrade for the selected contro...

Page 69: ...n a unit is receiving a pack age that will be a downgrade to its firmware If there are any units on a particular Control Sys tem that will be downgraded the entire Control Sys tem will be considered a downgrade Additionally if the Downgrade Allowed drop down was set to No the firmware will not be transferred to any controller on this Control System The firmware will be transferred to the gateway u...

Page 70: ...uling fu ture time or date no Run on Schedule option At the start of running the Firmware Apply activi ty a Control System Inventory will be performed on the Control System targeted for Firmware Transfer 5 3 1 Firmware Apply Deployment Firmware Apply deployment may be accessed from the main navigation tree at the control system level Figure 5 27 or from the Schedule Manager by selecting the Firmwa...

Page 71: ...7 is set to Yes a battery test will be performed on all units prior to applying the firm ware If any unit fails the battery test the Firmware Apply will automatically be cancelled and the Activ ity Details report will be updated to show that the ap ply process was cancelled as a result of the battery test failure of the applicable units When you are ready to initiate the Firmware Ap ply activity c...

Page 72: ...econds for 15 minutes or until it has been reconnected If the firmware activity is unable to reconnect to the unit the Firmware Apply status will result in a failed status 5 3 5 Firmware Matching Upon acknowledgment from the controller the Firmware Apply activity will check and attempt to find a match between the existing firmware version of the controller and the version of the firmware package b...

Page 73: ...traffic conditions 6 1 1 Navigation Live advisories are displayed in a table and can be sorted Occurrence Date shows the date and time when the advisory was generated Clicking the header will ar range the display of advisories newest to oldest Type defines the kind of advisory that has been gen erated Unit shows which controller the advisory was gen erated from Click on this header to arrange advi...

Page 74: ...us Whether the advisory was returned to normal The parent controller where the advisory originated The table can be configured to show only certain table column header categories To configure move cursor to one of the column headers to show the ar row down button Click on the arrow to expand and mouse over to Columns to show the list of column categories By default all categories are checked Un ch...

Page 75: ...ays month Last Month or by custom date range Custom Range Filtering by Type groups advisories by Alarm Fail or Notice types Filtering by Status groups advisories by Acknowledged or Unacknowledged Bolded rows indicate active advisories Active advisories are advisories that are unacknowledged and have not returned to normal Live advisories can also be filtered by priority High Urgency Medium Urgency...

Page 76: ... that requires no im mediate attention or may be a symptom of a condition that may require attention in the fu ture Failures are pre programmed advisories that are generated when a controller or device fail ure occurs such as a board going off line or a sensor short Warning is a type of advisory dependent on the type of controller used Source Shows parent controller from which con troller the advi...

Page 77: ... of advisories to an Excel spread sheet PDF or HTML Select from the drop down list and click the Export button to export the adviso ries to the desired file type A File Download win dow will open where you can choose to save the advisories to a location on the PC or open them as the selected file type For Einstein and E2 Controllers only Advisories are grouped into different Urgency Buckets for E1...

Page 78: ...nnect to the system server For ad ministrators to set up an email of this report go to the Schedule Manager page Before running the schedule the administrator should set the following Set Mail smtp host value to super user Provide an email address during user setup Problem Sites Report Email will not run if an email address is not provided For email setup go to My Info for email setup Schedule Man...

Page 79: ...sts a report will still be sent informing the user that no problem site exists 6 2 2 Purge Inbound Connections Controllers contact Monitoring once a day to ver ify the connection In this case the protocol will dis patch an event that does not include advisories just connection verification information or records These records may be used to perform diagnostics on sites that call in with the wrong ...

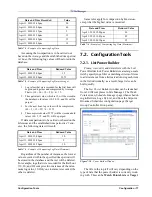
Page 80: ...ext or Cell Phone messages sent to cell phones for each in dividual alarm will be abbreviated to conserve space Enter the e mail addresses in the Users box and any overflow addresses into the Additional E mail Addresses box When the admin and guest users have e mail addresses entered for them the NO EMAIL will disappear and checking the boxes will send the advisories to the e mail associated with ...

Page 81: ...nitoring From the Monitoring Status menu choose menu items 1 5 to verify that the configuration has been sent to the E2 and that the various settings are correct Terminal Mode From the unit level on the navigation tree launch the Terminal Mode viewer and log in to the E2 In the E2 press Menu and 7 3 5 4 On the Sys tem Tests menu set Advisory Test to Yes for testing Press Enter after selecting Yes ...

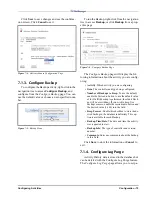
Page 82: ...ry Snooze Configuration Advisory Snooze Configuration allows you to set an alarm wait time a Snooze alarm to reduce the to tal amount of recurring advisories in the database When the Snooze flag is ON in the database adviso ries will be snoozed You can set up a default snooz ing period at the customer level site level or specific advisory level Once sent a Snoozed advisory will not be sent to the ...

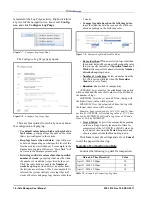
Page 83: ...lt enable the first radio button to use the default value of 4 If a fifth backup is performed the oldest Back up will be overridden If you wish to keep five backups or more enable the second radio button and the desired value 1 100 into the field Keep Forever Enable this checkbox to store the de sired backup in the database indefinitely This op tion is available for each Backup Backup Time Date Th...

Page 84: ...lder than the current date will be compacted based on the rules that you specify thereafter If Specified Number of Weeks is chosen select a number from the Number of weeks keep drop down Number of weeks keep Select a number from the list This option will hide when the Data older than rule is set to Now Based on the method of compaction AVERAGE Log values for the established time period will be add...

Page 85: ...uilder Create view edit and delete lists with the List Power Builder tool Power Builder creates large scale lists by specifying a filter or matching criteria of items to add or remove from a list instead of using each item in the list individually as a result large lists can be built quickly The List Power Builder window can be launched from 3 different places in Site Manager The Watch Points scre...

Page 86: ...o be used to match any character within a certain position in the phrase Additionally Point Category and its corre sponding Active Log setting may be used as part of the matching criteria by specifying a value in these drop downs Once all the criteria for matching is specified click the Add To List button to add the cri teria 7 2 1 1 Bulk Site Name Report A list of sites can be copied to the clipb...

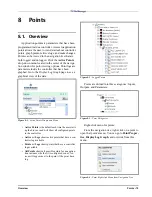
Page 87: ...the default each time the user starts up the browser and will show all configured points in the controller Active w Logs shows active points that have a con troller log available Points w Logs shows points that have a controller log available All Points shows all possible points for an applica tion instance whether it is configured or not An icon will appear next to the point if the point has a lo...

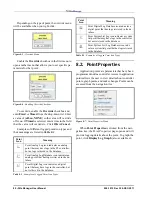
Page 88: ...operties is clicked from the navi gation tree the Point Properties page opens and will provide logging details about the point To graph the point click Display Log Graph also available di Figure 8 5 Override Menu Figure 8 6 Enabling Override Checkbox Point Icon Meaning Point Analog Log icon indicates an analog point that may have logs in the E2 controller but no logs retrieved in the database Poin...

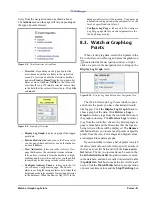
Page 89: ...kes you to the Configure Log Purge page where you can set parameters for the Log Purge activity 8 3 Watch or Graph Log Points When viewing log data select which points in the E2 controller you wish to log and press the graph icon located inside the navigation window or right click on a point in the navigation tree to bring up the Display Log Graph menu The Watch Or Graph Log Points window opens an...

Page 90: ...d add them in your collection The Graph Collection option will be dis abled for points that are inactive When all the desired points have been added in the collection click Display Collection from the Graph Collection menu A new window will launch and dis play the graph of the points Refer to Section 8 4 Display Log Graph for navigation of graphs Click Remove Point to remove a point from the colle...

Page 91: ...ed from the calendars next to them Save your chosen graph parameters or your cus tom date range as your default by clicking the Time Range Option button so that each time you open the Display Log Graph screen these defaults will ap ply 8 4 2 Site Time or My Time The graph can be specified based on Site Time or My Time Select the Site Time option to show log in formation for a date time in the time...

Page 92: ...Mouse over the value s to the right of the graph for example Case Temp 1 to see reference informa tion tree level controller application and point in formation about that value An example of a graphed digital information is shown in Figure 8 21 Move the cursor inside the graph to show time en gineering units and point information When you left click inside the graph the yellow bar appears and mark...

Page 93: ...e and click Add GS Screen from the flyout menu A blank GS screen opens with the Add Widgets menu Clicking the primary mouse button on the node will display the first GS Screen in the list If no GS Screen is available the Properties page will be dis played 9 1 1 Generic GS Screens Convenient pre set generic GS Screens are avail able for viewing controller values and are user con figurable These GS ...

Page 94: ...e Library Choose between system and user images and down load to the image library by clicking Use Different images have unique functionality depending on what the widget will be showing from the control ler ON OFF states different real time values and more The supported file types are jpg gif and png 6 To associate points with your GS Screen choose the points from the Navigation Tree and they wil...

Page 95: ...set GS Screen system home page A con firmation window appears click OK to set the GS Screen as your new system home page no undo or close this window After a GS Screen has been set as a system home page it may be disabled by uncheck ing the Enable System Home Page checkbox in the My Info drop down menu under User Info 9 2 5 JSON Source Code Figure 9 5 shows an example of a view only JSON Source gr...

Page 96: ...to save the GS screen to a specific location on your computer 6 If you click Save the Save As dialog will be dis played allowing you to save and download the ZIP anywhere on your computer A File Download win dow will also open to show the progress of the download to the chosen location After the down load is complete simply close the File Download window 9 3 2 Saving the GS Once you have created a...

Page 97: ...lick Cancel to stop If delet ed a confirmation message will appear to let you know that the GS Screen has been deleted from the system 9 3 4 Associating the GS Screen GS Screens can be associated with more than one node or position on the Navigation tree To associate a GS Screen to a particular node or position on the Navigation Tree click Associate GS Screen from the Navigation Tree menu and a li...

Page 98: ...er users To import a GS Screen from its associated place on the Navigation Tree 1 Click Graphical Status Tasks from the right click Navigation Tree menu and click Import GS Screen on the flyout menu The Import GS Screen window opens 2 To find the GS screen you are looking for ZIP enter the GS screen name or locate the file by click ing Browse A Choose File window opens and the list of any GS scree...

Page 99: ...ies of the GS This GS Screens properties menu is located on the GS Screens drop down menu on the mail tool bar Selecting Properties from the GS Screens drop down menu will open the GS Screen Properties win dow and display properties that belong to the GS Screen currently being viewed The GS Screen Properties window opens with var ious editable fields If the GS Screen is not published only the auth...

Page 100: ...he window 9 4 Widgets and Creating GS Screens 9 4 1 Adding GS Screens Based on user authority Graphical Status GS Screens Floor Plans will be available on all levels of the Navigation Tree menu When the Show GS Screen Edit Tool checkbox on the My User Info page is enabled the GS Screen menus become available on the Navigation Tree GS Screens use a variety of presentation models widgets that are av...

Page 101: ...e bottom of the Image Editor 9 Click OK at the bottom of the Properties window 10 To save the GS Screen click the save icon save indicator at the top right of your screen or click Save from the GS Screens drop down menu on the tool bar at the top of the screen A Save GS Screen window opens and will ask you to name your GS Screen Enter a name for the GS Screen and click OK Once you have saved the G...

Page 102: ...e widget so it is locked out of clicking dragging and other changes The widget selection handles turn purple to indicate the widget is locked When the widget is in lock mode this menu option will read Unlock Size Posi tion Click Unlock to release the widget This op tion is also available as a checkbox on the Image Properties menu Properties Displays the GS Image Property menu for more configuratio...

Page 103: ...gets equal flush with each other Horiz Center centers the widgets equally hor izontal depending on the starting position of the widgets For example if the widgets are vertical to each other to begin one will be placed on top of the other hiding the widget To undo click the area outside of the widgets Vert Center stacks the widgets equally verti cal one above the other depending on the start ing po...

Page 104: ... visible and when false will make the widget or group invis ible Refer to Section 9 4 4 Widget Parameters Customization for information on widget parame ters for this visibility expression Linking GS Screens If you link from one widget to another GS Screen enter the link path and link screen simply the actual name of the GS Screen For example add a push button widget GsPushButton that will allow y...

Page 105: ...aph link with the name of a screen to show as part of the graph For exam ple graph 1 2 GraphSubScreen would pop up the log graph for the points specified by references 1 and 2 and also load the GS Screen named GraphSubScreen as part of the popup graph The GS screen used in the popup graph must be specially designed for this purpose tree applied by default to the screen link path when a GS screen i...

Page 106: ...lect and right click the desired widget to show the widget context menu and then click Properties to open the GS Properties page Figure 9 27 GsImage Property Editor Screen Text Feature Options Text Alignment center left right Font Size enter a numeric value for the font size or xx small x small small medium large x large xx large Font Family times courier arial Font Variant normal small caps Font ...

Page 107: ...parameters if more than one parameter is needed paramName the string name of the parameter be ing looked up Refer to Table 9 2 for the list of pa rameters for a given feature or function paramValue the value of the parameter being ref erenced In the widget s Specific Properties section enter a widget label or name that you wish to appear on the screen Click OK to save or Cancel to exit the widget ...

Page 108: ...2 refer enceName 0 csName Backup Site BackupSiteActivity businessAction BackupSiteActivity referen ceId 0 siteID referenceTreeLevel 1 reference Name 0 siteName Obtain Controller Information SyncControllerDirSite businessAction SyncControllerDirSite referen ceId 0 siteID referenceTreeLevel 1 reference Name 0 siteName Retrieve Logs Site Level GetPointLogsSiteLevel businessAction GetPointLogsSiteLeve...

Page 109: ...folder All are listed in alphabetical order User images are images created modified and or uploaded by the user and may also be deleted from the database by the user User images can be found in folders cre ated by users or in the User folder System images may not be changed or deleted from the database be cause are pre set in the system System Images Folder Right Click Menu Obtain Controller Infor...

Page 110: ...eckmark to erase the filename from the list this will not remove the file from the database or tree Click outside the menu to close and view the file in the tree Uploading Images To upload an image click on the browse button in the widget properties win dow to locate an image in the database or right click on the User folder and click Add to open the Choose File window so you can upload a new imag...

Page 111: ...logged Point Properties takes you to the Point Properties page Graph Collection allows you to select points from GS Screens at run mode and graph them 9 4 2 2 My System Home Page Click the home page icon to return to the set GS system home page from anywhere within Site Manag er If a GS Screen has not been set as a system home page a message will appear indicating that no home page has been set 9 ...

Page 112: ...click to bring up the Actions menu After creating a GS Screen tog gle the button to Run mode to see the GS Screen op erate in real time IE 7 and above and the latest version of Firefox off the Firefox Web site are the supported browsers IE 6 is supported for viewing GS screens only Click the print icon to print the GS Screen in both Edit and Run modes 9 4 2 6 Print Icon While viewing a GS Screen R...

Page 113: ...ode so that you can make changes Hot Keys Control Z undo Control Y redo Control Alt Z redo 9 4 4 Widget Parameters Customization When you customize a text based widget a vari ety of parameter symbols can be used Text based widgets can use replaceable parameters that are used to help generate the actual contents of the label when displayed within the widget Any combination of reg ular text and repl...

Page 114: ...t replaceable parameter Parameter Symbol Definition 0 The most used replaceable parameter that shows a point value It is a synonym for the 0 val parameter 0 val The abbreviated value of the point For analog point this will be a number for exam ple a temperature reading as 69 DF Note that Engineering Units are not provided in this parameter for analog points See 0 eu and 0 engUnits For digital poin...

Page 115: ...ound INACTIVE white letters on a deep red background MISSING white letters on a deep red background N A white letters on a deep red background NOTACT white letters on a deep red background not active NO VAL white letters on a deep red background 0 sample 1 Widget visibility parameter This parameter makes the widget visible only when the point is ON 0 On Widget visibility parameter This parameter m...

Page 116: ...t to be invisible at run time 0 visible True if the point is visible 0 dataType A numeric code indicating the type of point 0 undefined unknown 1 analog 2 digital 3 system list Note that the 0 type property can be used to display an interpretation of these numbers 0 eu The Engineering Units short abbreviated form For example oF for Degrees Fahrenheit Note that for digital points it will contain th...

Page 117: ...point type is undefined or un known Parameter Symbol Definition Table 9 5 Point Reference Parameter Information Symbols Parameter Symbol Definition label go button For example this might map to Go on English systems and Vai in Portuguese message greeting For example this might map to Hello on English sys tems and Hola in Spanish Table 9 6 Locale Resource Message Keys Parameters NOTE For actual con...

Page 118: ...dard Cir cuits Graphical Status and a default Link Path of 0 appInstPath screen published The published flag true if this screen is published and thus will be seen by all users in the tree when associated false if unpub lished and thus will only be seen in the tree by the user that created this screen when associated screen creatorUserId The database primary key for the user that created this scre...

Page 119: ...one widget move and size it to cover the area that the new screen should be based on and then on the widget s right click menu click Convert to Sub Screen Text Feature Options Text Alignment center left right Font Size 9px 10px 12px Font Family times courier arial Font Variant normal small caps Font Style italic normal oblique Font Weight normal bold bolder lighter or enter a numeric value from 10...

Page 120: ...widget menu for screens at di rectory site and application instance levels 1 Click on the Summary Screen widget from the Add Widgets menu 2 This will add the widget to the GS Screen and will look similar to the following image Points to be associated with this widget can be pre selected before selecting the widget similar to the be havior of the other widgets Figure 9 41 Saving the Sub Screen Figu...

Page 121: ...tiple control systems and combine them into a single list of all applications Application rows will be generated for all corre sponding application types found for the specified application type where the GS screen is located This can span multiple units if the GS screen is at control system level If there are no applications found for the specified application type no rows will be shown in the wi...

Page 122: ...d from the tree prior to select ing the widget and the points will be pre filled in the widget properties If invalid points are selected the columns will ap pear but the data will not A will appear for all points that cannot be resolved similar to the follow ing image under OAT OUT and REFR PHASE LOSS columns If no points are valid for the application type the widget will not appear during Run mod...

Page 123: ...vity History screens now have more granularity in the Occurrence Date drop down User can select 1 to 31 days 1 to 12 months and Last Month and the sys tem is now able to resolve automatically how many days the last month contained Ability to export the following information into an excel file HTML file and PDF report 1 Users and their corresponding User Group 2 Groups and their corresponding privi...

Page 124: ......

Page 125: ...actor Manager 23 configuring information 23 properties 24 Control Systems 41 adding new 23 40 configuring information 42 Control System Configuration page illustration of 40 deleting 42 editing 42 properties 42 Create Setpoint Broadcast 55 D Delete Application Instance 44 Directories 38 adding new 21 38 configuring information 22 39 deleting 22 39 Directory Configuration page illustration of 22 39...

Page 126: ...es menus and icons 102 GS Screens actions associating 89 deleting 89 disassociating 90 exporting ZIP 87 importing ZIP 90 properties 91 publishing 89 saving 88 adding 92 edit and run mode 104 Image Library 93 privileges 85 site home page setting up of 104 system home page 103 setting up of 103 widget parameters 105 locale resource message keys 109 point reference information 108 point status inform...

Page 127: ...me 83 drop down menu 79 properties page 80 watch or graph logs of 81 Problem Sites Report Email 70 Protocol Access Levels drop down list of 20 Purge Inbound Connections 71 Purging advisories 74 inbound connections 71 logs 75 R Refresh Application 51 Refresh Point List 51 Refresh Units 52 Registration Software 8 Restore 52 Retrieve Logs 52 S Schedule Manager 26 display table column headers 26 heade...

Page 128: ...ser Manager 17 adding new 18 configuring information 18 deleting 19 editing 18 page illustration of 17 User Menus Activity History 15 My Pending Activities 15 User Info 14 enabling system homepage 14 Hide Nav Frame checkbox 15 setting the engineering units 14 Show GS Screen Edit Tool checkbox 14 W Widget Parameters 105 Widget Screen Linking 97 Widgets 93 context menu properties 94 texts 98 X XML d...

Page 129: ......
Page 130: ...ight to modify the designs or specifications of such products at any time without notice Emerson Retail Services Inc does not assume responsibility for the selection use or maintenance of any product Responsibility for proper selection use and maintenance of any Emerson Retail Services Inc product remains solely with the purchaser and end user 026 1012 06 DEC 2011 Emerson is a trademark of Emerson...

Reviews: