


46 • Site Manager User Manual
026-1012 Rev 3 06-DEC-2011
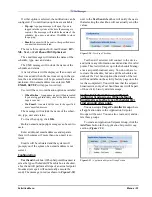
Each application instance is divided into groups of
points. Each group is a tab that contains point names
and values. Use your keyboard tab key or use your
mouse cursor to move between tabs.
• The left column shows the names assigned to points
(pre-configured in the controller). Hover the cursor
over the names to display its description in the Ad-
ditional Info panel.
• The right column contains fields where you can en-
ter your changes to point values (can be either edit-
able or non-editable depending on the controller's
setup). Values can be of the following types: text
(enter the value in the field provided), drop-down
(expand and select from the list), or checkbox (click
to enable/disable the indicated property). Use the ar-
row keys on your keyboard to move between values
within a tab.
The icons to the left of the point names indicate
whether a point value has changed or not.
• The dot icon indicates that the point value has not
changed.
• The lightning bolt icon indicates that the point value
has been modified.
Click Apply to save the changes to the controller.
Changes will apply and all point values will refresh
from the controller. You will stay on this same screen.
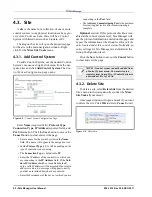
Click OK to save the changes to the controller and
exit the page.
If a change was not saved to the controller, the
page is enabled and a message appears on top of the
page along with a link to Activity Details. The page
will then wait for more input.
To exit the screen, click Cancel.
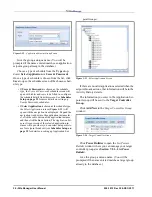
• Full Options/Reduced Options toggle button: Al-
lows you to select the display mode for points.
(When Full Options is displayed, the Reduced Op-
tions mode is in use, and vice versa.) Full Options al-
lows you to view more points than in the Reduced
Options. By default, the page is set to Full Options;
click the toggle button to shift modes.
• Advanced Access and Normal Access toggle but-
ton: Click this button to display Level 5 properties in
the page. A pop-up window will show on the page
and ask you to enter a valid password. Click OK af-
ter entering the password. If the password is correct,
the user will be able to view additional fields that
were not available previously. If the password that
was entered is invalid, an error pop-up message will
display and the screen remains unchanged.
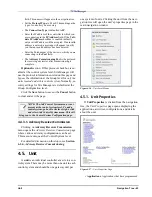
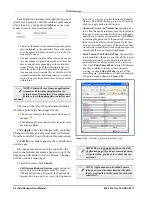
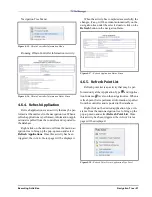
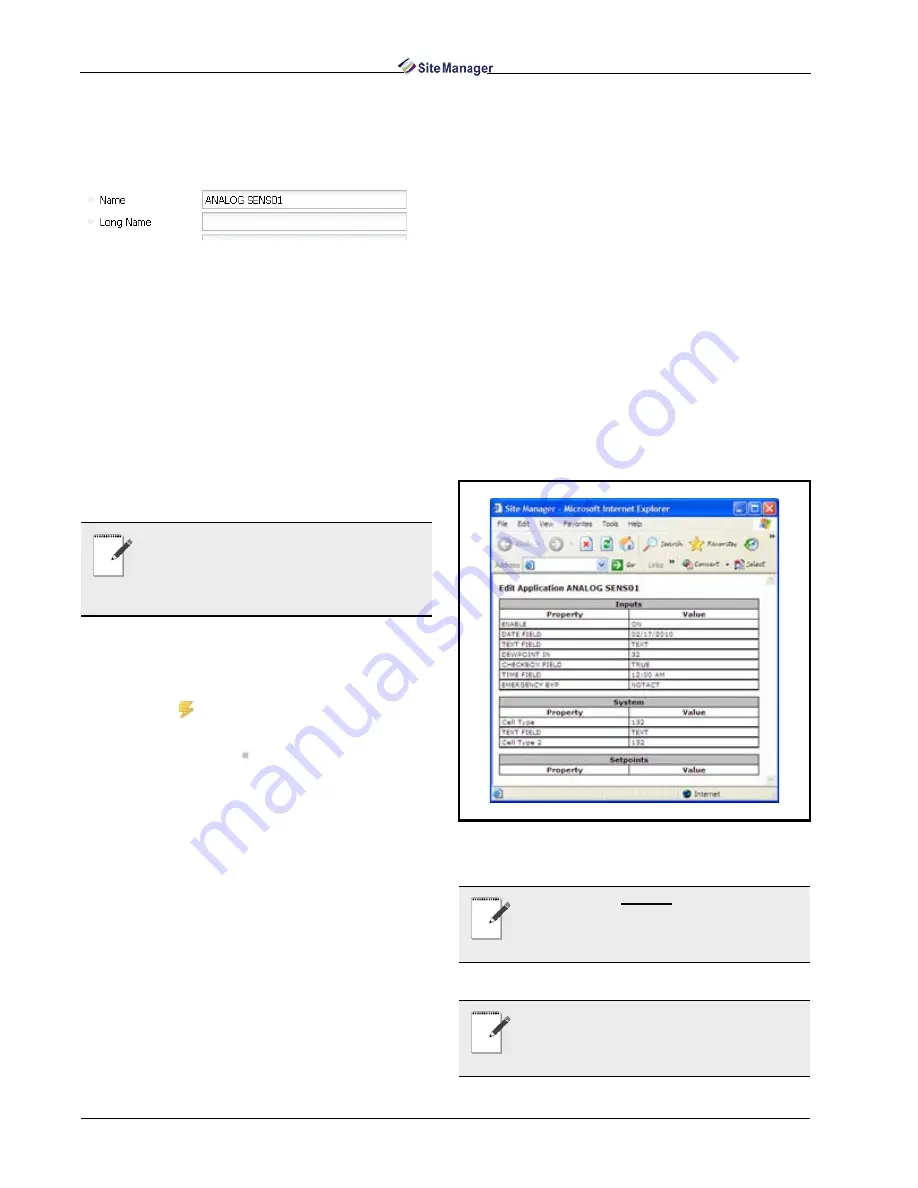
• Print Current Tab/Print All Tabs: The print but-
tons beneath the window give you the ability to print
point information. If a print button is clicked, all
point information shown will show in a new win-
dow. Click Print Current Tab to print the informa-
tion that is related to the tab you are currently
viewing, or click Print All Tabs to print all the
available point information in all tabs. An example
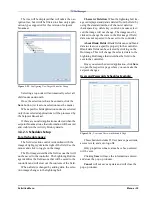
of a print output is shown in Figure 4-26.
NOTE: Points will vary from one application
to another. Point values displayed are set-
points, not real-time values. For assistance on
points, refer to the appropriate controller user
manual.
Figure 4-26 - Print Edit Application Instance Page
NOTE: There is no undo option on the Edit
Application page; if you have entered an incor-
rect point value, you have to re-enter the cor-
rect value.
NOTE: Applications can be edited by more
than one user at the same time, but the data
that is received last will be saved (as set by the
controller).
Summary of Contents for Site Manager
Page 1: ...026 1012 Rev 3 06 DEC 2011 Site Manager User Manual ...
Page 2: ......
Page 4: ......
Page 124: ......
Page 129: ......